 |
Need a knowledge base like this for your business?
How To Download All The Images In A Gallery
| By Kim Dixon, MyPhotoApp Training Guru Created: July 19, 2018, 12:16 pm UTC Last updated: February 16, 2019, 7:38 pm UTC |
If you want to be able to deliver ALL the images in your MyPhotoApp gallery to clients in one easy action you can!
Here's how:
1. First, you need a Gallery Section with images uploaded at the maximum resolution you want your clients to have.
MyPhotoApp supports image uploads up to 2048px on the long edge, large enough for an 8 x 10" print at just over 200ppi. BUT the default maximum upload image size is 1024 px so you will need to change this BEFORE you upload the images. If you have already uploaded them you will need to start again and upload them at the larger size if you want to make images larger than 1024px available.
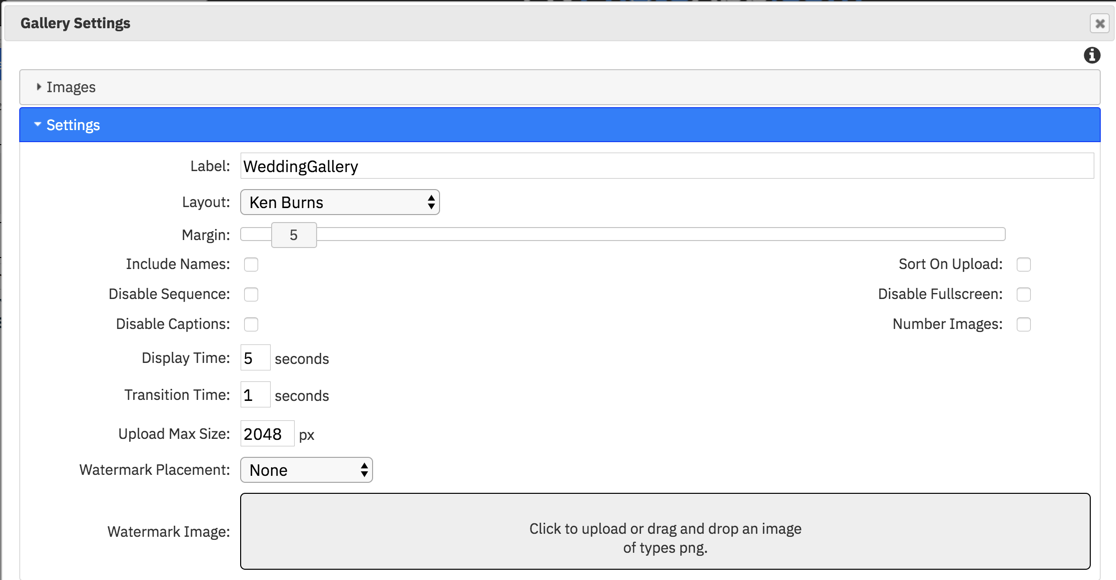
2. Once you have uploaded your images click on the settings cog to open the Gallery settings menu and click on the Settings Tab and make sure that you have added a unique label for the Gallery section, I have called this one WeddingGallery.
TIP: it's a good idea to highlight the Gallery label and copy it so you have it ready to paste into the Link Field in the next step!

3. Images from a gallery are downloaded as a Zip file using the link -downloadgallery:gallerylabel you will need to add a button or other section of your choice to add the link to, you could, for example, use an image section with a tile over it if you wanted to. I'm going to use a Primary Button for this example. Add your button section and click on the settings cog to set up the button how you want it to look and then add the Download Gallery link.
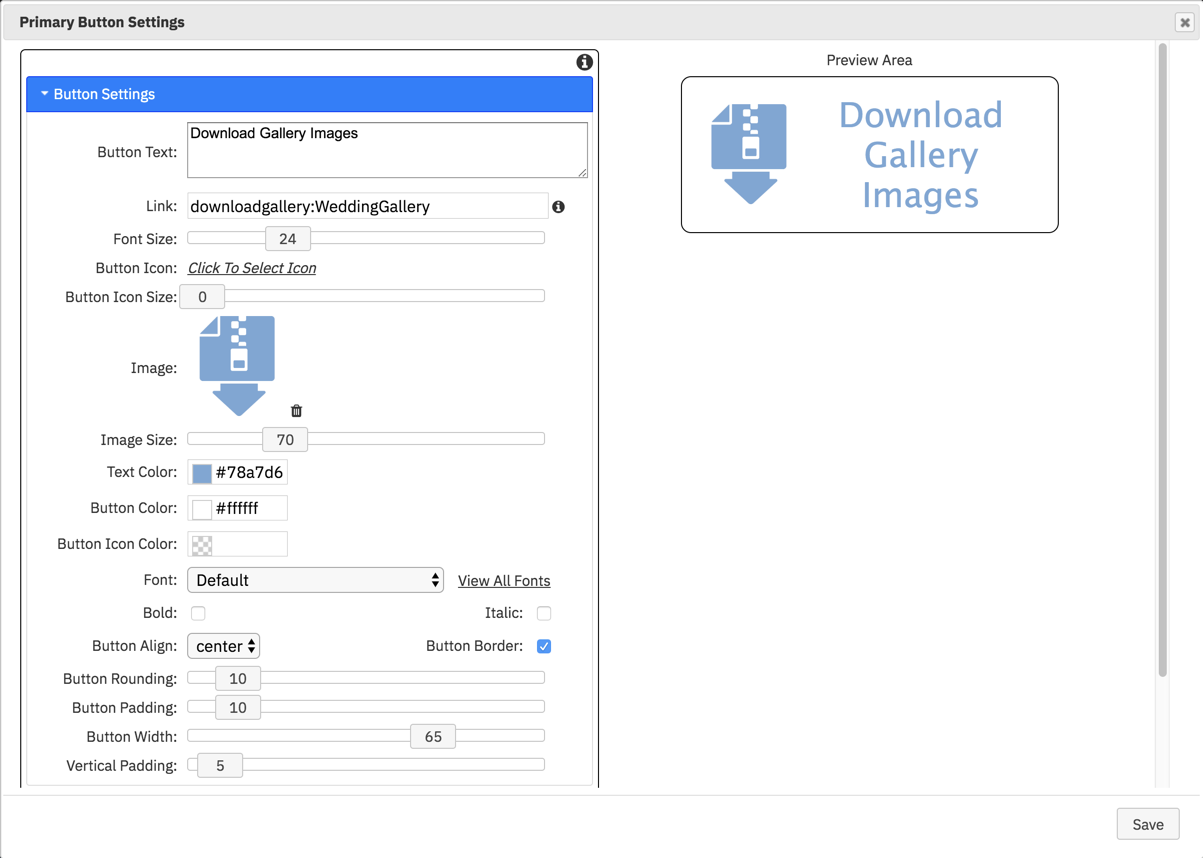
I have added some Button text and then in the Link field the download gallery link using the label I gave the image gallery in step 2, remember sections labels are always case sensitive so the download link in this example is - downloadgallery:WeddingGallery and my button settings look like this:

I have added a download Zip file Icon graphic to my button and descriptive text and ticked the button rounding option.
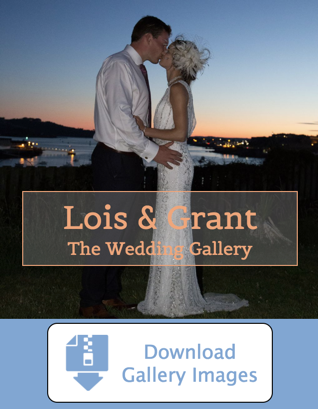
Here's what it looks like in the app:

4. Publish the App and test your button which should now give you the option to download all the images in the gallery as a Zip File. When you click the download Gallery Images Button a new Blank Tab should open in the browser with the Save As dialog window, type in a suitable name for the image Zip file and choose where to Save it and click Save.
5. Once the zip file has been saved you can locate it on your computer and unzip it by right clicking and be choosing the appropriate option from the context menu, usually on a mac open with Archive Utility and on a windows PC Extract All.
Providing More Than One Download Option
If you want to provide both a low res and a high res image download do the following
1. Create two galleries - Once with high-resolution images in it, and one with low-resolution images in it and add a suitable gallery label for each, for example, LowresGallery and HighresGallery.
2. Next Hide one of the galleries so that the images are only visible once, in the App, it's probably a good idea to hide the HighresGallery as the LowresGallery images will load faster.
3. Add 2 Buttons, one for each option with suitable descriptive text and link them to the relevant gallery.
Adding The Download Option Later
If you are providing your clients with proof images in a photo App BEFORE they have paid to download their images you should do the following:
1. Create a Gallery or IPS Gallery in Proof or Cart mode with Low resolution, watermarked images for your client to review and select from.
To find out more about how to do this click the links below:
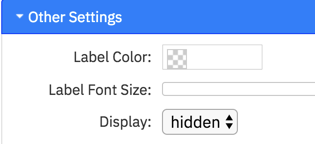
2. Create a Second Gallery with High-Resolution images for your client to access once they have paid and change the section display option, found on the other settings menu, to Hidden.

You can them simply unhide this Gallery, delete any images they did not buy or wait and only upload those they purchased, and delete or hide the proofing gallery.
3. You will need to create a Download Gallery Button and link it to the HiresGallery and also hide this until they have paid for their order.
Remember even when you turn off the share and download options in a Gallery section it is impossible to prevent screenshots which are now so easy to do on any mobile device or computer! Always think before sharing images you have not been paid for and remember to protect your business by taking all reasonable precautions. An excellent option is to require a pre-payment for at least your minimum package or order value before providing a digital gallery.
Depending on which MyPhotoApp subscription you have you can also use a variety of other options:
- Add a group section and add the Hires gallery and download button sections to it and simply hide the group.
- Add the High-resolution gallery and Download Gallery Button to a Page section and only provide navigation to it after they have paid. For example, you could then exclude it from the Menu or provide another button to link to the page saying view & download images and hide this until needed. Remember you need a minimum of 2 pages to hide a page from view as the content of the top page in the layout setting is always visible in the App!
How do I limit the download to just my clients and not people they share the App with?
If you want to retain low-resolution images in the main app your clients are sharing and keep the high-resolution images hidden there are several options:
- Provide the high-resolution gallery and download Gallery button in a second app which is password protected and provide a link to that app in the Main App. The high-resolution images will then only be available to those who have the password, obviously, you cannot stop your client sharing the images they download or their password with family and friends, but at least acquaintances won't get that access.
- Add Password protection to gain access to the download gallery button section or the page that contains the high-resolution images and download gallery button. To password protect the download button section you will actually need a second button that can look identical that links to the real button and requires a password to be entered first.
- Supply high resolution images using share.myphotoapp.com independently by text or email to your clients.
Check out these links to find out more about how to do these options.