Need a knowledge base like this for your business?
Automatic Watermarking Of Gallery Images
By Kim Dixon, MyPhotoApp Training Guru
Created: November 5, 2015, 10:18 pm UTC Last updated: February 19, 2019, 11:47 am UTC
How To Add A Watermark File To MyPhotoApp
The option to Automatically watermark gallery images when you upload them is available in the professional subscription level of MyPhotoApp.
There are two ways to automatically add watermarks or any overlay you want to your images when you upload them to a Gallery Section in an App:
A Default watermark added in the Setup Tab
A Gallery Specific watermark uploaded in the Gallery Settings - This will override any default watermark already set for this gallery alone
1. Adding a Default Watermark
To be able to add a default watermark to your images, you first need to go to the setup tab and click on the watermarktab to upload the watermark image file you want to use, this must be a PNG file, once you have done so the Png image will be available to be optionallyadded to your gallery images when you upload them.
You can only have one default watermark per Brand. If you wish to change the default watermark at any time simply repeat this process with the new watermark PNG file you wish to use in future.
Once you have uploaded a watermarkPNG file you can choose to add the default watermark to images when they are uploaded in the gallery settings menu from the watermark placement drop-down menu.
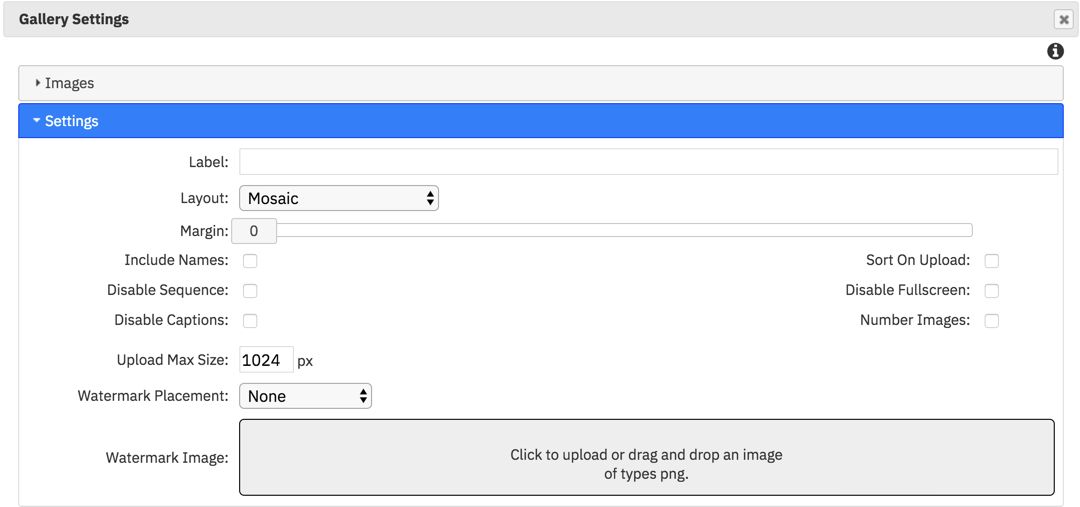
Click on the Gallery settings cog and select the settings menu.
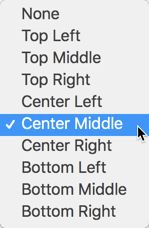
By default, the watermark placement is set to none and no watermark will be added to the gallery images. To choose to have the default watermark added to the images you upload simply click the drop-down arrow and choose the placement option you want from the list to turn on automatic watermarking.
Click Save to update the gallery settings. Any images you uploaded to this gallery will now have the default watermark applied in the position you specified.
NOTE: Because watermarking is applied to images on upload. Only images uploaded to your gallery after you have turned watermarking on will have the watermark applied. Any existing images in the gallery prior to watermarking being turned on, will not have the watermark applied.
If you do not want a watermark applied to future uploads to this particular gallery, simply turn off watermarking by selecting none as the watermark placement option.
TIP: If you want to automatically add the default watermark to your future Galleries created using the defaulttemplate, you will need to create a new app using the default template and turn on watermarking and save the changes. You can then click on Save as Template and choose Save as Default Template to update the default template for that Brand with the changes.
You can always turn off watermarking before uploading for individual apps by setting the watermark placement to None or by changing the gallerysettings and updating the default template again.
2. Adding A Gallery Specific Watermark or Overlay
It is now possible to add a unique watermark or overlay to an individual Gallery. This is really handy if you want to add an event badge or other text or graphic to all the images in a particular App gallery.
Create the watermark or overlay you wish to use with a transparent background and save as a Png file.
Click on the Gallery settings cog and select the settings menu and click on the watermark Image upload option to add your png file.
Next, click the drop-down arrow on watermark placement and choose the placement option you want from the list to turn on automatic watermarking.
Click Save to update the gallery settings. Any images you uploaded to this gallery will now have the Gallery watermark applied in the position you specified instead of any default watermark already available.
When you choose to use high resolution images and allow MyPhotoApp to resize them according to the upload maximum size set in the Gallery settings the watermark will be applied to the original image size before it is resized by MyPhotoApp. The size of your images and the watermark Png are therefore crucial in determining how it will look.
In this example the watermark was 1800px square and the original image was 2400 x 3600px. the image on the left was uploaded with the default max upload size of 1024px and the one on the right with the max supported upload size of 2048px. As you can see the watermark appears exactly the same in both images even thought the image on the left is 683 x 1024 and the one on the right is 1365 x 2048px this is because the watermark was applied before the original image was resized. It is also far to big for the effect wanted!
In this example the images had been exported as jpegs at 2048px on the long side and then uploaded to the gallery with the max upload size also set to 2048px. The Gallery watermark previously uploaded was 400px square and I changed the watermark placement for each image I uploaded to show the 9 different options available.
TIP: To use the default watermark instead simply delete the gallery watermark and save the changes and upload your images.
How To Create A Watermark PNG file
A Watermark file must be a PNG file that has a transparent background. Besides a transparent background, the color RGB (0,0,2) is also considered transparent. You can easily create A watermark in Photoshop and save it as a PNG file. The size of the file should be suitable for the size of the image files you intend uploading to the gallery.
The watermark will be used as the size you upload unless the width is larger than that of the image file being uploaded.
If the watermark width is larger than the original width of the image being uploaded the watermark will be resized to the width of the image keeping the height proportional.
If the watermark height is larger than the height of the image, it resizes the watermark to the height of the image keeping the width proportional.
The watermark is then placed on the image at the location specified in the gallery settings. If the watermark placement was set to a location including left, right, top or bottom the watermark will be placed 5% from the edge of the image.
NOTE: the watermark is applied to the ORIGINAL image file BEFORE any resizing takes place with regard to the maximum upload file size set in the Gallery settings. Therefore If your original file is larger than the watermark file the watermark will appear smaller. To avoid this export your image files to 2048px on the long side in readiness for uploading to your App.
Here is an example of watermark created in Photoshop with a 50% white background, a logo and the text Proof. It is 2048px on the long side so it will span the width of images no wider than that when applied.
And here is an example of an image with the above watermark applied where the watermark placement was set to center middle. Ideal placement for a client proofing galley where you wish to prevent screen grabs of usable images!
And here is another example using an updated watermark I have uploaded with the opacity of the text and logo reduced to 75% and the watermark placement set as bottom middle which works much better.
Attached is an example watermark file kindly provided by Bill Tucker. You can download it and take a look at it in Photoshop if you want to get an idea of what a working watermark png file looks like.