 |
Need a knowledge base like this for your business?
How To Use MyPhotoApp As A Proofing System
 | By Kim Dixon, MyPhotoApp Training Guru Created: November 12, 2015, 7:53 pm UTC Last updated: February 17, 2019, 8:29 pm UTC |
You can use MyPhotoApp as a way for your clients to view their proofs, select which ones they like, and then transmit the image names back to you all from their App using the Favorites 'Heart' Option in the Gallery full-screen view.
You can create your own Submit favorites option in your App using the instructions below or for a quick and easy option, use one of the two submit favorite templates available in the Template Bazaar by searching for:
kim.submitfavoriteslight or kim.submitfavoritesdark
How to Add a Submit Favorites Option To Your App
1. Upload the images into a Gallery in the App.
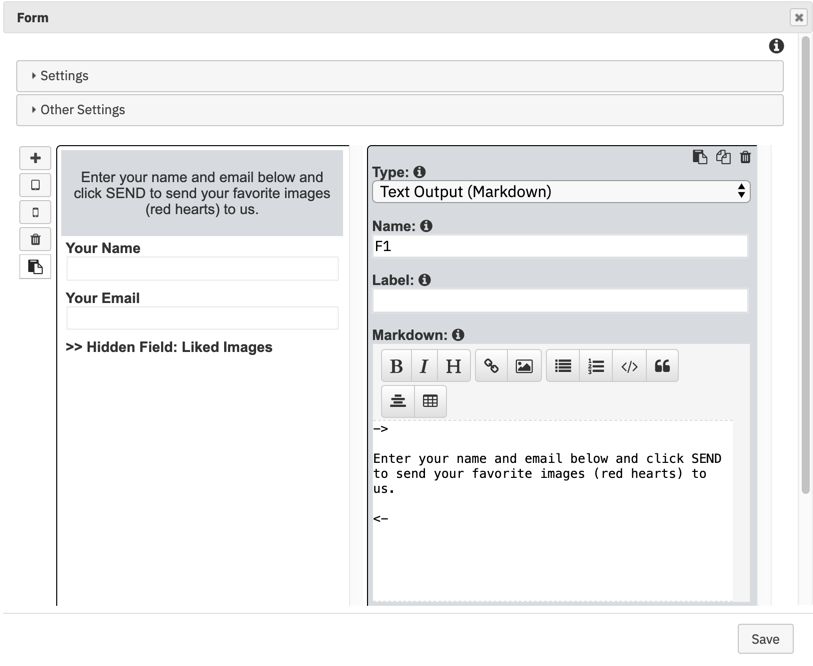
2. Add a new form section to the App and click the Settings Cog to open the Form settings menu. Click the '+' plus symbol to add a new field, by default this will be a Text Line Input field but you can change this to text output (markdown) using the Field Type drop down arrow. Add some brief instructions on how to use the form and type a suitable heading in the Label box or if you don't want one clear the default 'new field#' label. To center the text highlight the text and then click the Center button on the toolbar.
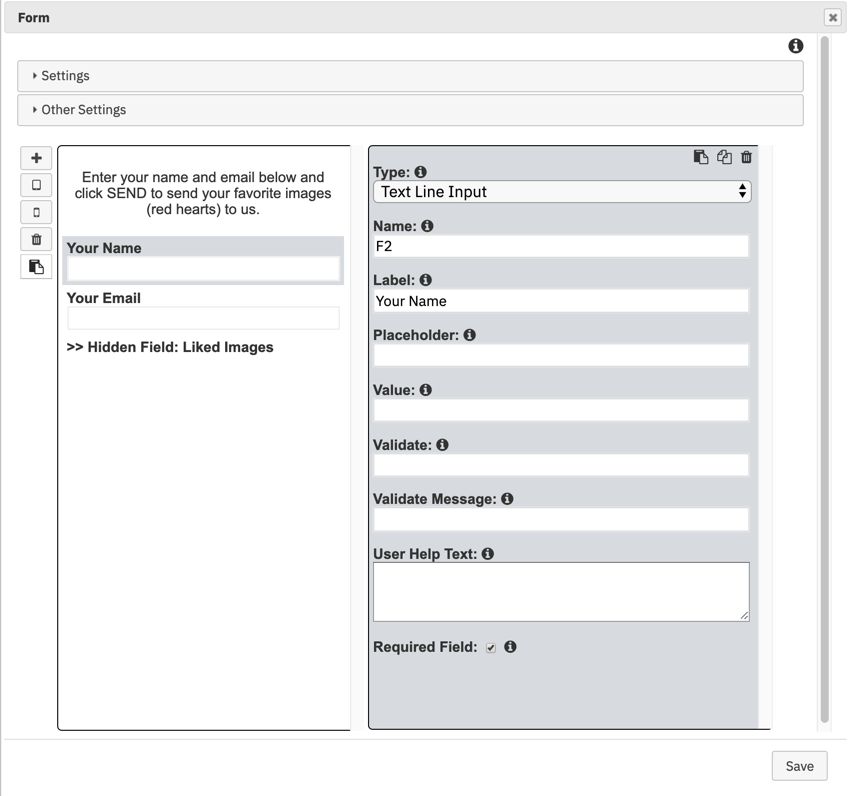
3. Click the '+' plus symbol again to add a text line input field for people to add their name. Add a label such as Name if you want and any placeholder text you want. Scroll down and put a tick in the required box to ensure they fill in this field.
4. Add any additional fields you want to include to collect more information from the person submitting the form, such as a mobile number or email, useful if you intend the proofing app to be shared with others.
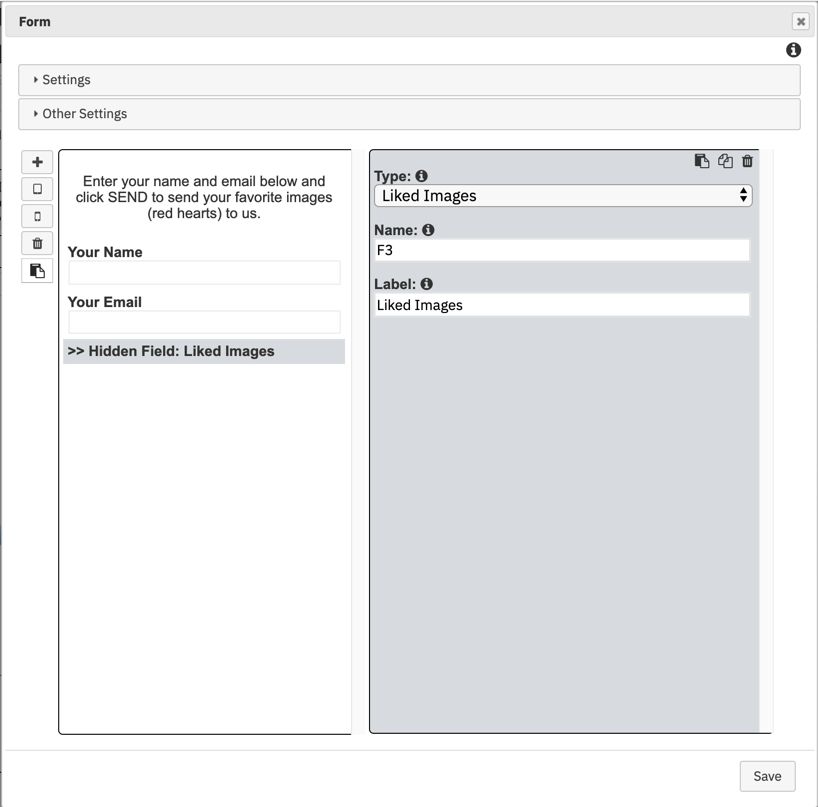
5. Click the '+' plus symbol and add a liked image section to the form. This is a hidden field which isn't displayed on the form that they fill in and submit when they are ready to send you their favorites. Add Liked Images in the label Field and choose the mail chimp list to associate this form with if you linked a mail chimp account to MyPhotoApp. The default color for the submit color is bright green so it's probably a good idea to change this to match your branding by typing in the hexadecimal number.
6. It's a good practice to name individual sections, click on Edit section settings and type a name for the form: liked images into the label field and then click Return.
7. Check the form one last time and when you are happy click Save to close the form settings menu.
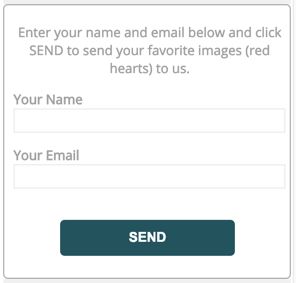
The form and the submit button will now appear in the App Visual Design ready to be completed.
When the form is submitted, the names of any gallery images that have been liked with the heart symbol will be submitted along with the form to the email address specified or to your default brand email if the email field was left blank.
NOTE: Favorites are remembered per device and not per user. So if a user has two devices, favoriting an image on one device will not show as a favorite on another device.
What your client does
1. To mark images as favorites they need to click any image in the Gallery to open the full-screen preview, they can now view the images in turn and mark each image they want as a favorite by pressing the heart symbol in the upper right-hand corner of the screen. To unmark an image as a favorite simply click the heart symbol again to remove it.
2. When they have finished selecting their images, click the 'X' cross in the top right-hand corner of the screen to exit full-screen preview.
3. They can now fill in the submit favorites form and submit it to you with the details of their liked images.
TIP: It's a good idea to add a document section to the App with some simple brief instruction on how to use the proofing system and submit favorites.
Here is a video that shows how to do this and get it going.
Add a Submit Favorites Button
By default the submit favorites form you create will be visible in the App but you can easily change this by adding a Submit Favorites Button instead that is linked to the hidden form. This is how to do it:-
1. Add a new Buttons section and click the cog to open the buttons setting menu.
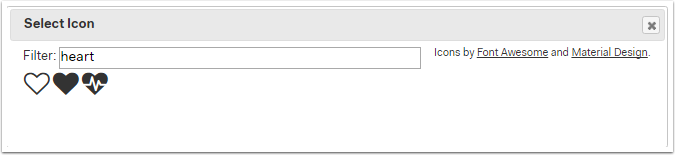
2. Click Add standard button and in the search box type heart and choose a heart icon.
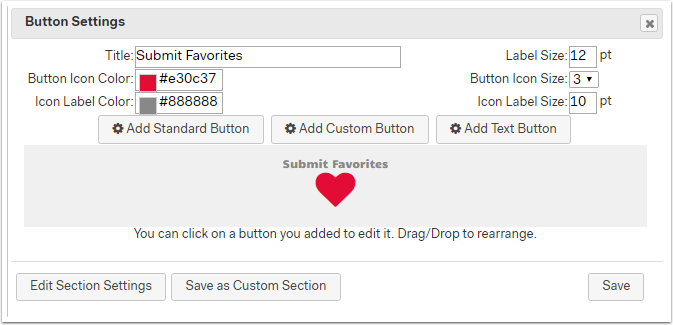
The icon and label text will be set to your brand default colors but you can change it if you want, I have chosen a nice deep red for the Icon. Next, add a title for the button: Submit favorites and make any changes to text or Icon size.
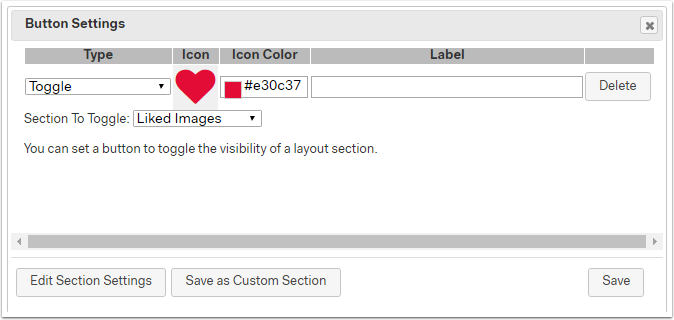
3. Click the heart icon to set up the button properties. Change the type from linked to Toggle using the drop-down list, and select the Liked Images form as the section to Toggle and click Save to return to the main button settings menu, and then Save again to close this.
4. Drag the new Submit Favorites Button section to where you want it in the App for example, below the gallery section.

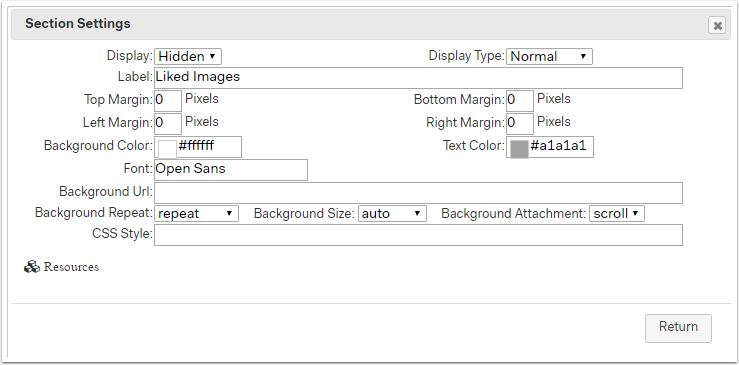
5. Finally to stop the Submit Favorites Form from being displayed in the App we need to change the display setting, click the cog on the form section and then click Edit Section Settings. Now change the Display setting from Visible to Hidden and click Return and then Save to finish.
The form section will now have the hidden section symbol and will no longer be visible in the visual design.

Finishing Touches - Adding A View Favorites Button
To make it easy to check which images have been selected as favorites before submitting them you can add a Show Favorites button to the App that will only display the images that have been marked with a heart.
1. Add a new Button section and click on text button to add a new button.
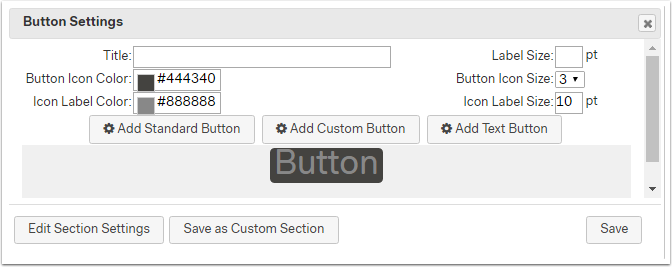
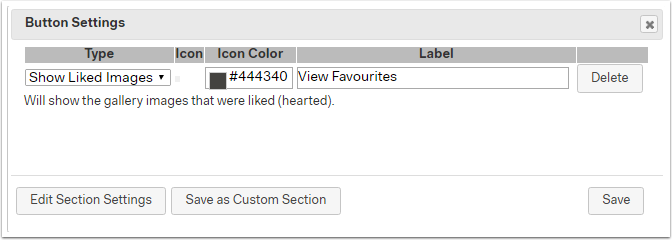
Click on the new button and type in a new label: View favorites and then change the Type for the button to Show Liked Images from the drop-down list and click Save to return to the main button settings menu.
2. Add a title to tell users what to do: Click the Button to View Your Hearted Images and make any changes you want to the text or Icon size and click Save to close the button settings menu.
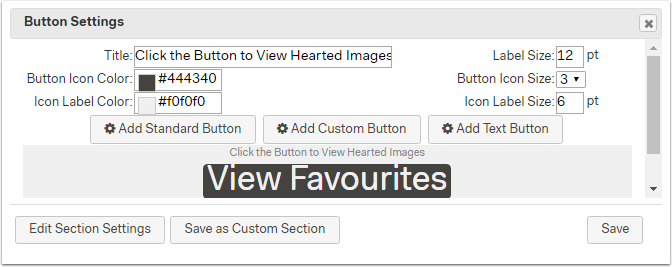
3. Drag the View Favorites Button section to where you want it in the app for example, below the Submit Favorites Button.

When the View Favorites Button is pressed in the App, a gallery will appear displaying only those images that have previously been liked by marking them with a Heart.
Proofing Apps are great if your clients have out of town relatives who want to add to an order already placed by your client or if you provide personal branding and head shots for clients where there is usually a specific number of shots included in the package they have already booked. It's a quick and easy way to choose which images they want to receive.
TIP: If you are going to regularly create proofing apps, it is a good idea to save a template app that you can just reuse for each client.
If you have an ELITE subscription the IPS Section Proofing or Order Gallery may be a better option. Click the link below to find out more about these options.
IPS Proof Gallery
IPS Order Gallery