Need a knowledge base like this for your business?
IPS Section
By Kim Dixon, MyPhotoApp Training Guru
Created: October 13, 2017, 5:27 pm UTC Last updated: February 19, 2019, 11:56 am UTC
The IPS section is designed to allow you or your client to select and rate images and choose products for an order. It has 3 different modes:
IPS - This mode is ONLY intended for use by the photographer at an IPS sales session with the client as it allows customization of product items and prices on the Sales order.
Proof - This mode allows clients to select and rate images and submit them to the studio. It is suitable where the client has already decided on the products they want and simply needs to choose the images for them from their full gallery. There is no Cart in this mode.
Cart - This mode allows the client to both select and rate images and create a Sales order and choose products from a preset list of items to submit a full sales order to the studio.
NOTE: By default, the IPS section is set up in Full IPS Mode - which is intended for use by the photographer with their client during an IPS sales session so you will need to change the mode if you are intending your clients to use the IPS Gallery.
How To Set Up The IPS Section
Once you have added an IPS section you are ready to upload your images. if you are intending to provide the app to clients to use in the Proof or Cart Modes you should consider watermarking the images before you upload them as the MPA automatic watermarking is not available as an option in the IPS section.
Once you have uploaded your images click on the settings cog to set up the options.
Images
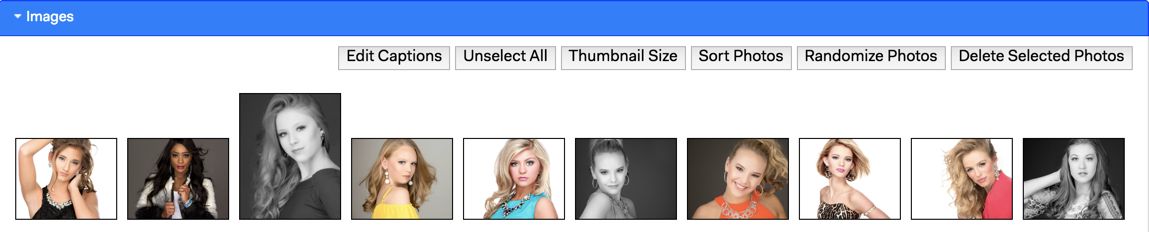
There are 6 image controls
Edit Captions - opens a window that allows you to easily add alt tag captions to the images in the gallery
Unselect All - Deselects any images currently selected.
Thumbnail Size - changes the thumbnail size displayed within the builder toggles between medium, large and small, the default being medium.
Sort Photos - Sorts photos alphabetically and numerically according to file names.
Randomize Photos - organizes images in a random order.
Delete Selected Photos - Click this to delete any images you have selected and highlighted blue.
IPS Settings
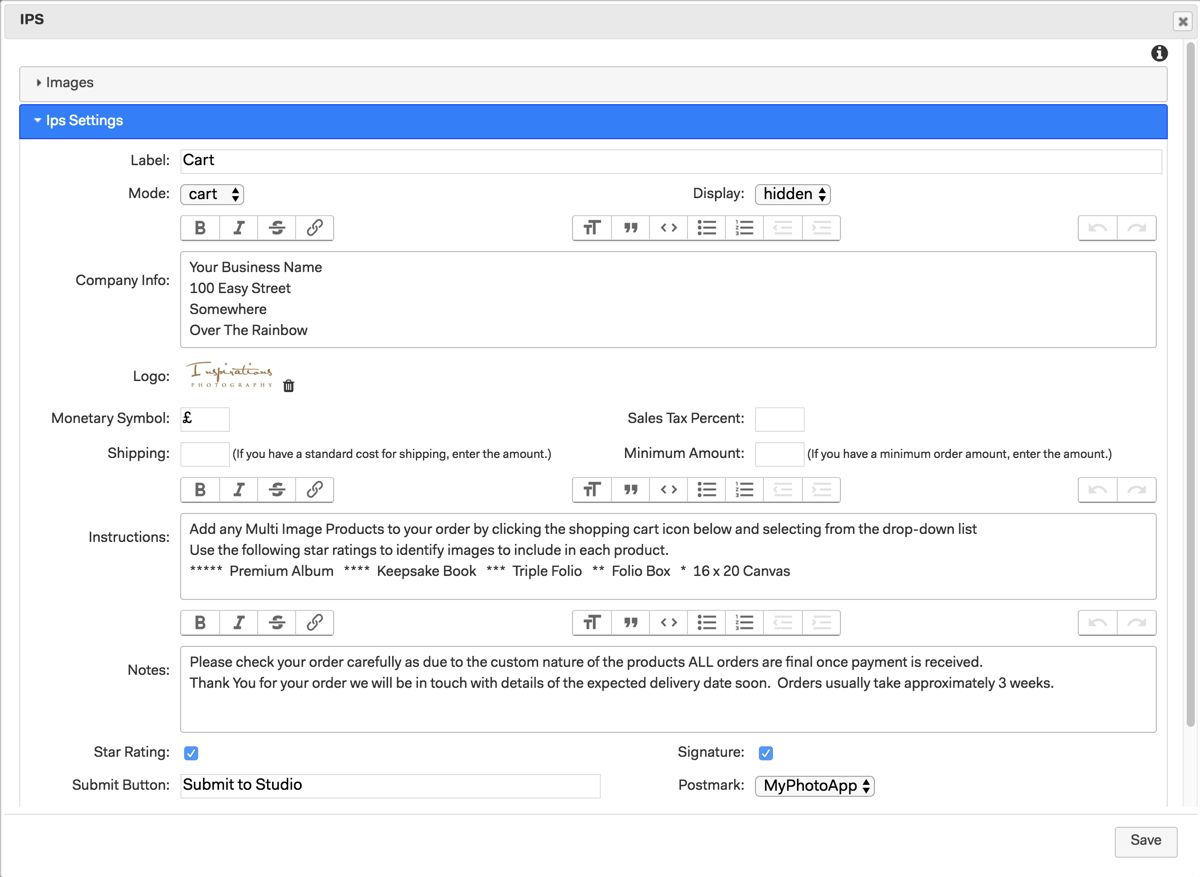
Label - Add a label for the IPS section - this is required if you wish to use an image, button or text link to open the IPS gallery in the App.
Mode - The IPS function works in conjunction with the cart function to produce an order form choose from:
IPS - This is the full IPS option intended ONLY for use by the photographer as this mode allows full customization of cart items and prices from within the App. Custom items can be added and prices amended or removed. The Sales Order can also be emailed and printed on completion.
Proof - This mode can be used by clients to select and rate images from the gallery and submit their selection to the studio. There is no cart function.
Cart - This mode can be used by clients to select and rate images from the gallery and produce a Sales Order and select items from a list. When finished the Sales Order can be submitted to the studio to process and fulfill.
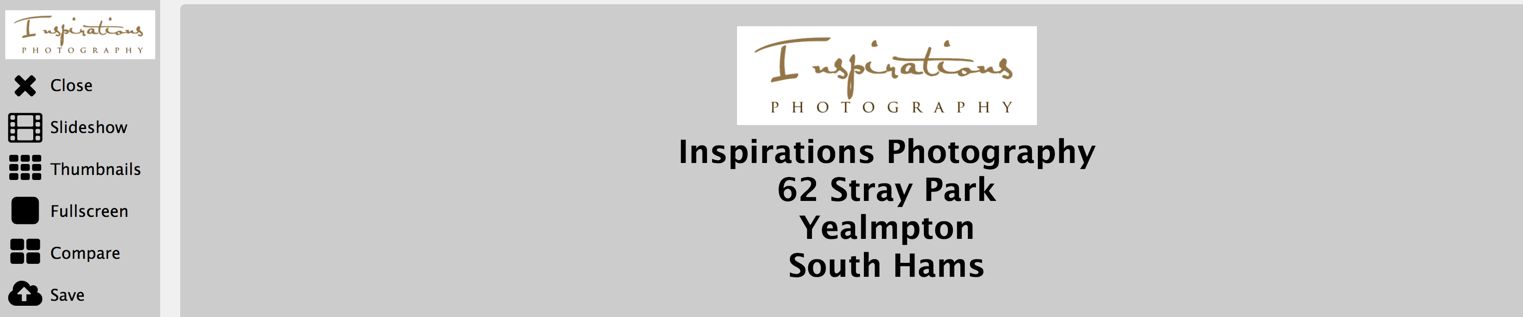
Company Info - Add the company information you want to appear at the top of the order form such as your studio address.
Logo - upload your logo to appear as the header on the order form above the company info and at the top of the menu.
Enter the following information to be used in the cart order form
Monetary symbol
Sales Tax Percent - if required
Shipping - if required
Minimum amount - if required
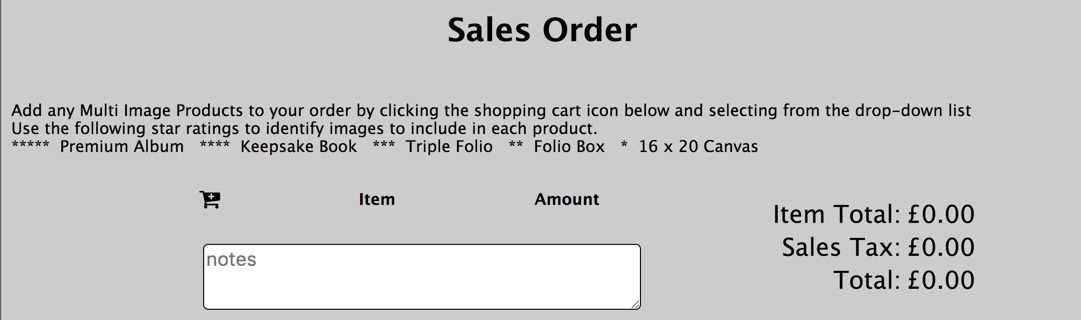
Instructions - This allows you to add basic instructions and information such as a star rating key or how to identify images for multi-image products in the order. The instruction notes do not appear in when the IPS section is set to Proof mode.
In Cart or Full IPS mode, the Instruction notes appear at the top of the Sales Order form above the global items which can be used for multi-image items, discounts and free of charge products.
Notes - Add your closing notes regarding the order process and policies. This appears below the images included in the Proof Submission or Sales Order and above the signature box if included.
Star Rating - Tick this box to include the star rating option in the IPS Gallery. By default, this is not selected.
Signature - Tick this box to include a signature box at the bottom of the order form. By default, this is not selected.
Submit Button - type in the text you wish to appear on the submit button at the bottom of the order form.
Postmark - If you have linked a postmark account in MPA you can select it here. Otherwise, the default MyPhotoApp postmark account will be used to send emails from the App.
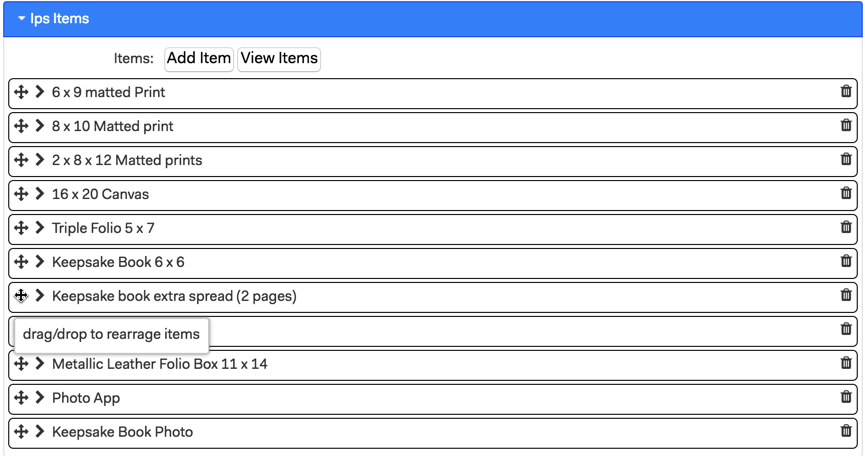
IPS Items
This is where you can add and define items that can be added to the IPS Cart in Proof or Full IPS modes.
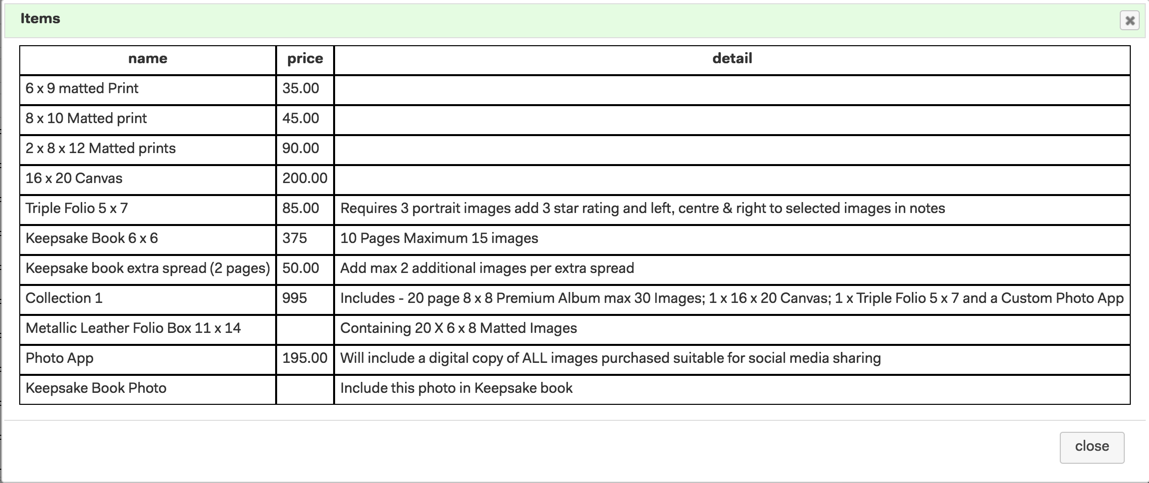
Click the Add Item button to add a new item. Each item has 3 fields
Name - this will appear in the drop-down list and should be
Price - enter the price for the item or leave blank for no charge items
Detail - add any descriptive detail for the item. This field only appears if you have entered any text.
You can rearrange the items order using the 4-way arrow.
To delete an item click the trash can on the right.
Click the view items Button to open a table with the details of all the items you have added
You can add no charge items such as Album photo for clients to select to indicate that an image should be used in a multi-image product. Alternatively, you could supply clients with a key to use star ratings to do this.
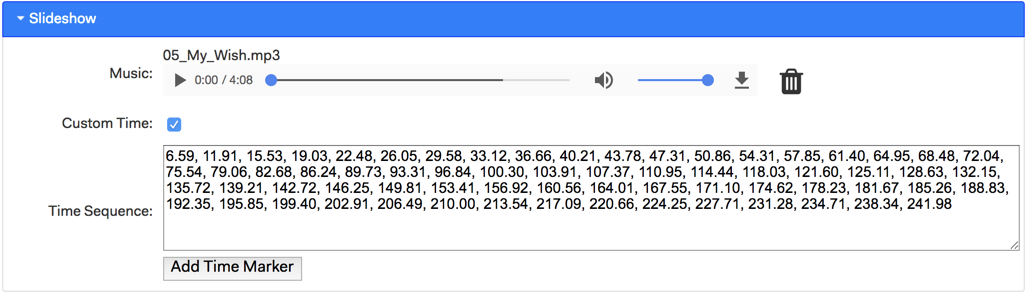
Slideshow
Click to upload or drag and drop an MP3 music track.
Transition Time - There are two options to chose from:
Fixed time period - you can set a custom time for the photos to change. The default is 5 seconds
Custom timing - you can enter the values or press the add time marker button to suit the music.
Press the add time marker to start the music playing and then click it again each time you want the photo to change.
If custom timing has been selected and you have more images slides than timing marks, the slides without marks will play for 4 seconds.
When you have finished setting up the IPS section click Save to update the section.
Other Considerations
If you are creating an app with an IPS section set to Proof or Cart mode for use by your clients you need to ensure that the App includes sufficient guidance for your clients to understand how to use the IPS gallery. The IPS Gallery menu has a help button which opens a different help document for each mode. These provide general guidance on navigating and using the IPS Gallery.
Here are the links to the Help documents your clients will see if they press the Help button in the IPS gallery:
If you wish to add specific instructions on how your clients should prepare their Proof submission or Sales order you will need to do so in the App and or the accompanying email.
You can add final instructions and information in the IPS section notes but should remember these will only appear once your client clicks on the Submit or Checkout button and the proof submission or Sales order form is displayed.
Here are some suggestions for other information you might want to include in the app:
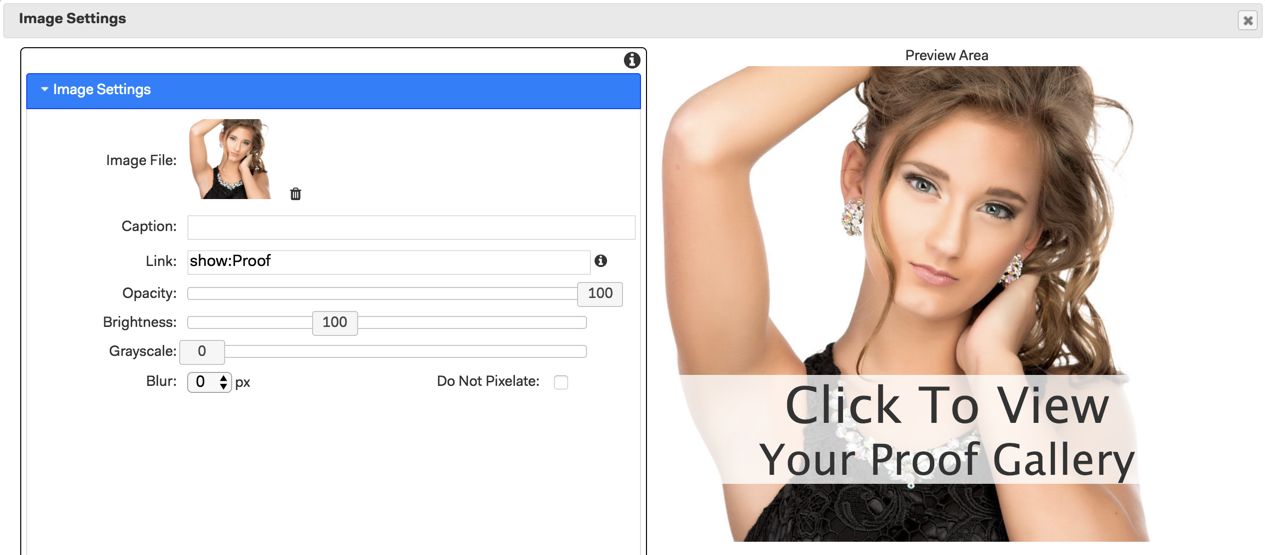
1. An image section to link to the IPS section
This allows you to add title text on the image as a call to action making it easier for clients to understand what they need to do. You need to add a label to the IPS section and set the display to hidden. Then add the following syntax as the image link show:XXX where XXX is the Label of the ISP section for example show:Proof.
2. A right-click section
It is also a good idea to add a right click section to the app to disable the right-click function on a computer and preventsaving images by this method. However, it is not possible to prevent disable the press and hold to save image option on a mobile device or to prevent any means of taking a screenshot such as using keyboard shortcuts or screenshot software and watermarking your images prior to uploading them to the IPS gallery is the best option for discouraging these actions.
3. A video Section with a brief guide on how to use the IPS gallery
People are used to watching videos to learn how to do things so why not create a short video guide on how to use the IPS Proof or Cart Gallery?
4. A document section with key information
This could include any specific information on how clients should make their selection and submit it to the studio that is not in the general help file within the IPS gallery. For example, it could include a key for star ratings and information about what information clients should add int he notes. The document section could be set to the accordion and hidden display options.
5. A Title Section for a simple instruction
To add a simple instruction on what your clients need to do.
6. Create Some IPS Templates
Templates make it quick and easy to create new apps for different clients and with the ability to easily duplicate Apps and copy and paste sections it's never been easier to do. Start off by creating a master app for the full IPS mode and then simply save as 3 templates, one for each mode, and then customize the Proof and CartApps by adding the extra customer information needed.
WARNING: If you publish the app again, ALL IPSselections, ratings and any cart info is reset and the IPS gallery is returned to the default settings where everything is selected as a favorite and the checkout cart is empty.