Need a knowledge base like this for your business?
Model Release Form
By Kim Dixon, MyPhotoApp Training Guru
Created: December 30, 2018, 11:48 pm UTC Last updated: February 10, 2019, 5:46 pm UTC
The Model Release From allows you to quickly create a simple Model Release App in a few simple steps that you can save on your mobile devices so you are never without a model release again. Each time the form is filled in and submitted it is cleared ready for the next time you need to use it.
How to create a simple Model Release App
1.Create a new app based on your default template and click on Add Section and choose Form - Model Release.
2. Click on the setting cog for the model release form to customise it.
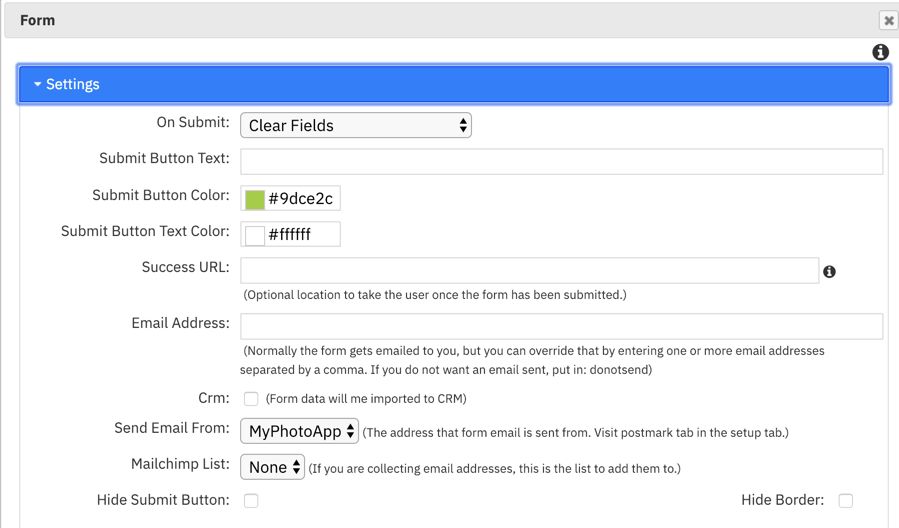
3. Click on the settings Tab to customise the basic form settings: Choose what happens when the form is submitted, Change the button text and colors Enter a success URL which could be another page or section with a message or the home page Add an alternate email for form submissions to be sent to, useful for third party apps you create Add the contact info to the CRM client rolodex Choose to send email from your CRM credentials or a postmark account you have added in the setup tab. Select a mail chimp list you have added in the set up tab to add contact info to. Hide the submit button ( this will render the form unusable as they wont be able to submit it any more! Hide the form border.
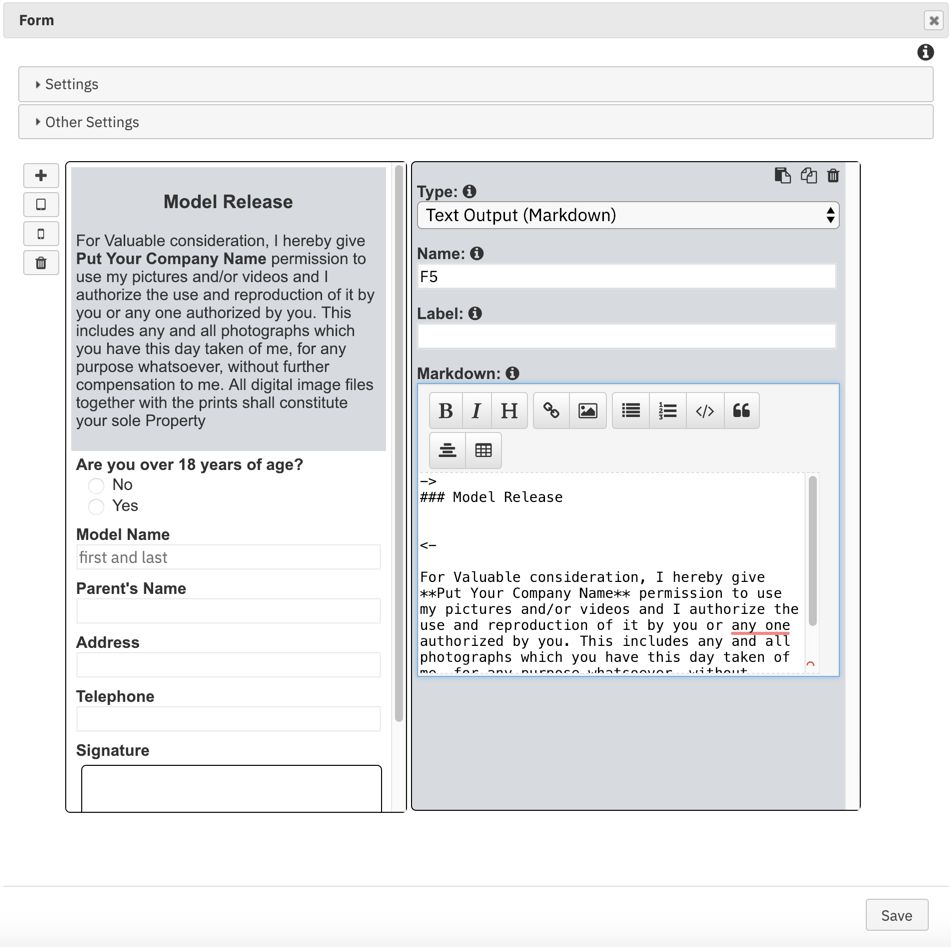
4. Click on the top field on the left to modify the wording of the release in the Text Output (Markdown) field.
5. Click on the + sign to add a new field you can then use the drop down arrow to choose the type of filed you want for example a markdown text field or tick box
6. When you have finished customising the Model Release Form to suit your needs and meet data protection regulations in your country click Save to update the form.
7. Publish your App to apply the changes.
You can now text the app url to your phone and forward it to your client and save it to your home screen for future use.
TIP: Its a good idea to add a text and email share button to your model release app so you can instantly share it with clients.
How to use the Model Release
You can get your client to fill out and sign the model release in one of two ways:
You can open the Model Release on your phone and hand it to them to fill it out or
You can open the Model Release on your phone and instantly share it with them as a text or email by pressing one of the share buttons in the app. They will then receive a copy of the release and can fill it out on their device.
Once they have filled out the release and signed it, all they need to do is press the submit button to send the release to you.
How will I receive a copy of the Model Release?
When the release is submitted you will automatically receive an email to you registered email address. The form submission is also stored on the MyPhotoApp server and retained for 6 months. You can access your form submissions by clicking on the Forms Data tab in the builder.
Here you can:
Filter form submissions by the app name or other detail
Download a CSV file of all form submissions
View forms in a new browser tab by clicking the form icon on the left this allows you to Print or Save your form as a PDF using the print options from your browser.
Delete forms by clicking the trash can next to the form submission entry
Will the client also receive a copy of the model release?
The client will not receive a copy by default but there are 2 ways to provide a copy of the model release to your client:
You can forward a copy of the email you receive with the form submission to your client or
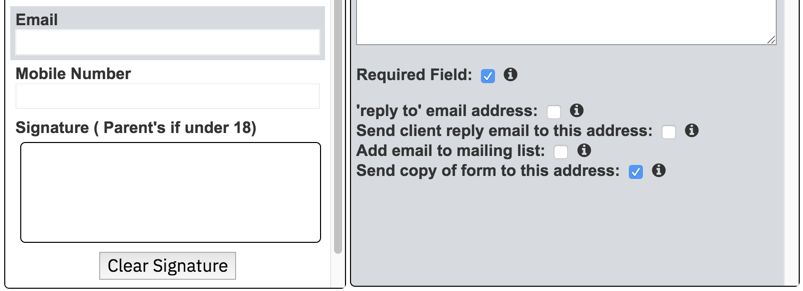
You can edit the model release form and change the simple text line field for their email to an email field and make sure that the box send a copy of this submission to this email is checked and republish the app. When ever someone fills in and submits the model release they will then also automatically get a copy of it.