Need a knowledge base like this for your business?
How To Deliver High Resolution Images With Share.MyPhotoApp
By Kim Dixon, MyPhotoApp Training Guru
Created: December 25, 2018, 8:26 pm UTC Last updated: March 8, 2023, 9:28 pm UTC
Share.MyPhotoApp.com
MyPhotoApp Share is the new easy to use FREE way to share High-Resolution Digital Files to your clients or anyone in just a few simple steps. You can include other file types like PDF's, Documents, MP4's, Raw Images or Photoshop or TIFF Images allowing you to send high-resolution images and a PDF with notes to your editor or include a print release or other important information about archiving images with your client's images. The possibilities are endless and its all so easy.
10 reasons why you should use Share.MyPhotoApp.com
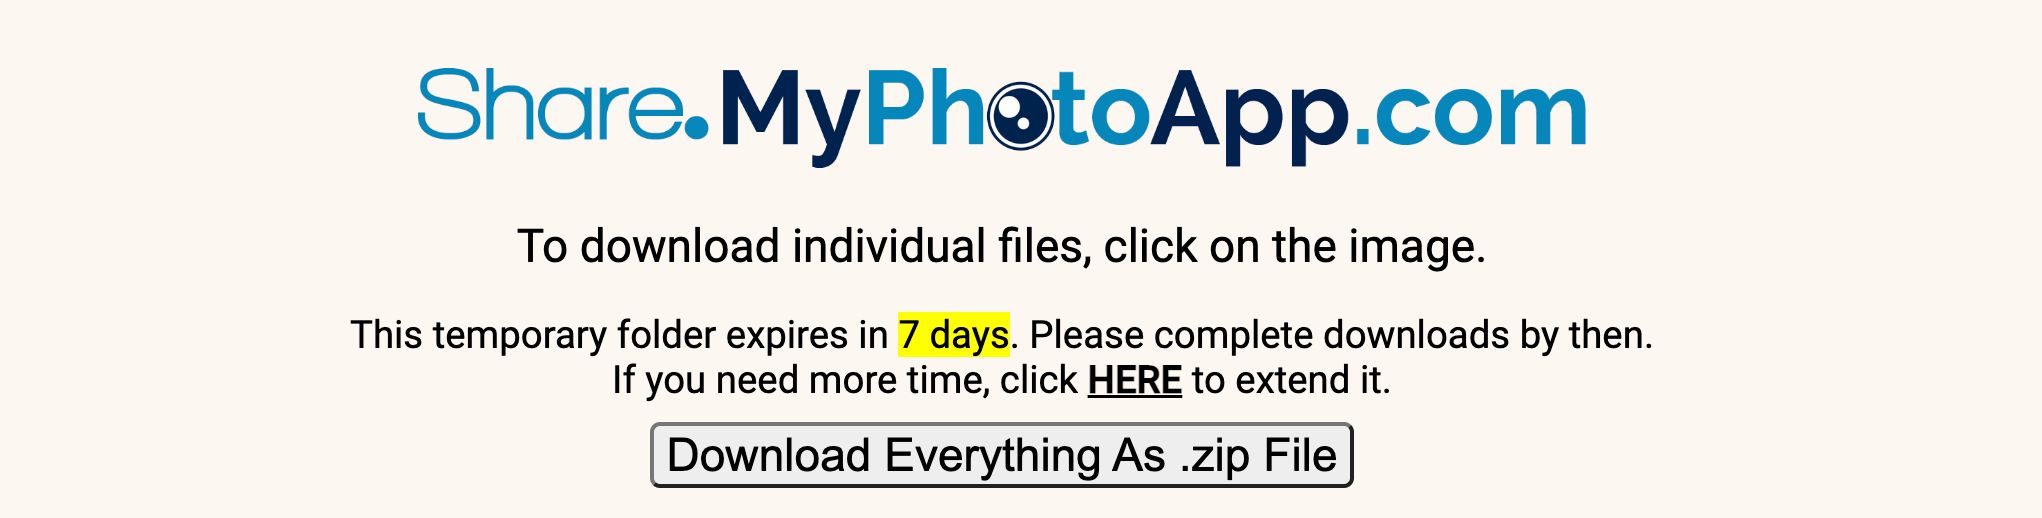
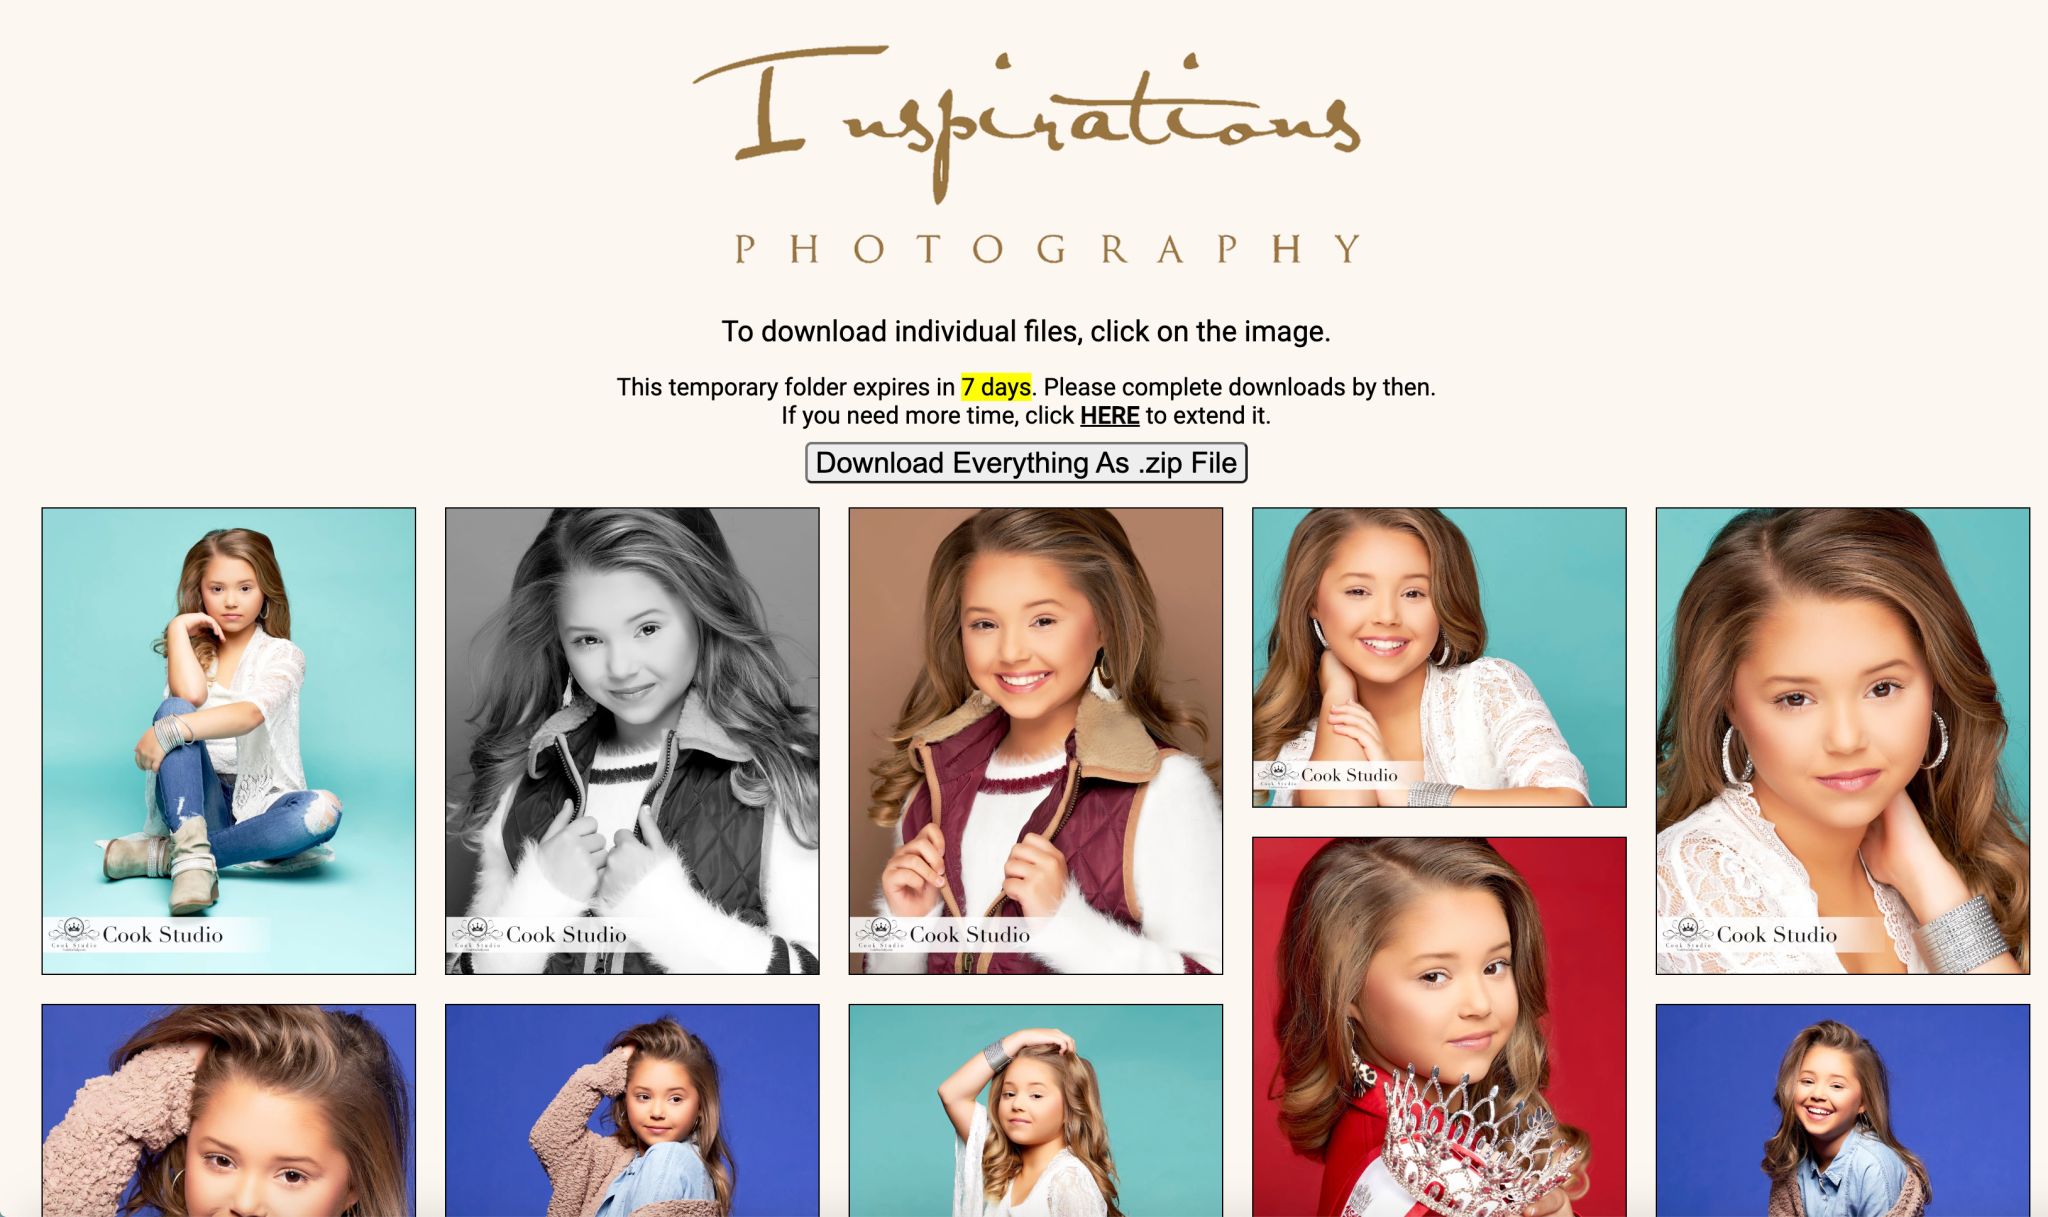
1. It is 100% FREE for 7 day temporary share folders.
2. No need to sign up or log in to any account for you or your clients.
3. Hassle-free 1 step upload using drag and drop or browse to a folder.
4. Unique Download Gallery for each share upload you create.
5. Secure and private images are ONLY accessible via the unique Share URL no passwords or complicated instructions needed.
6. Easy to use download gallery with thumbnails of the images.
7. Download All images at the click of a button as a Zipped file or choose to download individual images.
8. Share galleries are available FREE for 7 days.
9. Handy countdown of the days remaining active when the Share Gallery is viewed
10. Share galleries can be extended by you or your client for a fee.
I fact it’s so easy to use you will wonder how you ever managed before!
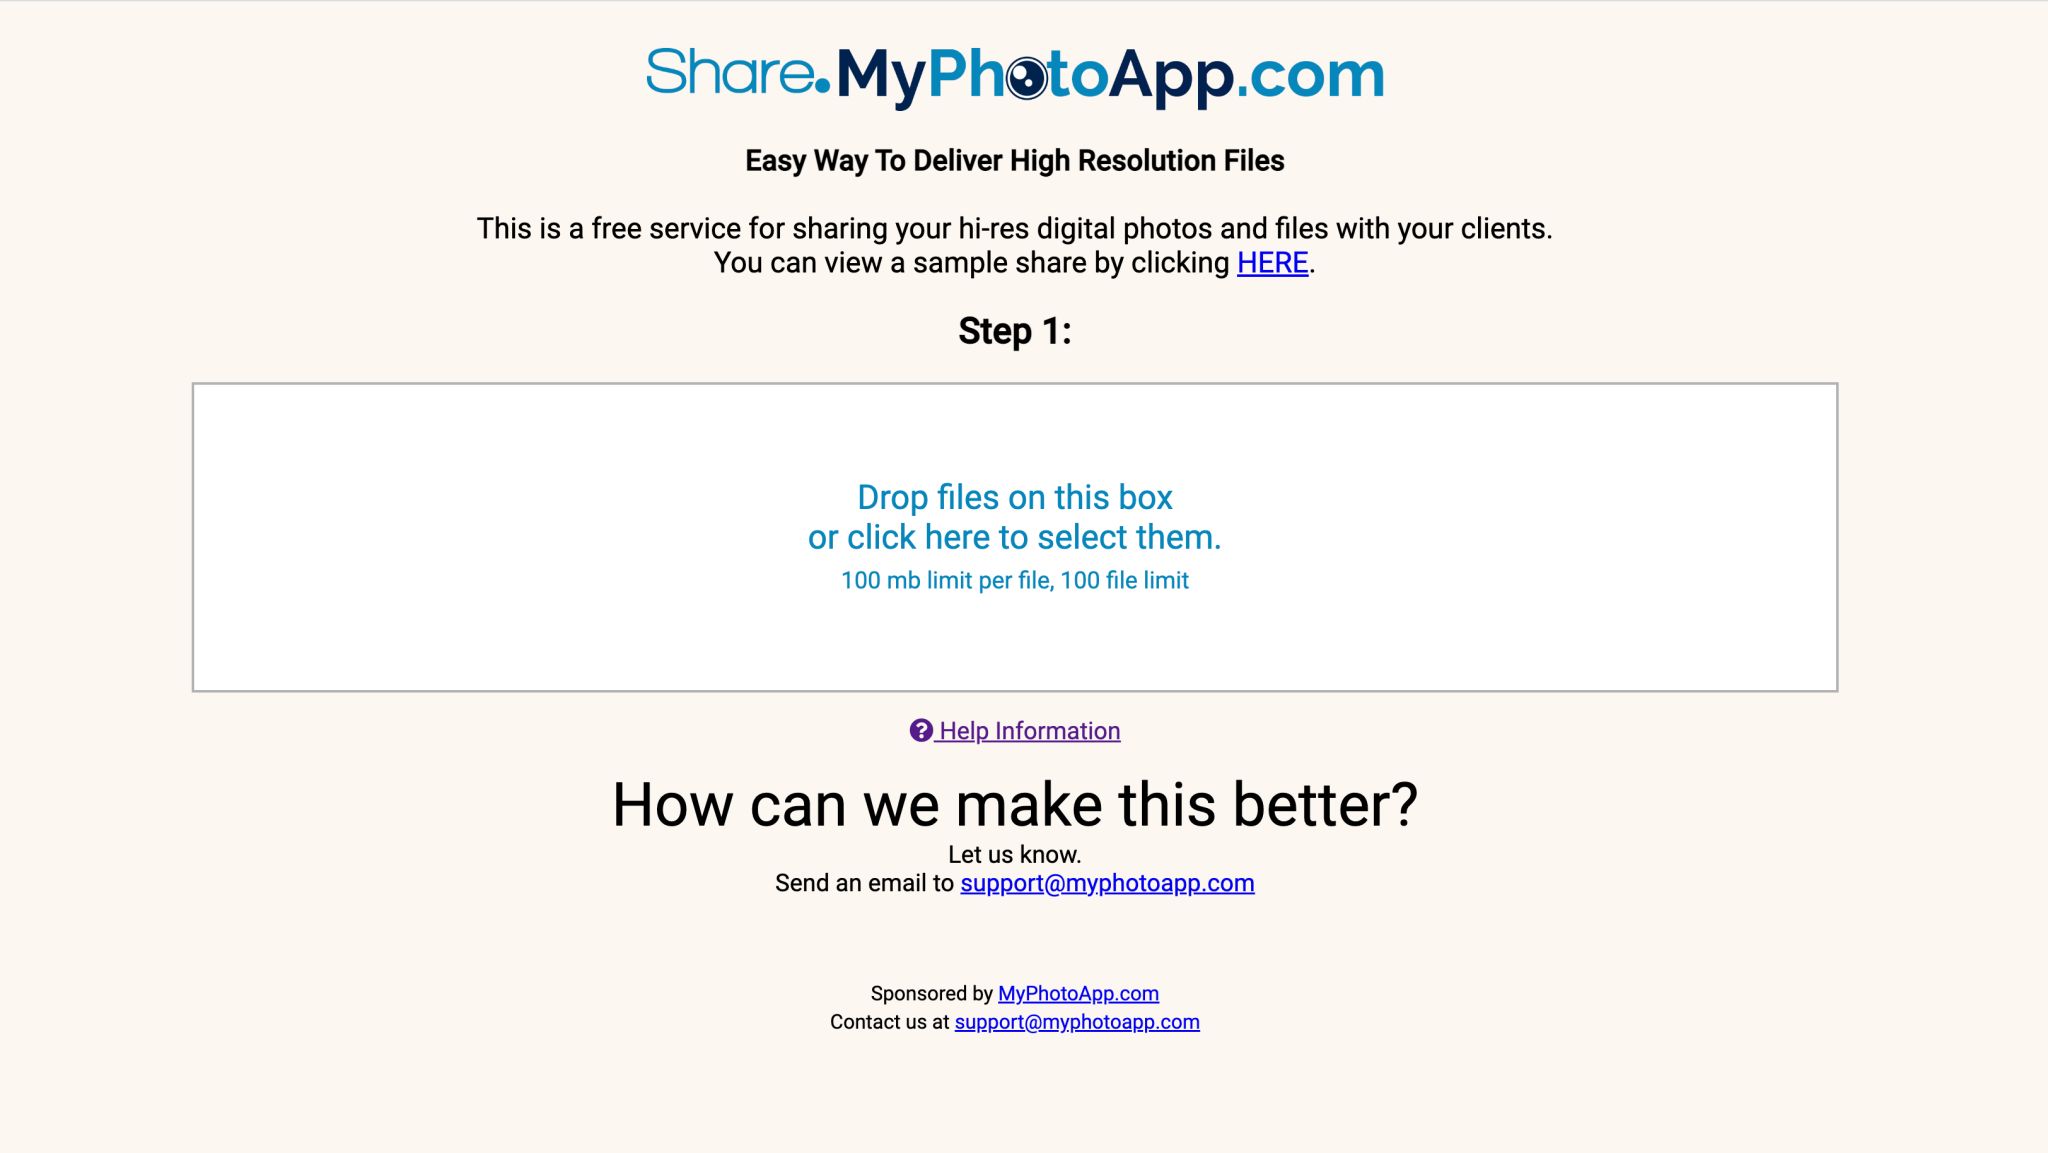
Here are the simple steps to sharing your high-resolution files:-
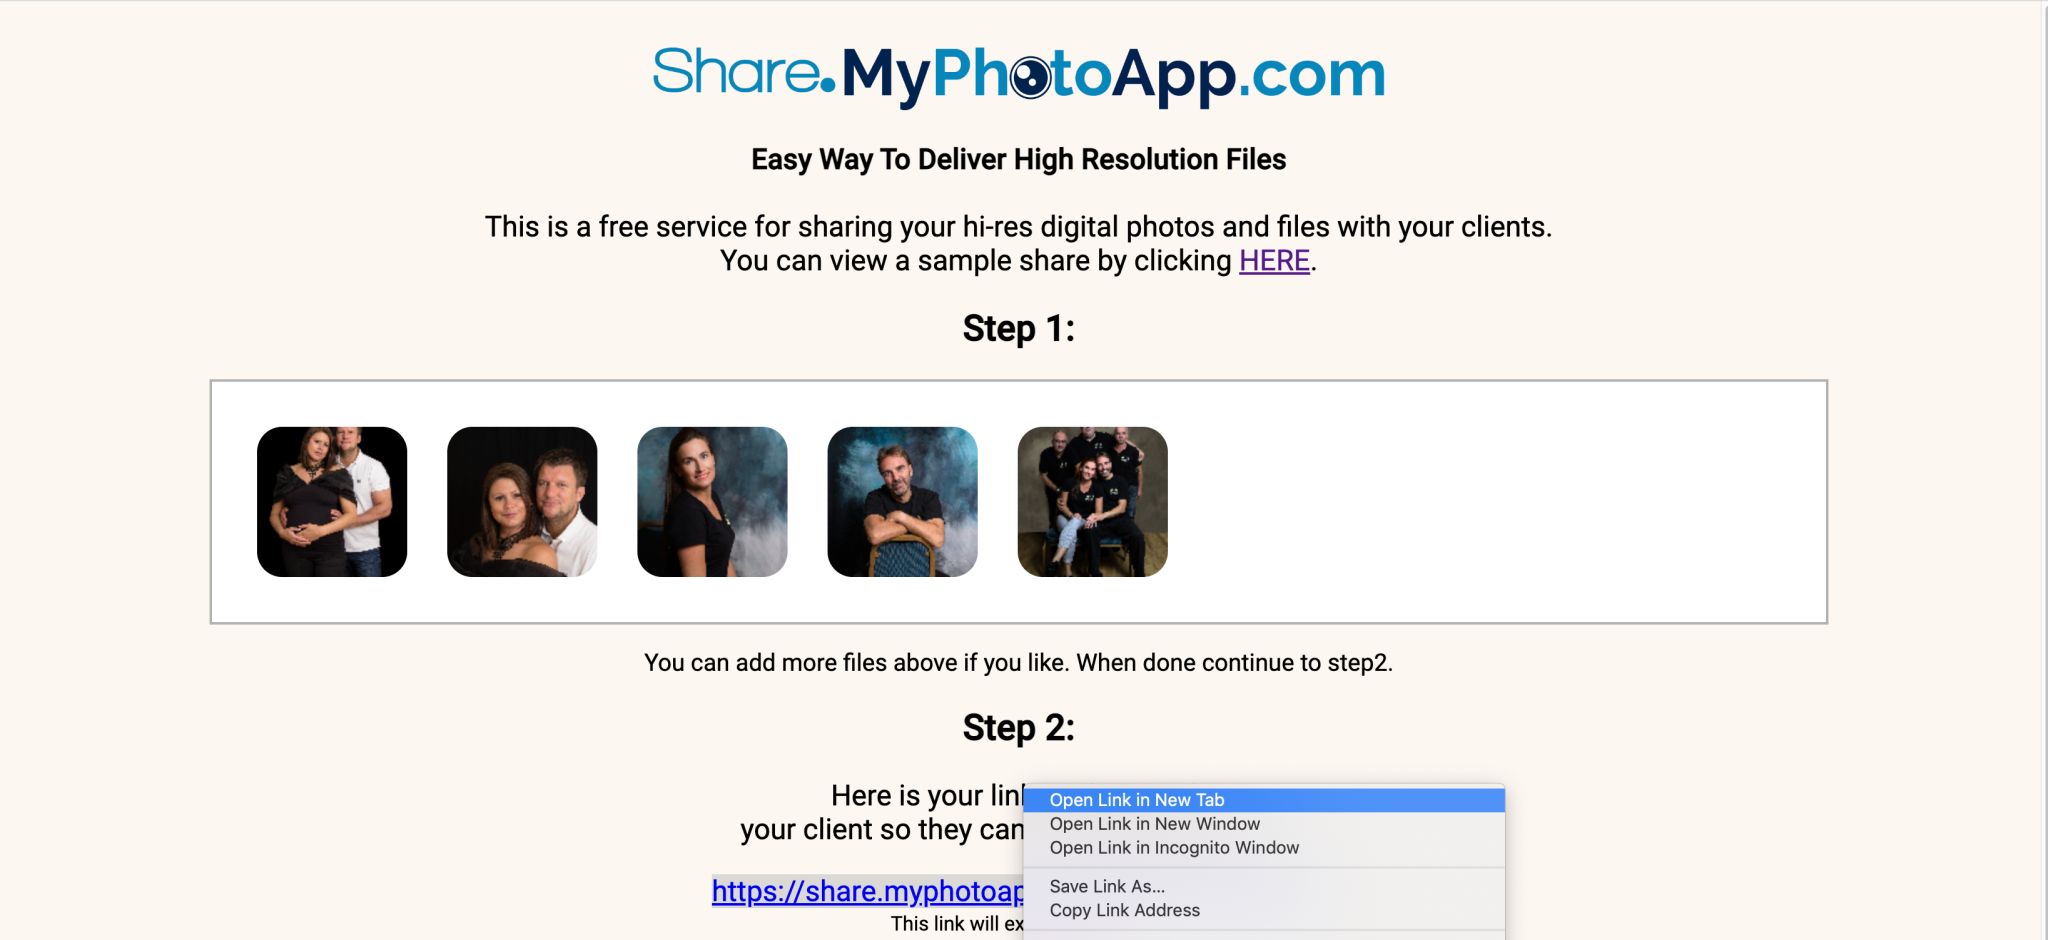
2. Upload the image or other files you want to add to the Share Gallery by simply dragging & dropping them onto the upload box or by clicking the upload box and browsing to the folder where the images are and selecting them that way. Files should be less than 100 mb in size and no more than 100 images or files per share. You can create multiple shares if you have more images.
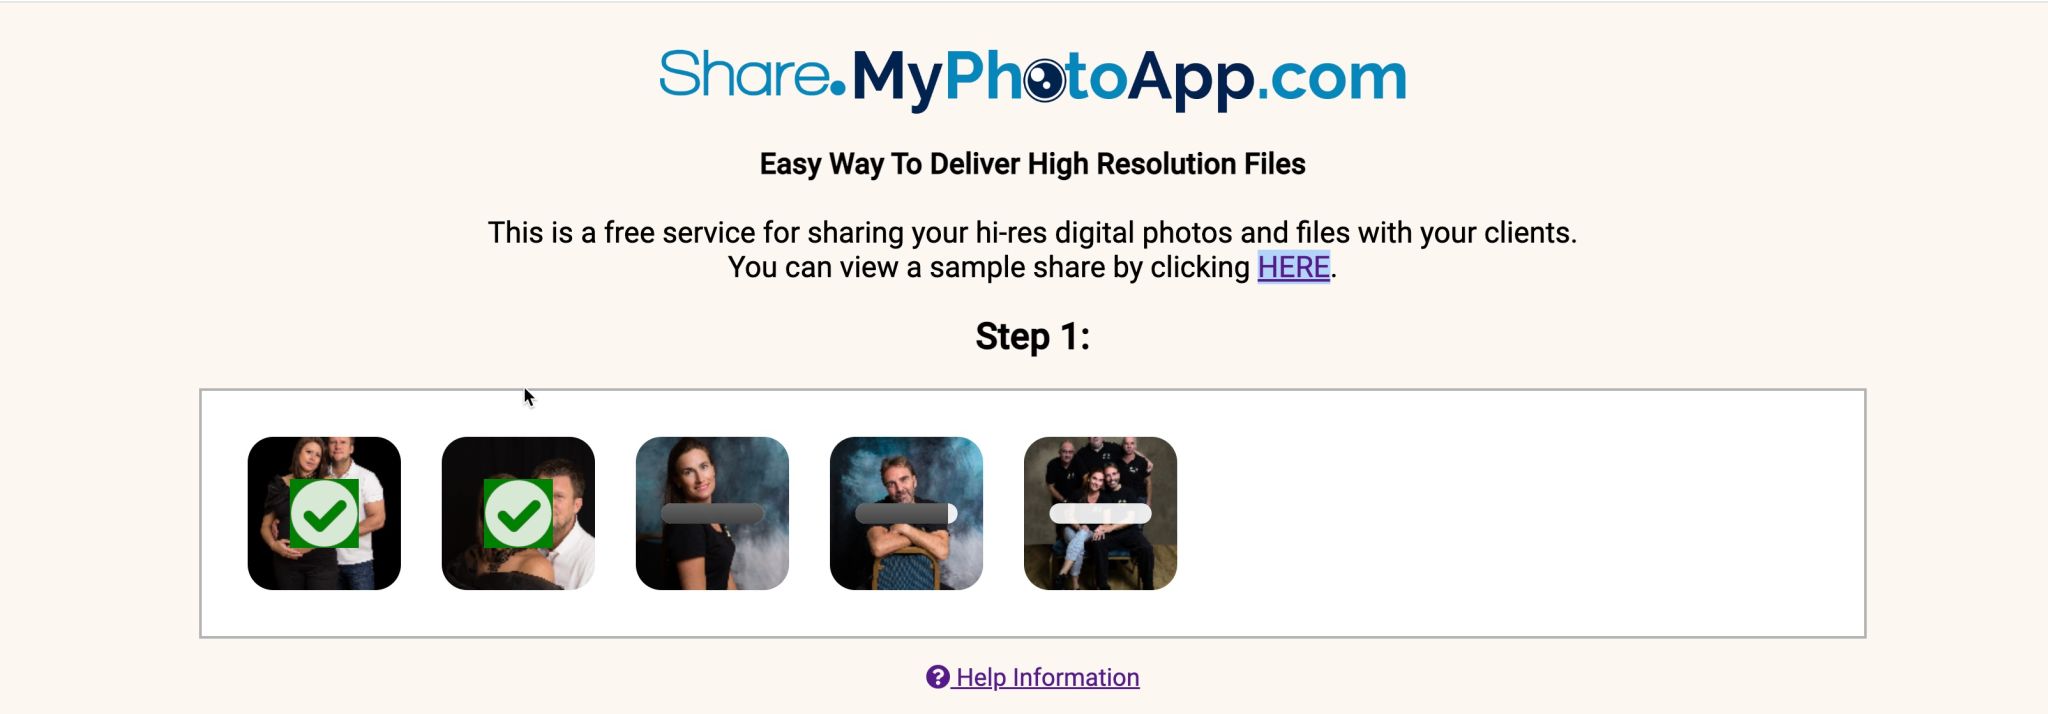
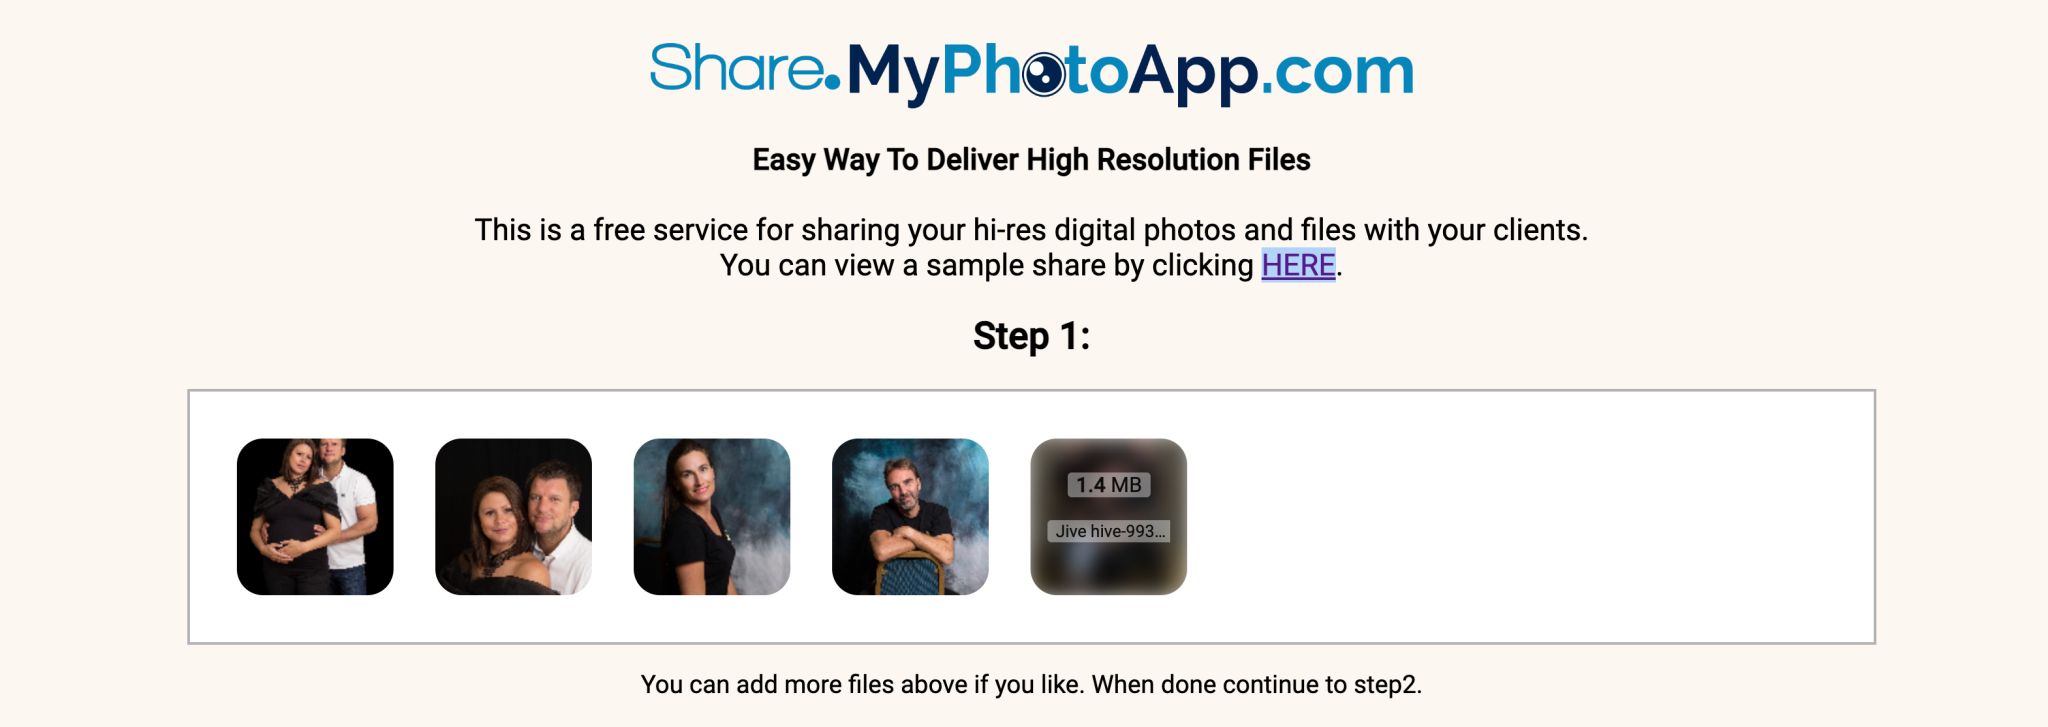
3. Review your uploaded images and files and make sure ALL the images you wish to include are shown as you cannot change the contents of your file transfer once you have confirmed it and left this page. Hovering your mouse over an image thumbnail will show the file name and image size like this.
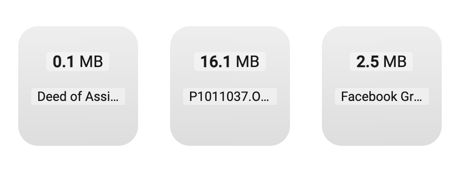
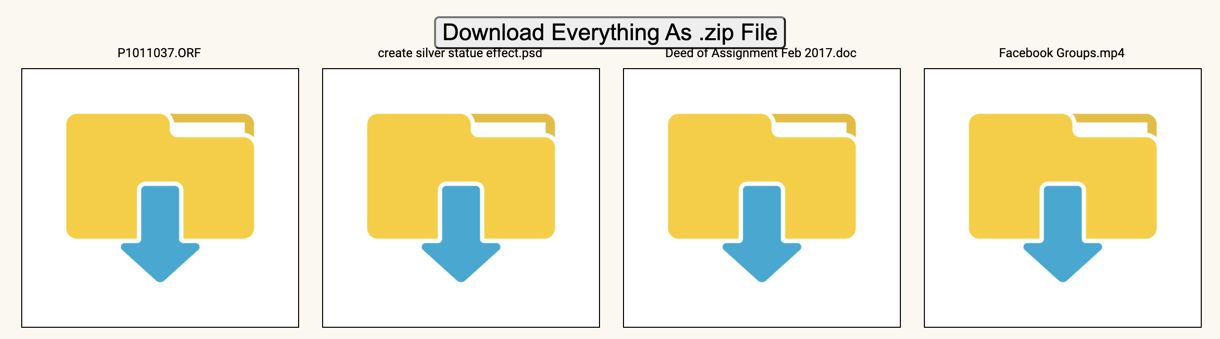
When you upload other files types, they will show as a blank thumbnail with the file name and size displayed like this:
While the share page URL is open, you can keep adding more images or files to this share Link until the limit of 100 files is reached.
4. When you have finished uploading images and are satisfied they are all there, click the Share Link URL to close the new share window and go to the download page your clients will see.
TIP: Right-click on the share gallery URL and open the share Gallery in a new tab if you think you might want to add more images before sharing.
File types other than JPEG or PNG will appear in the Share Gallery as a file folder with a download arrow and just like images can be individually downloaded or downloaded together with images files as a Zip file:
5. Check all the images and files you want to send are there and then copy the share link URL and send it to your client with some simple instructions.
TIP: If any images are missing or you want to remove a file you uploaded in error, you will need to start again with a new gallery, as you cannot edit a Share Gallery after you have navigated away from the upload window. Previewing the finished gallery in another tab will allow you to still add additional photos to your gallery in the share upload window, but you cannot remove unwanted images and will need to start again to exclude an unwanted image or file you accidentally uploaded.
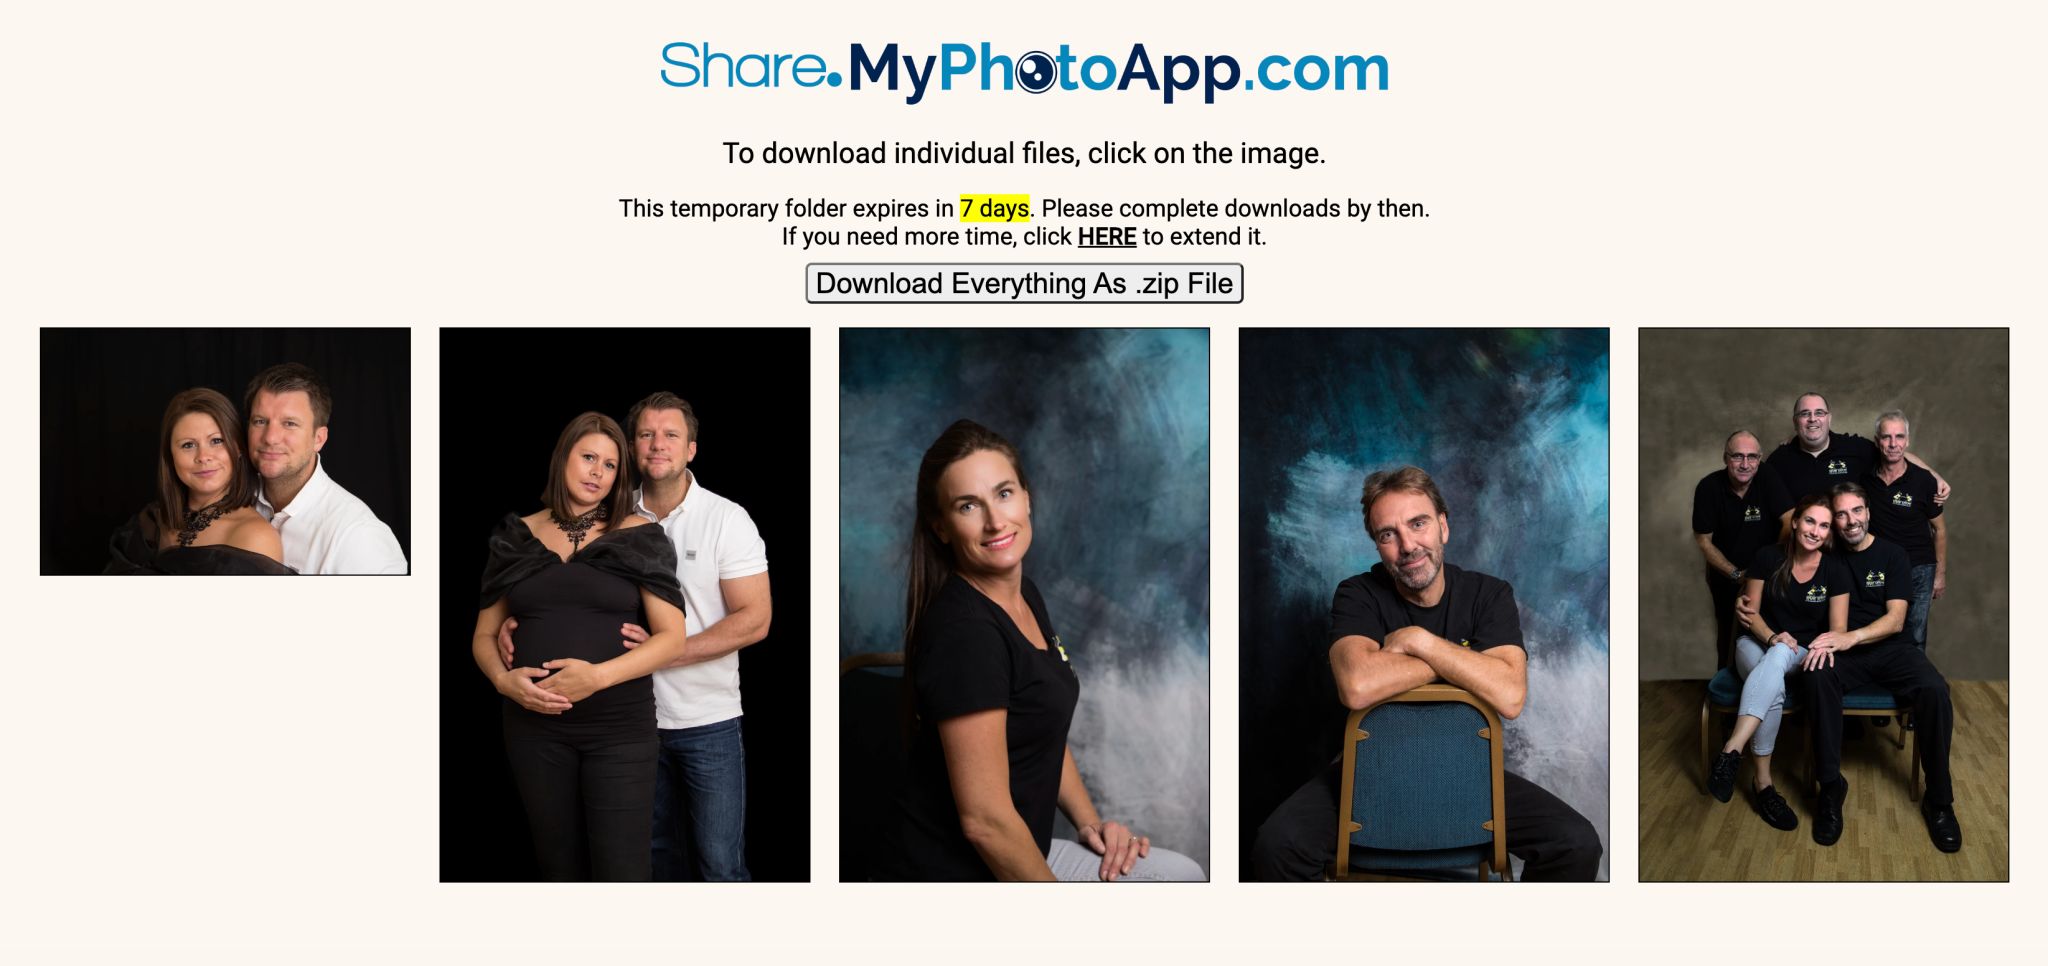
PLEASE NOTE: To download images, your client will need to access the Share Gallery on a computer NOT a mobile device.
It is just as easy for your clients to view and download their images in easy steps:-
1. Open the email you sent with the Share Gallery URL on a computer and click on the Share URL link
2. This will open the unique Share Gallery where their images are displayed as large thumbnails.
3. Choose how to download the images:
a. Click the Download Everything as Zip File Button to automatically download all the images & files as a Zipped file to the default download folder on your PC or another location of choice.
b. Click on a Single Image to enlarge it to full screen and click the download button to download it. Other file types cannot be previewed within the Share Gallery and will need to be downloaded first in order to view them so its a good idea to make sure they have good descriptive names.
4. The share gallery will display the number of remaining days before it expires, reminding them to download their images before then as they will be unavailable without payment to extend access to the Gallery.
NOTE: If your clients fail to download the images within the allocated 7 days they will need to pay to extend it. Expired Share Galleries are purged periodically from the server and there is no guaranteed time limit within which they can be reactivated.
NOTE: If they do not extend the gallery before it has been purged and request access later you will need to create a NEW Share Gallery which will have a different link by uploading the images again. They will then get a further 7 days to download their images and the option to extend it again. It is up to you whether or not you charge for this service.
Here is a sample client email you can copy and use:-
Dear
Your personal Photo Share Gallery is now available with your (High Resolution) Images (and print release/archive instruction) ready for you to download. Please note that the Share Gallery will ONLY be available for 7 days after which you will need to pay a fee to extend it. If you wait too long, it will be deleted permanently.
You will need to view the Share Gallery on a computer to allow you to download them and save them to a folder.
To get started open this email on your PC, and click on your unique link below to open your Share Gallery:
1.Choose from the following ways to download your images:
Click the Download Everything As .zip File Button to automatically download all the images and files as a Zipped file to the default download folder on your computer or a location you choose.
Click on a Single Image to enlarge it and then click the download button to download it to the default download folder or a location you choose.
2.The Share Gallery will display the number of remaining days before it expires. Please make sure you download ALL your images before then, as the Share Gallery will NOT be available after the 7 days have elapsed *.
3.Once you have downloaded your images, you should also back them up by saving them in a different location, such as an external hard drive, USB pen drive or cloud storage.
I hope you enjoy your beautiful visual memories.
Your Photographer Your Business Name
* Please note we strongly recommend you download your images without delay as we are unable to guarantee they will be available at a future date / there is a charge for providing a new Share Gallery.
You can easily amend this sample email with the information you wish to provide in line with your usual communication style and studio policies.
CUSTOM URL
Have you already added a custom URL to your MyPhotApp Apps? Want to add that special wow factor to your share galleries and add your own brand info? To use your own custom business URL, like https://share.yourdomain.com, it is simple to set up.
1. Create a PNG version of your logo with a transparent background and give it the name share.yourdomain.com.png (all lowercase letters) and send it to support@myphotoapp.com and we will install it for you. Recommended size: 600px wide, 200px tall.
share.inspiratationsphotography.co.uk.png
2. After you receive confirmation that the logo file is in place, log in to your domain provider and go to the DNS settings and create a new CNAME record and give it the name share and have it point to share.myphotoapp.com
3. From now on all you do is visit your custom share URL to create your Share Galleries - share.yourdomain.com - and have your Share Galleries white labelled!
this is what your custom share upload screen will look like
When you share your new white-labelled share galleries, this is what your clients will see: