 |
Need a knowledge base like this for your business?
Dynamic Gallery Section
 | By Kim Dixon, MyPhotoApp Training Guru Created: November 17, 2017, 8:29 pm UTC Last updated: October 21, 2018, 3:36 pm UTC |
The dynamic gallery section is similar to a standard gallery, but with one big difference, it allows the app users to upload jpg, png, and gif images to it. Making it a great addition to a Wedding Guest App, competition or any App where you might want people to be able to interact by adding their own images.
NOTE: Because of the way the Dynamic gallery works Apps with a dynamic gallery section will not work unless connected to the internet.
How To Set Up The Dynamic Gallery Section
Add a dynamic gallery section to your app and click on the settings cog to begin setting it up in a few easy steps:
Click on the Settings menu
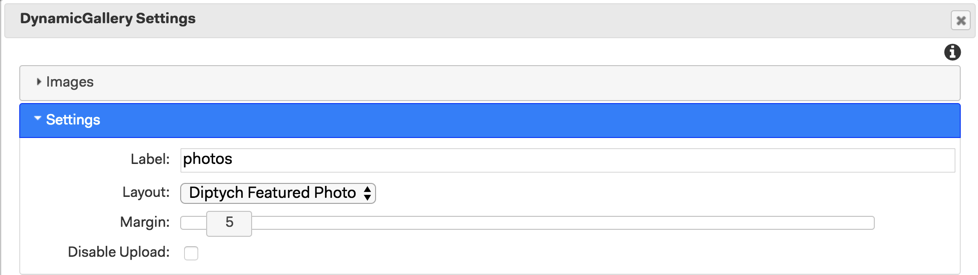
Label - you need to add a label to the dynamic gallery as this will be used to link the gallery to the upload button later. Type in a label, I have used photos.
Layout - choose the layout for the galley.
Margin - set a suitable margin between photos, usually, 3-5 is enough.
Upload Max Size - The maximum size (pixels on the long side of the images) of the images that can be uploaded. The default is 1024 and the maximum value is 2048. Images larger than that value are resized to the max size pixels.
Disable Sharing - removes the sharing button on the gallery.
Disable Upload - You can disable uploads to the gallery at any time by ticking this box and republishing the app. However, a better way to disable uploads is to remove or hide the upload button.
Now click on the other settings Manu
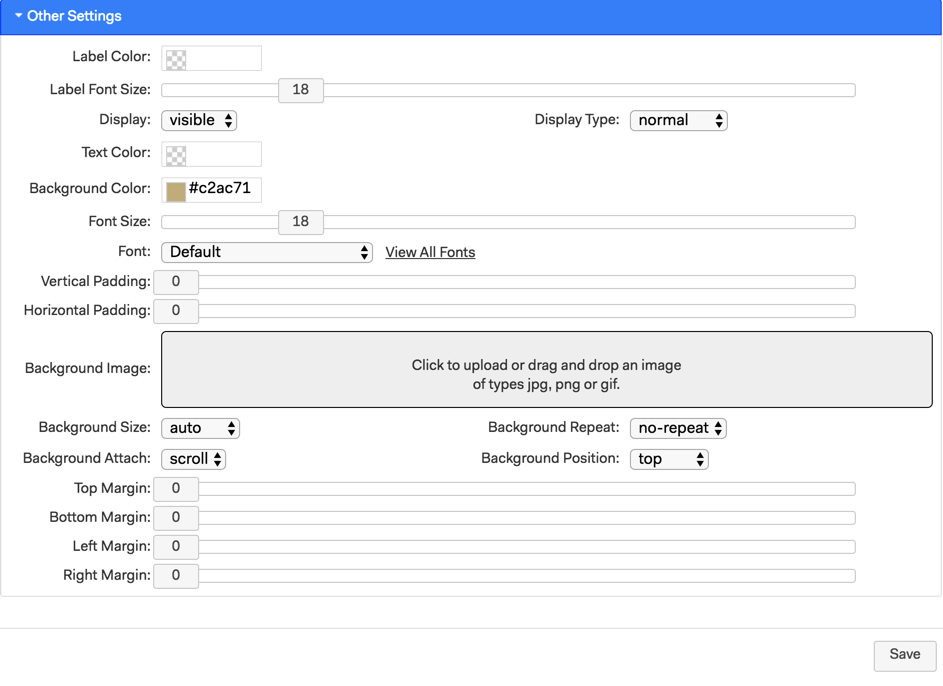
Label color - This is the color the Section label will appear in the app if you choose to set the display type to Accordion.
Lable Font Size - This controls the size of the label when used as an accordion heading
Display - Set to Visible by default
Display type - Set to normal by default so all comments added will be visible in the App
Text color - This sets a custom text color and overrides the default text color set in the brand setup or any color set in the main settings menu.
Background color - sets a custom background color for the section - I have set a pale gold in this example.
Font Size - Sets the size of the text for uploaded message
Font - sets the font used for the uploaded messages
Vertical Padding - adds padding to the left and right side within the section
Horizontal Padding - Adds padding to the top and bottom within the section
Background image - allows you to set a custom image as the section background - choose the various settings you want for how the image is displayed.
Section margins - set margins around the section to indent it, so that the app background is visible for any of the sides.
When you have finished making changes click Save to update the section.
TIP: Because this works like any other Image Gallery you can click the section in the gallery or drag & drop images to it and upload images in the usual way.
Add A Button to Open the Upload Image Dialog
To enable App users to upload images to the dynamic gallery section, you need to create a button or other navigation option that will open the upload image dialog when they press it. For example, you could use a text link or an image.
1. Add a button section of your choice such as a primary or buttons+ section and position above the dynamic gallery section. I have added a primary button section.
2. Click the settings cog for the button section to set it up as you want. In this example I have added Button text and set the button color to gold.
3. In the Button section, link field add the following link: add:gallerylabel where gallerylabel is the label you added earlier for the dynamic gallery section so in this case, it would be add:photos. Labels are case sensitive and you will get an error message if the label name you try to use is incorrect or doesn't exist.
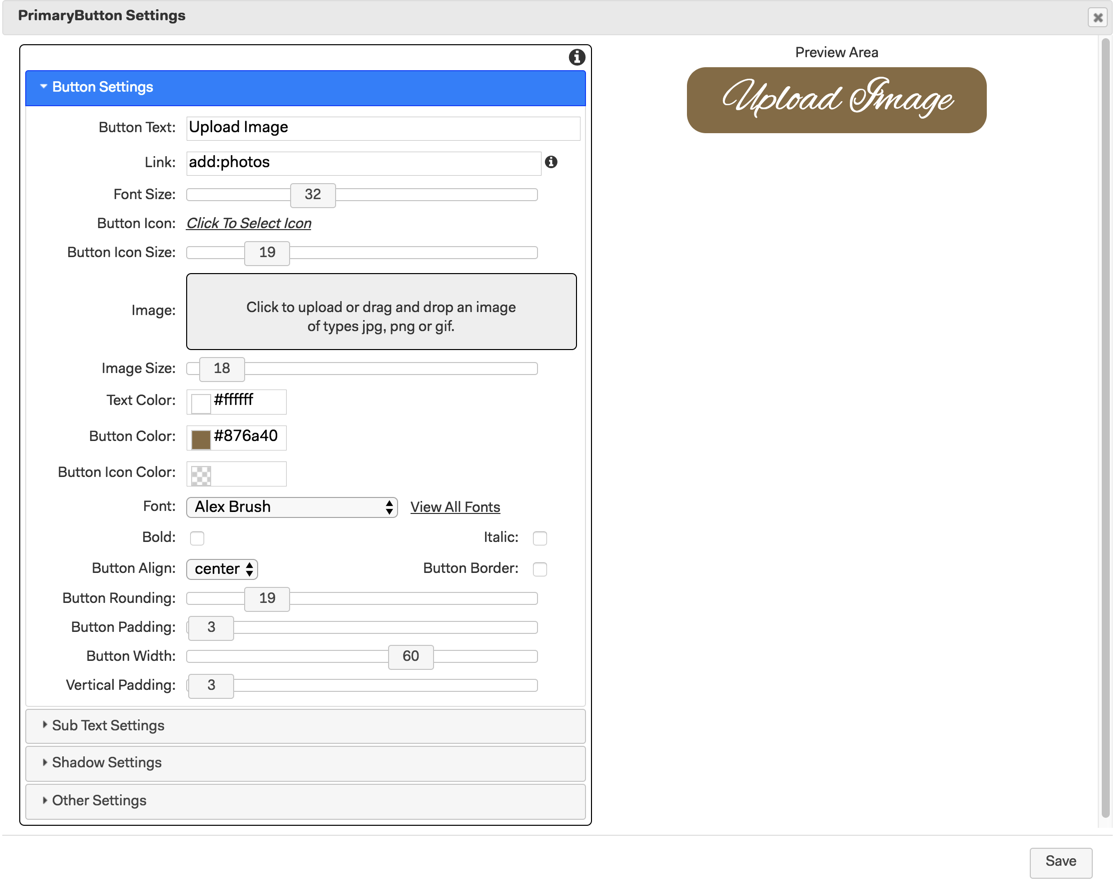
4. Save the changes to the button section.
Add A Title For The Gallery In The App
It's a good idea to add a heading that will appear above the photos people have uploaded to the dynamic gallery. This is easy to do using a title section.
1. Add a title section and position it above the upload photos button you have just created. I have also added an image section with a gif above the title.

2. Click on the settings cog and add a suitable title and subtitle.
3. Choose the settings you want in terms of font, size and padding
4. Save the changes.
Add any other content you want to the app and publish it. You are now ready to test it out and upload the first image.
How to Add Upload A Photo To The App
It's really easy to upload an image to the app and as with the other gallery sections jpg, png, and gif images are supported.
Click the Upload Image Button to choose your photo.

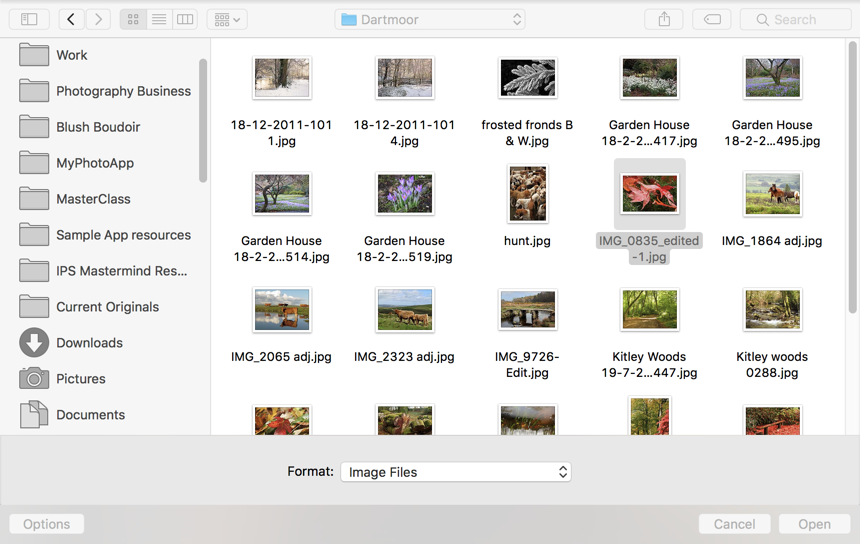
On a PC it works in exactly the same way a regular gallery works and clicking the Upload Image button opens the select image file dialog. Find the folder you want and highlight the image or images you want to upload and then click Open to upload it.
When the upload is complete the image will appear in the App in the position you placed the dynamic gallery. You can see the narrow gold border created by the margin I set in the section settings.

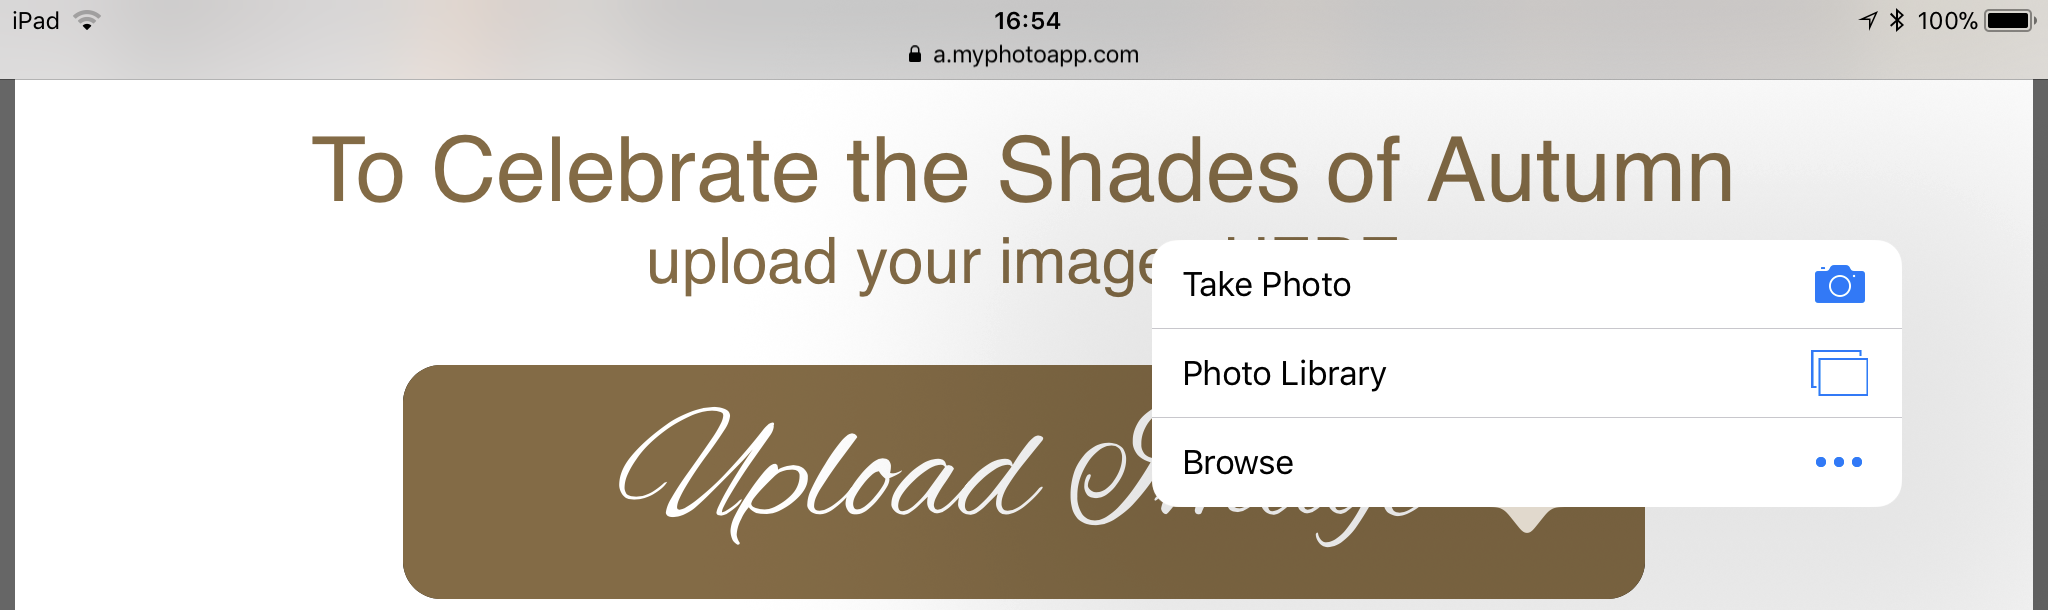
When people press the upload image button on a mobile device, a dialog will open prompting them to choose an image to upload, there are normally two relevant options:
- Take photo
- Photo Library
On up to date iOS devices, there is a 3rd option Browse which opens the new document folder which is not relevant to uploading images.
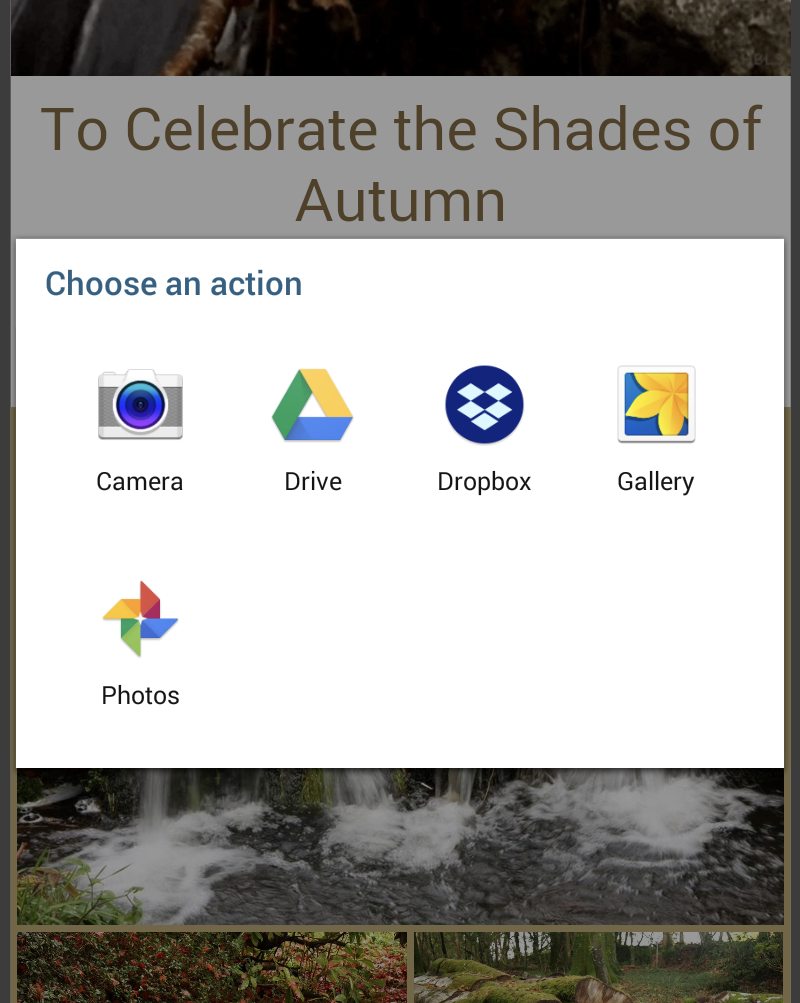
And on an Android device, it looks like this, with the addition of the option to choose from google drive or Dropbox
Here is an example of how to upload images from an iOS device. On an iPad click on Photo library and then choose the album/folder. I'm going to click on Moments to choose some images I have just saved on my iPad like this.
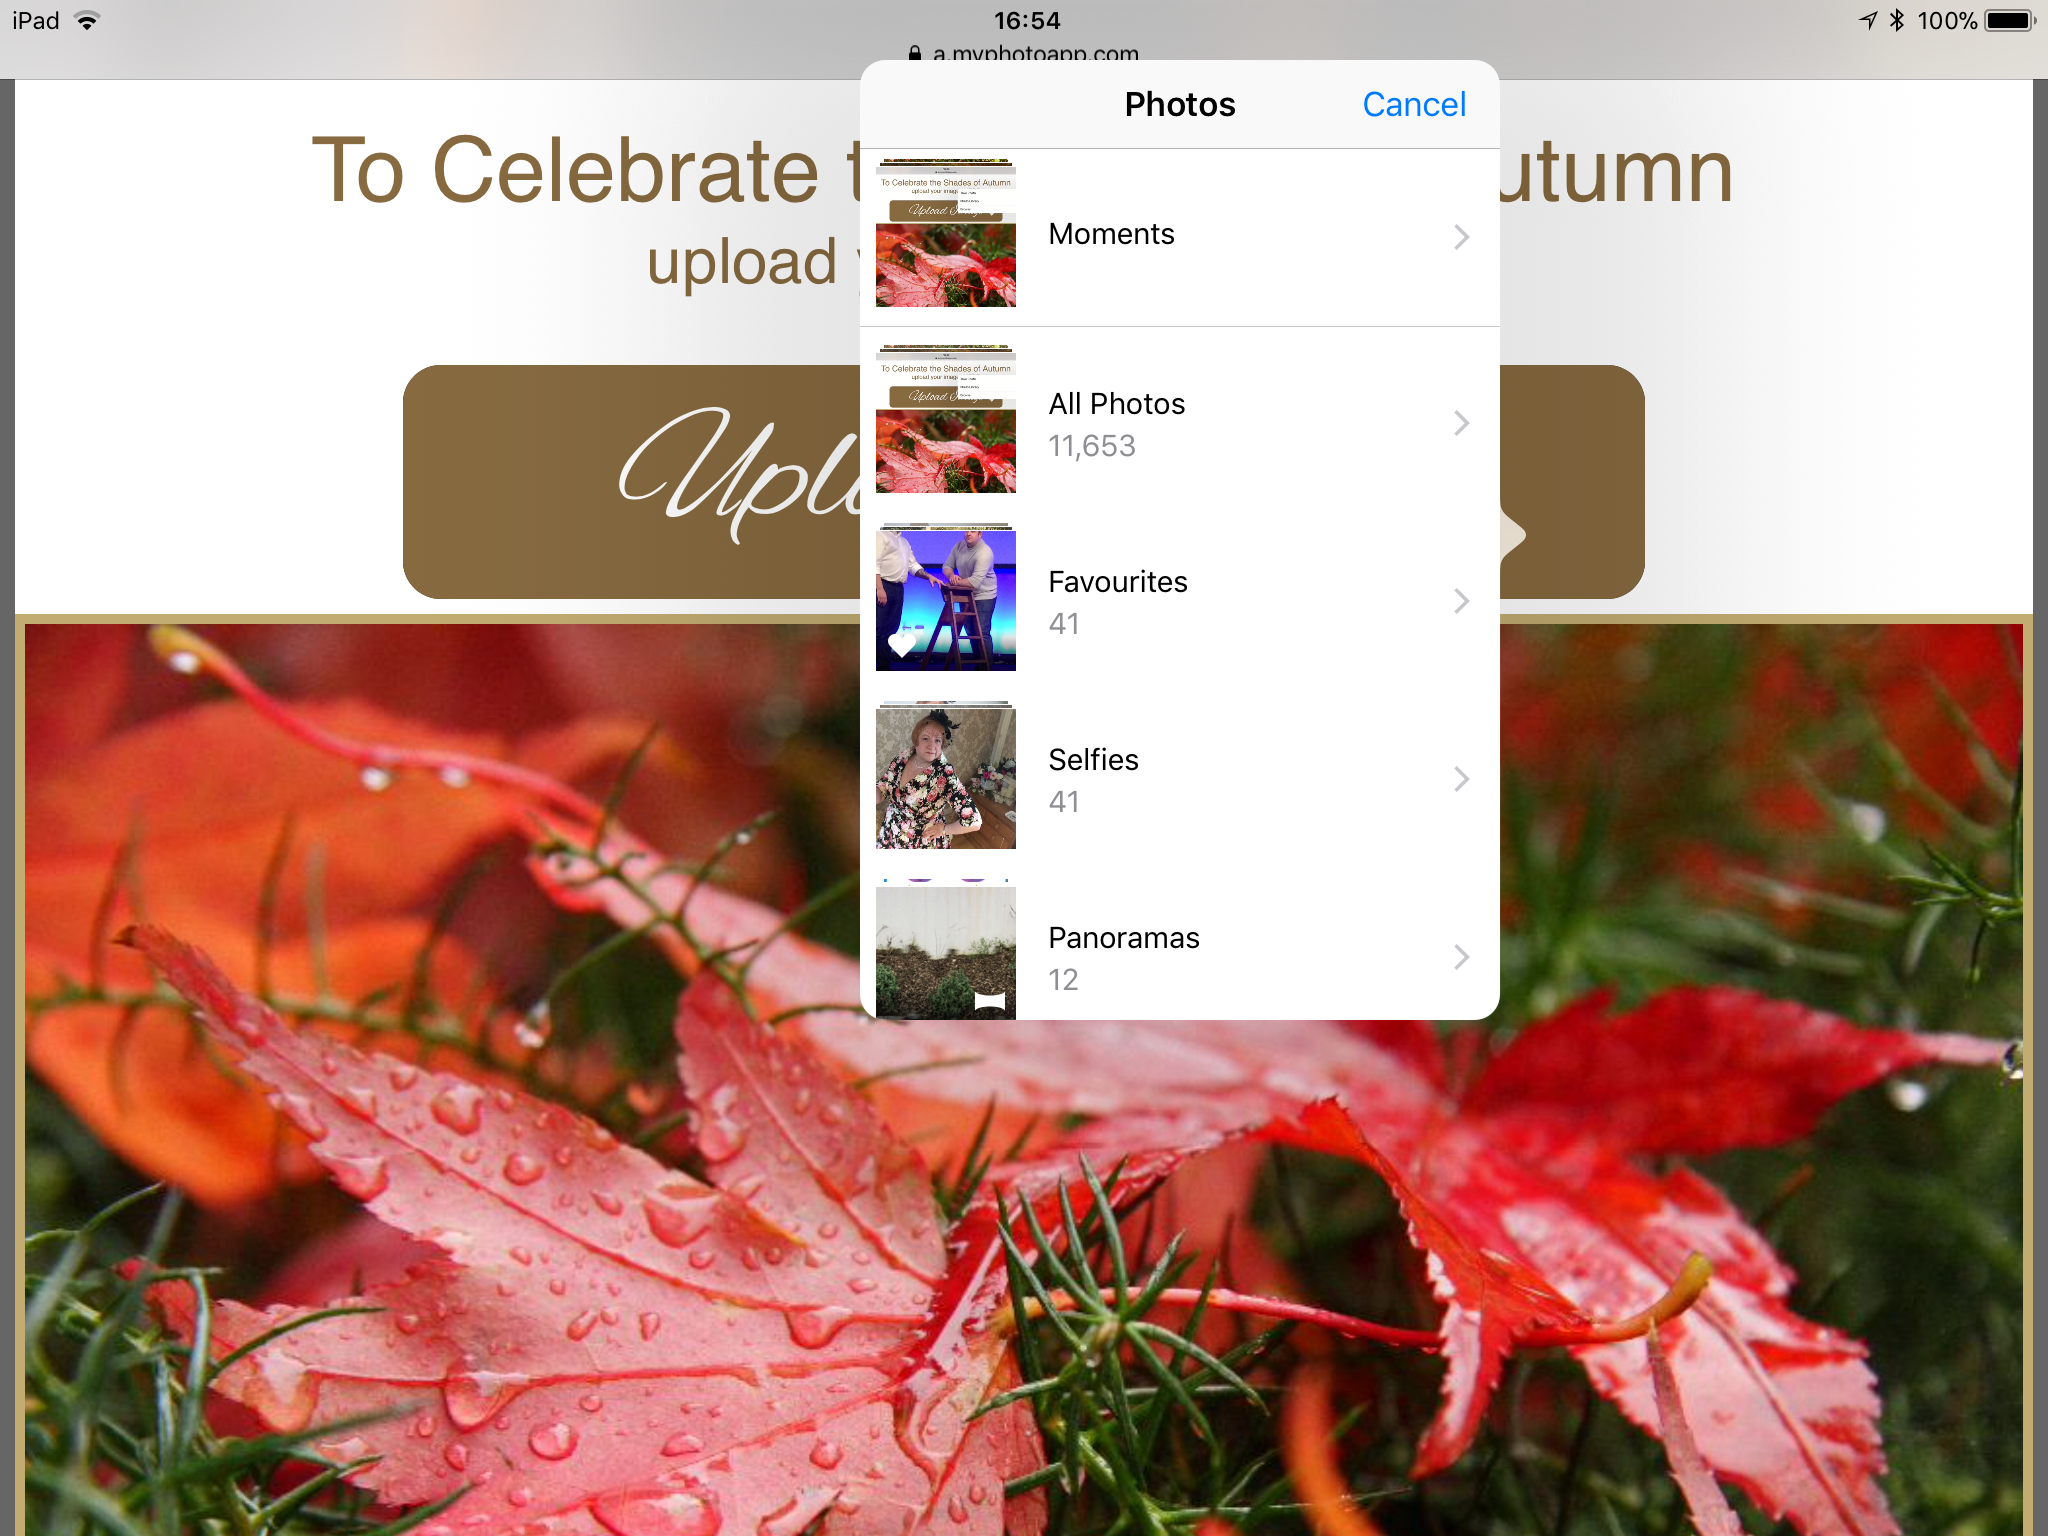
Next select the image or images you want to upload and click Done to upload the images.

A progress bar will appear as the image(s) uploads and close when the upload has finished.

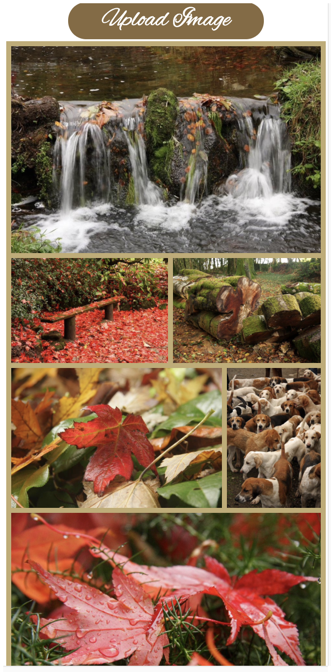
Once the images are uploaded, the gallery will refresh automatically and you will see your images have been added at the top of the gallery like this.
Images are uploaded at the default MyPhotoApp size of 1024px on the long side.
Whenever someone uploads a new image it will appear in the app at the top of the gallery above images previously submitted. When you or others add images on different devices you will only see the new images if the version of the App you are viewing is refreshed. So the images I just added from my iPad won't appear on the App I am viewing on my PC.
The gallery always refreshes when the app is started or when you manually refresh it. On a PC you can click the reload symbol to refresh the web app. If you want people to be able to check for new images without having to restart the app on their mobile device you can add a refresh button that will refresh the dynamic content immediately when pressed.
The Refresh button should have the following link: refresh:gallerylabel where gallerylabel is the label you added earlier for the dynamic gallery settings - so in this example, it would be refresh:photos.
To test the refresh button, you can just open the app on two different devices or browsers. Upload an image in one, and hit refresh on the other.
Managing The Images People Have Uploaded
You can delete and manage the images in the builder. Click on the setting cog and click on the images menu to see all the images that have been uploaded.
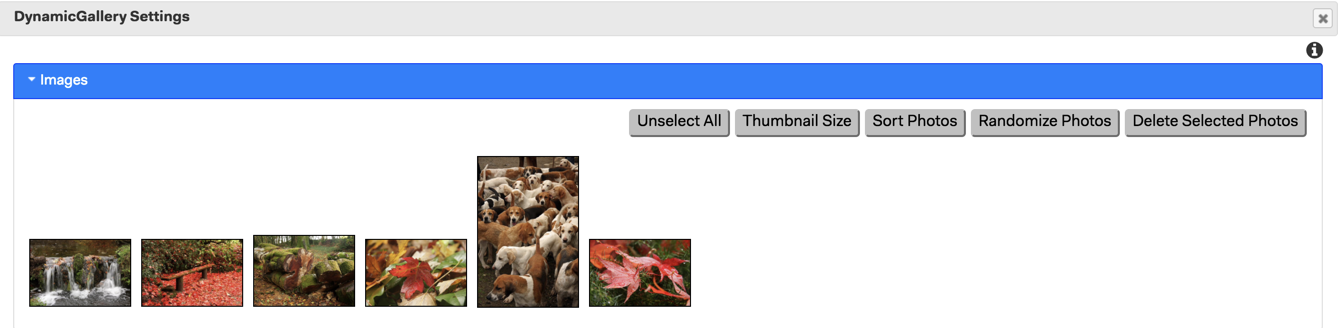
You can now make changes to how the images are arranged, the gallery layout or delete unwanted images or all the images by highlighting them and pressing delete.
When you have finished making changes click Save to update the section and republish the App to apply them.
Saving Uploaded Images
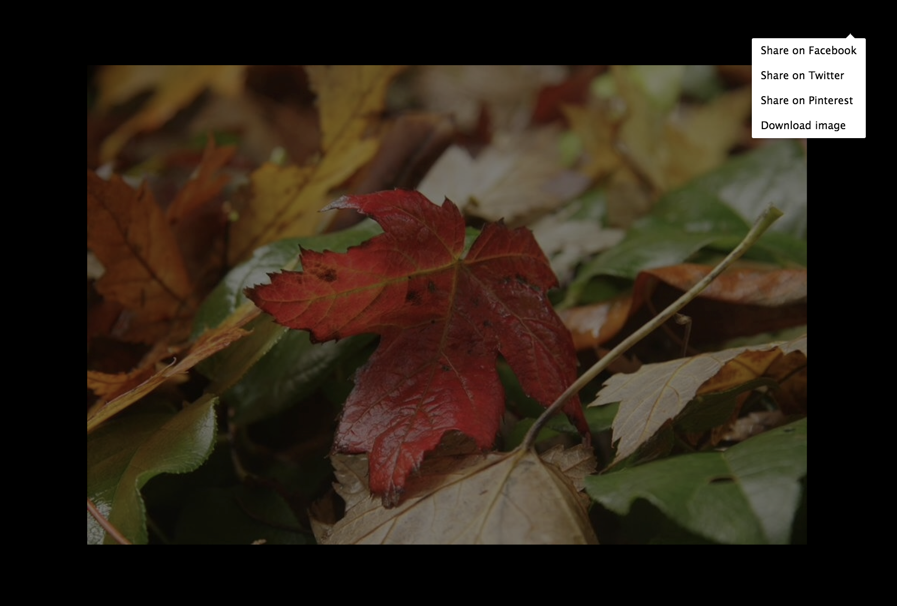
You can easily save a copy of any of the uploaded images by simply opening the App on your computer or mobile device and clicking on an image to go to full-screen mode and choosing download image from the share menu.
WARNING: While you are editing an app, any images uploaded to the app by your clients may be lost.
It is, therefore, best to ensure that you add the dynamic section once all other editing has been done. If you do need to edit an active app it is essential that you do so quickly and ideally at a time when people are not yet using it or unlikely to be using it while you are editing it.
You can check out an example app by clicking the link below
Download Photos Button
You can add a button with the link: downloadGallery:label
where label is the label of the dynamic gallery and it will permit end users to be able to download a .zip file of the photos that have been uploaded.
Download Dynamic Photos API
You can use an api to download a .zip file of all of the photos.
You first login to the builder and select the brand that contains the app that has the dynamic photos.
Then you can open a new tab in the browser and use the following URL to download the photos that have been uploaded:
http://builder.mp-app.com/php/downloadDynamicPhotos.php?app=appname&label=labelname
Where appname is the name of the app and labelname is the label you specified on the dynamic gallery.