 |
Need a knowledge base like this for your business?
Slideshow Section
| By Kim Dixon, MyPhotoApp Training Guru Created: November 20, 2017, 4:32 pm UTC Last updated: November 25, 2018, 11:15 pm UTC |
The slideshow section allows you to create a simple slideshow from an uploaded gallery of images set to music.
Unlike the video section, the slideshow produced will autoplay within the app and is, therefore, ideal to use in a portfolio App or webpage to showcase images.
Adding Images To The Slideshow
After adding a slideshow section to the first thing to do is add some photos to the empty Slideshow section. You do this in exactly the same way as you add images to a Gallery section:
- Drag and Drop photos from an open folder on to the Gallery section in the Visual Design preview or
- Click on the Upload Icon to select a folder and photos
MyPhotoApp works with images in the following formats jpeg, png, and Gif.
Once the images have finished uploading you will see the first image displayed in the Slideshow section in the Visual Design area.
Setting Up The Slideshow Section
Click the Settings Cog on the left of the slideshow section in the Layout Sections area to open the Slideshow Settings and select the options you want from the 2 menus:
1. Images
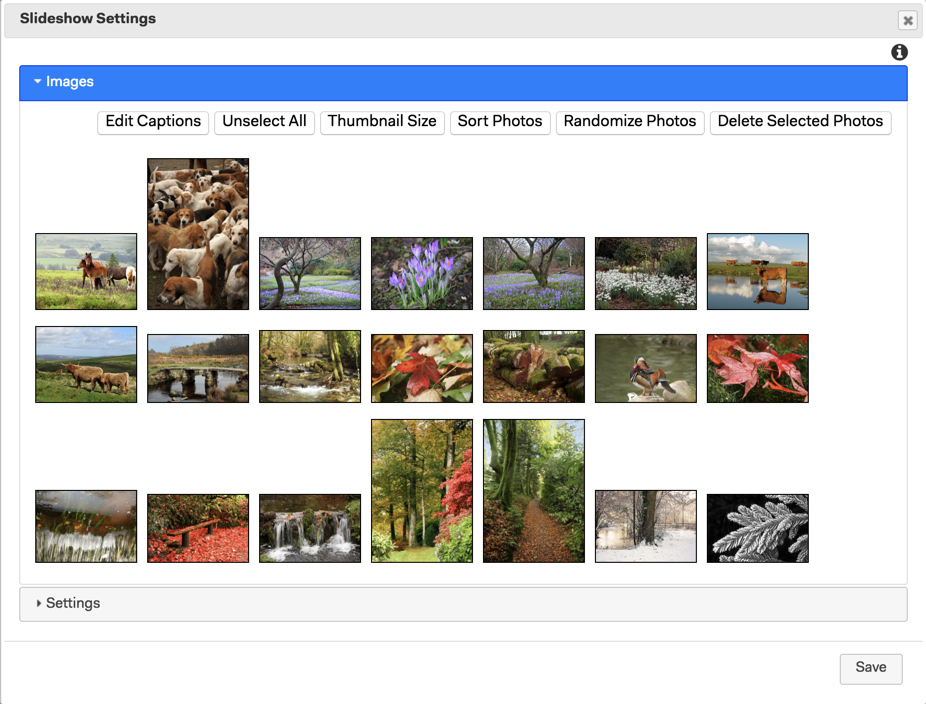
The images you have uploaded will be displayed with the various option buttons above.

Edit Captions - click on the edit captions button to open a menu with each image displayed with a text box to enter individual captions. Enter keywords and tags to improve your SEO for images.
You can rearrange images using drag and drop to put them in the order you prefer. Standard keyboard shortcuts can be used to select multiple images and position them:
- To select a block of adjacent images - click the first image and shift + click on the last image in the block to highlight all the images between.
- To select non-adjacent images - just click on each image you want to select.
- To move selected images click and hold on a highlighted image and drag where you want them.
Unselect All: To quickly deselect the images you have selected click on the Unselect All button.
Thumbnail size: You can toggle the size of the thumbnails you see in the Gallery settings by clicking the Thumbnail Size button, with each click it will toggle between small, medium, and large. The defaults display size for image thumbnails is medium.
Alternatively, you can use the built-in options to sort them:
Sort photos: Click this button to sort the images by file name works best where you have named images according to the order you want or want them in chronological order when using file names.
Randomize Photos: Click this button to randomize the order of your photos, MyPhotoApp will arrange the photos for the best fit according to the layout chosen.
Delete Selected Photos: To delete individual or multiple images you have changed your mind about by simply clicking on each image you wish to delete to highlight it, then click the Delete Selected Photos button to delete ALL selected images.
when you have finished arranging your images into the order you want for the slideshow click on the Settings menu to continue.
1. Settings
The settings menu is where you add the music that will play during the slideshow and choose other settings.

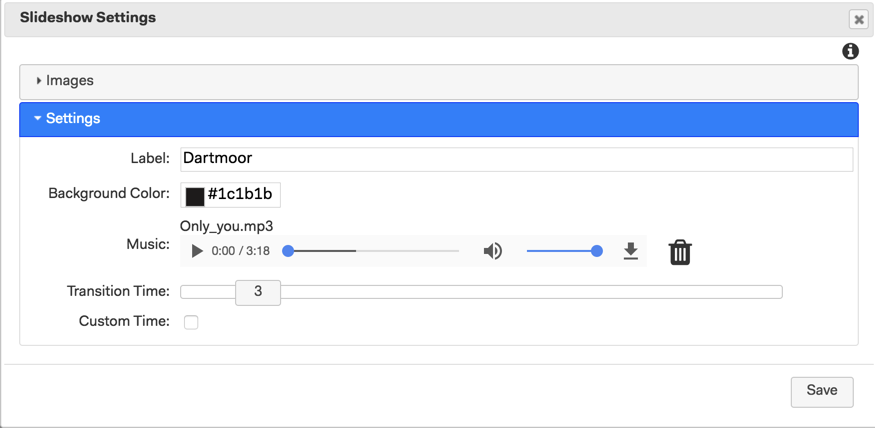
Label: enter a label for the section to make it easy to identify in the builder.
Background color: by default the background area in the slideshow is black but you can choose a different color by entering the Hexadecimal number or using the color picker.
Music: click to upload or drag a drop an mp3 music file onto the music upload area. Once you have uploaded a music track the length in minutes and seconds is shown to the right of the play button. Click play to preview the track, you can adjust the volume using the slider.
To delete the music track to upload another click the trash can.
Transition time: The default transition time is 5 seconds use the slider to reduce or increase it.

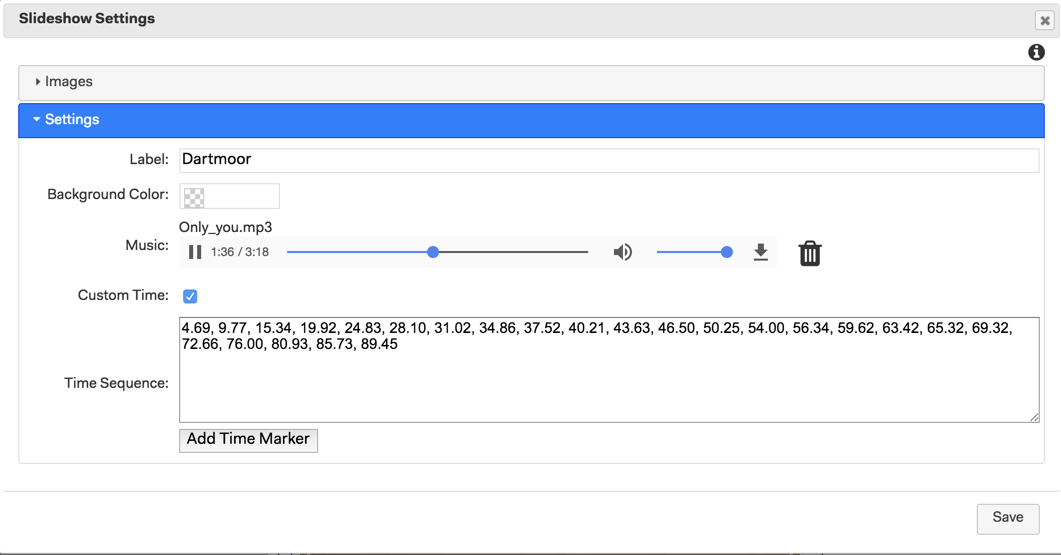
Custom Time: Alternatively tick the box to set custom transition times. This allows you to customise the slide transitions to the music. Click play and then click the add time marker button at the point you want to change to a different slide. You only need to set sufficient for the number of images you have uploaded as the music will fade out when the last image is reached.

When you have finished click Save to update the slideshow section. Publish your app and check out the slideshow.
There is no loop facility for the slideshow and it will stop at the last image. Clicking the X that is displayed in the top right-hand corner will exit the slideshow.