Need a knowledge base like this for your business?
Setting App & Section Backgrounds
By Kim Dixon, MyPhotoApp Training Guru
Created: November 11, 2015, 5:33 pm UTC Last updated: February 19, 2019, 12:04 pm UTC
By default, when you create a new App the color scheme is defined by either the choices you made in your brand set up or the color scheme and or custom color settings applied in the App template or the App you based the new App on. You can change the background of an App by clicking on the Layout Setting Button in the builder tab where you can choose from various color or image settings.
Layout Settings Options
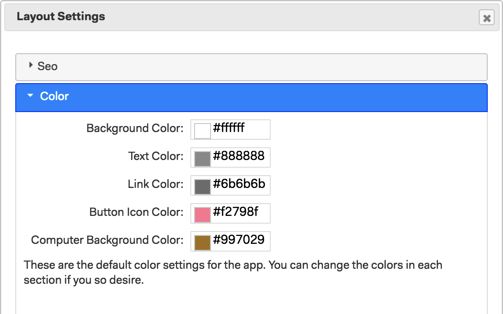
1. Color - You can set a custom color for the App background by clicking on the color tab. Use the color picker or enter the hexadecimal color number to select a new background color.
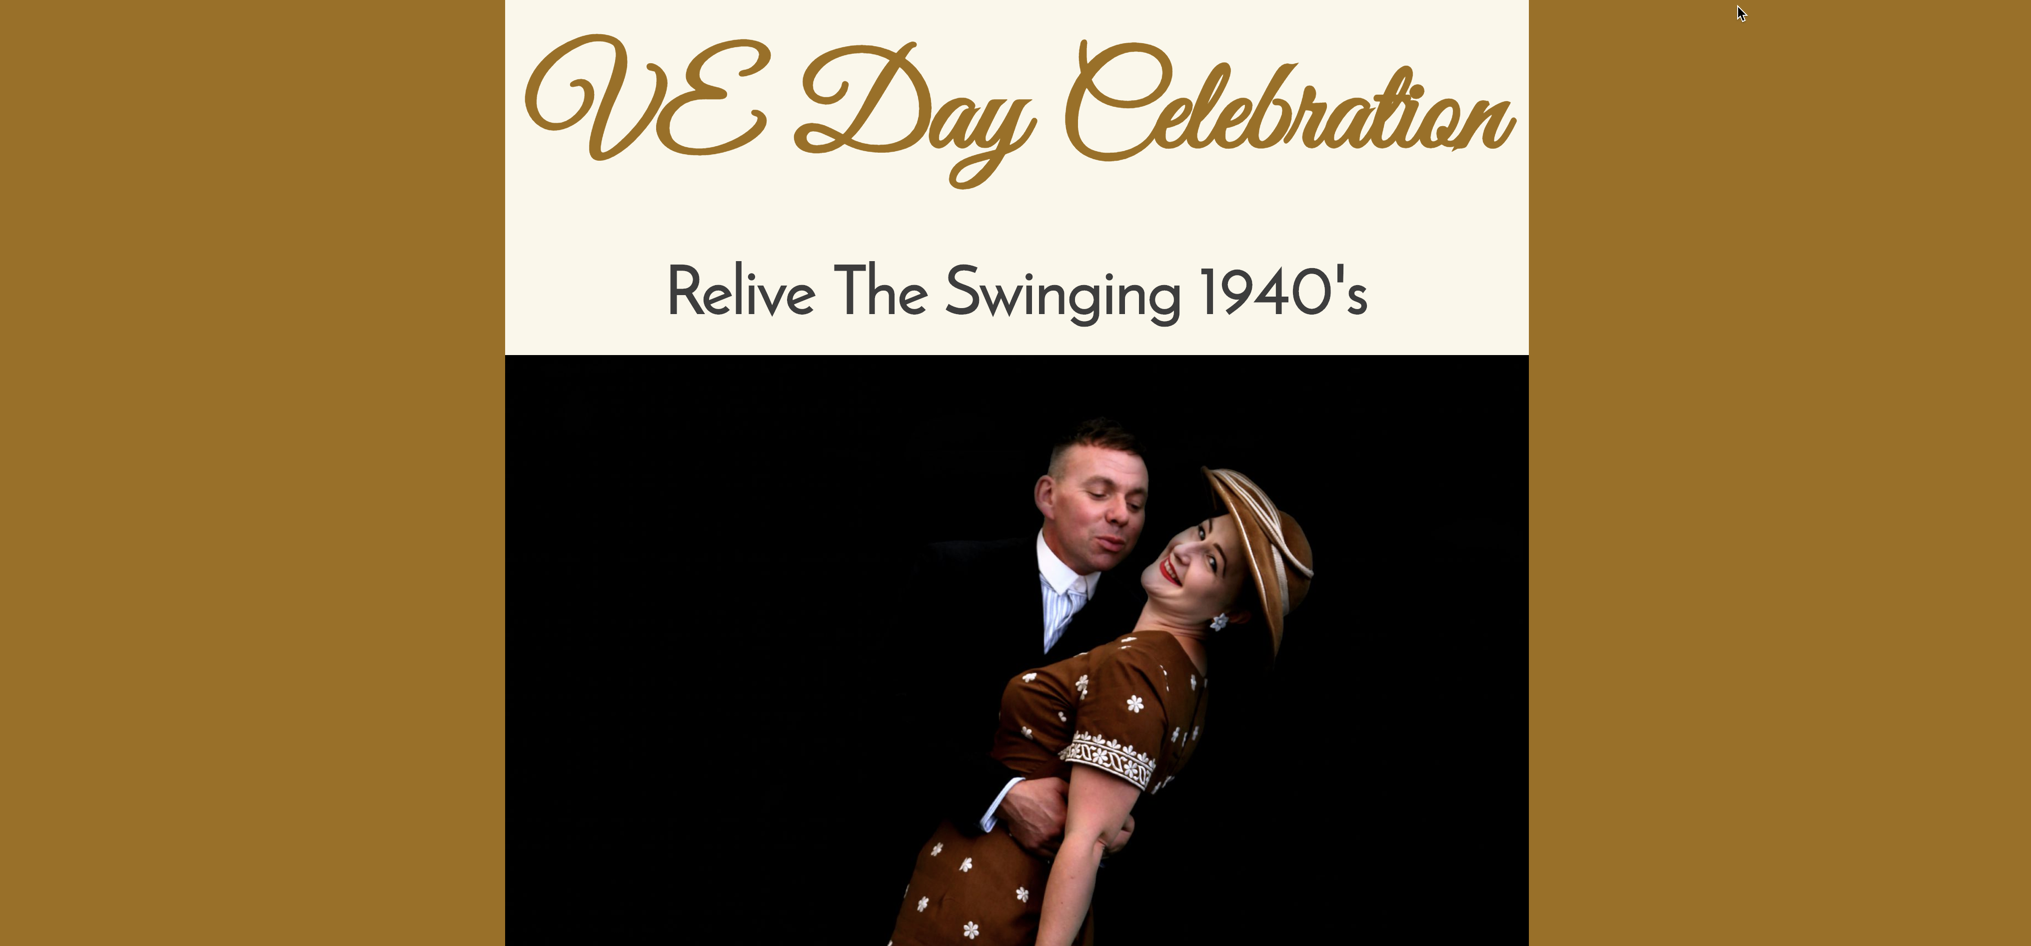
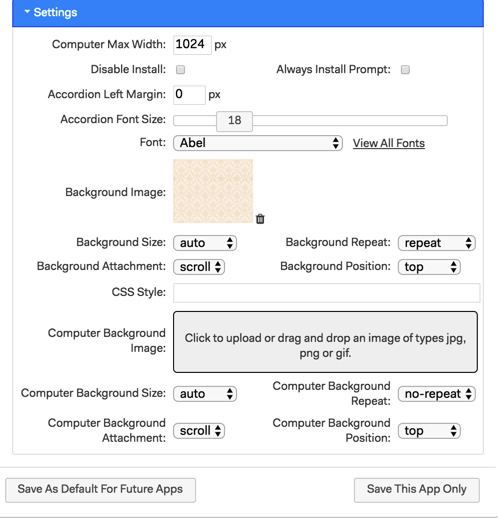
You can also choose a computer background color, this can be the same or different. When you view the App on a large screen and the Max App Width is less than the resolution of the screen, e.g. the default width of 1024px, this is the color you will see either side of the App. However, if you have set a high enough Max App Width the App will be expanded to fit the screen. In the example below the App Max Width has been left at the default 1024 px and I have set the dark gold as the Computer background color so this is what it looks like on my higher resolution computer screen. To change the Max App Width click on the Settings tab in the Layout Settings.
2. Background Image - Alternatively you can set an image as the App background by clicking on the Settings tab - to add an image drag or click on the upload background image and choose a jpg, png or gif file. Files must not be larger than 1mb in size and need simple file names consisting of letters and number without any spaces and no special characters followed by 1 period and the 3 letter file suffix e.g. wallpaper2.jpg. Adding a background image will override the background color. To upload a different image or remove the background image simply delete the image by clicking the trash can.
Once you have added the image select the options you want to apply to it
Size - There are three size options:
Auto - The default setting this uses the background image width and height.
Cover - Scale the background image to be as large as possible so that the background area is completely covered by the background image. Some parts of the background image may not be in view within the background positioning area.
Contain - Scale the image to the largest size that is possible so that both the image width and height can fit inside the content area.
Repeat - Set as no repeat by default change this to repeat if the background image you have used is smaller than the App, and the image will be repeated to fill the background. This is useful for standard tiled background images.
Background Attachment - Set as Scroll by default the background moves with the App as you scroll down changing this to fixed will cause the background to remain static as the sections scroll over it giving and look similar to a parallax effect.
Background position - Set as top by default if the background image is small and you have chosen no repeat this will determine where the background image appears in the App. Choose from top, center or bottom.
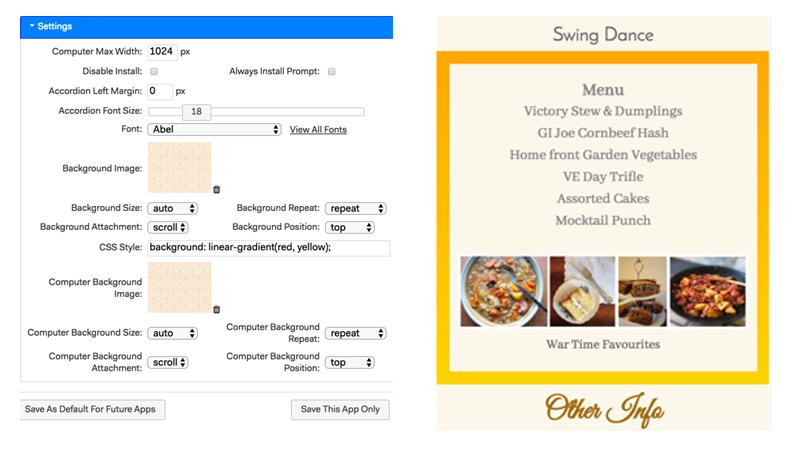
3. CSS Style - This feature allows those of you who are more technically minded to add syntax for your favorite awesome CSS styles. You can specify a vast range of CSS content to use in your Apps including backgroundstyles from cool Gradients like this - linear-gradient(red, yellow); to psychedelic patterns.
You can also set a variety of other things using CSS Styles, for example, an App border - BORDER: 5px solid black;
Below is an example of a CSS gradient style set as the App background, the sections have a cream custom background color set and a margin has then been added to allow the App background to show as a border around the menu document section.
When you add a CSS background it overrides any other app background setting, color or image. To remove the CSS background simply delete the syntax and update the layout settings by saving it.
You can find out more about CSS styles by doing a google search there is lots of information online about them if you want to learn more.
For those of us with no idea what this all means you can simply stick to creating awesome background effects in PhotoShop and upload them as a background image!
4. Computer BackgroundImage - You can also set an image for the computer background in the same way as for the App background simply drag or click to upload the image. This makes it possible to create interesting designs for Apps you expect to be viewed on a computer. Here is an example of what you can achieve, I have uploaded an image of damask wall paper as the computer background image.
When you upload a computer background image it will automatically override the computer background color set in the layout settings. To revert back to a color for the computer background simply delete the computer background image by clicking on the trash can.
Save Your Settings
When you have finished choosing your options for the App background it is time to save the layout settings, choose either for this app only or as the default settings for future apps. If you click the cross'X' in the top right-hand corner none of the new settings you have selected will be saved.
When do you see the App background?
Think of the App background as wallpaper for your App by default when you add a new section to an App the section background color will be blank so the section is in effect transparent and the Background Color set in the Layout Settings, will be revealed and is what you actually see. The left-hand image below is an example of the background color in the layout setting set as white. If you have uploaded a background image, this will override the App background color and you will see the App background image instead, as shown in the right-hand image in the example below where a damask wallpaper image has been uploaded as the App background.
Setting Custom Section Backgrounds
Set A Custom Color As A Section Background
As already stated by default new sections added to an App will have NO Section background color set and the App background will be visible. If you have created the App using a template or other App then any background settings in that App will be applied.
You can control how much of the App background color or image is visible by setting a custom background for any individual sections where you do not want the App background to be visible.
Simply set the section background color to one other than the one set as the App background color in the layout settings and this will then be visible instead of the default app background.
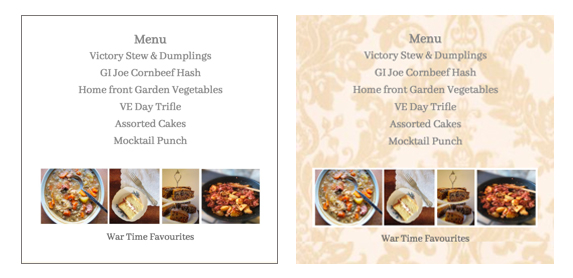
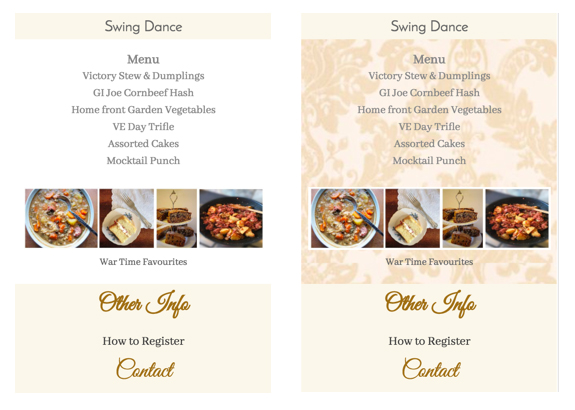
In the example below a custom background color of cream has been set for the Title sections that are above and below the menu document section. The image on the left shows the App background color, white, visible in the menu document section and the custom cream backgrounds on the title sections. The image on the right shows an App background image visible for the menu document section and the custom cream section backgrounds for the title sections.
Set An Image As A Section Background
On many of the new style sections you can also upload an image to use as a custom section background, this can look really good when you are creating a call to action or on titles or documents to make them look more distinctive. Here are some examples of an image used as a section background in a documentsection to enhance the menu. When you add an image as the section background in a document section you can only see how it looks in the visual design after you click save. As with a custom color section background, this will override the App background by covering it up.
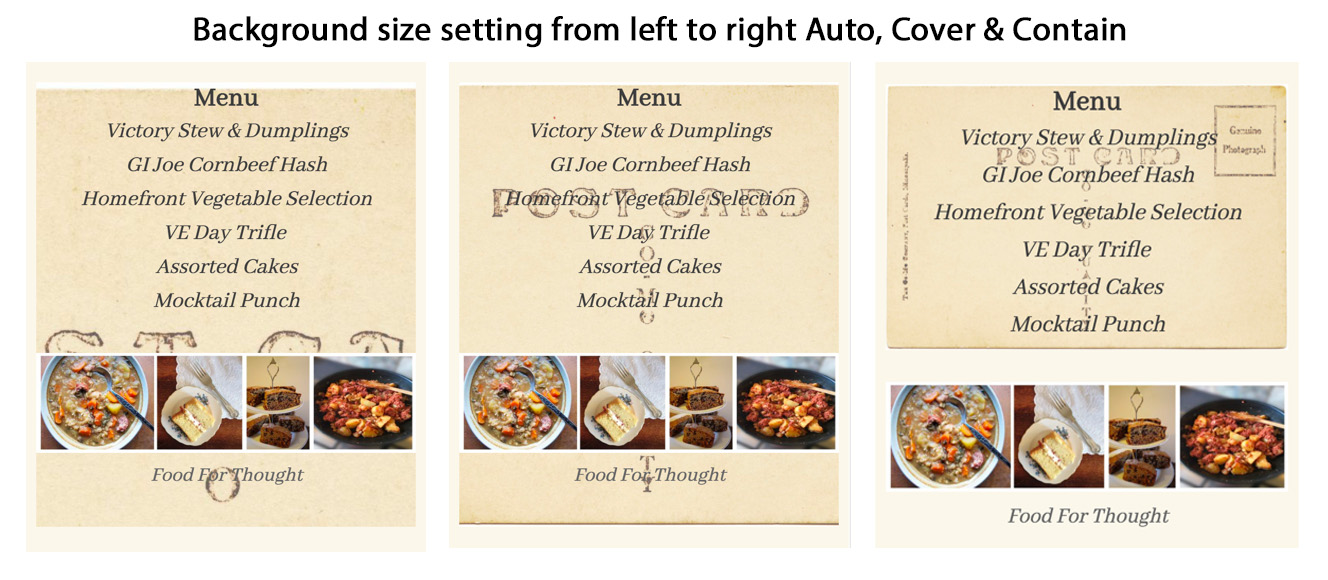
In the examples below I have added a postcard image, the screen shot on the left shows how it looks with the background size set to auto and the position to top, you can only see a small portion of the image because it has more pixels than the displayed width of the App, the cream border is the section padding I have added. The screen shot in the middle shows what it looks like with the background size set to cover and the right-hand screen shot shows how it looks when set to contain. This gives you an idea of how the different settings will affect the result. I chose to use the one on the right. If you are using an image that is suitable for tiling and what to achieve over all cover for the section background the best choice is to choose auto and repeat.
Adding Section Padding
In the new style sections, you can also add padding within the section which increases the space around the content, for example in a title section to add more negative space around the text. You can get the same effect with the older style sections using the old margin setting found in the other settings menu where you can add 'padding' as a pixel amount to the section.
This allows you to control the spacing between sections to get a more attractive layout and replaces the need to add empty sections to achieve this. Padding will either be the visible App background or the color that has been set as a custom section background.
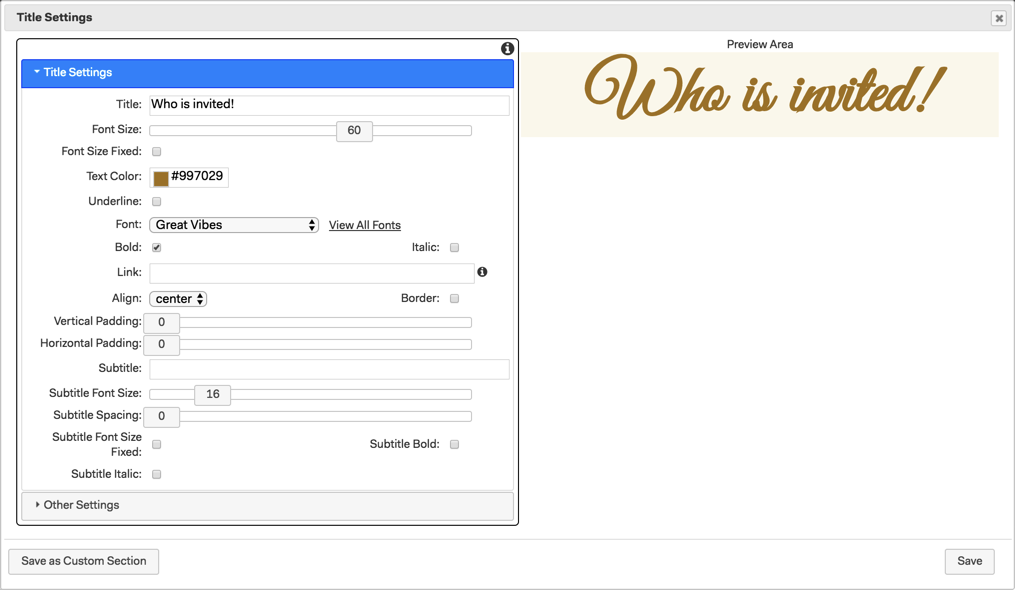
Here is a Title section without any section padding added.
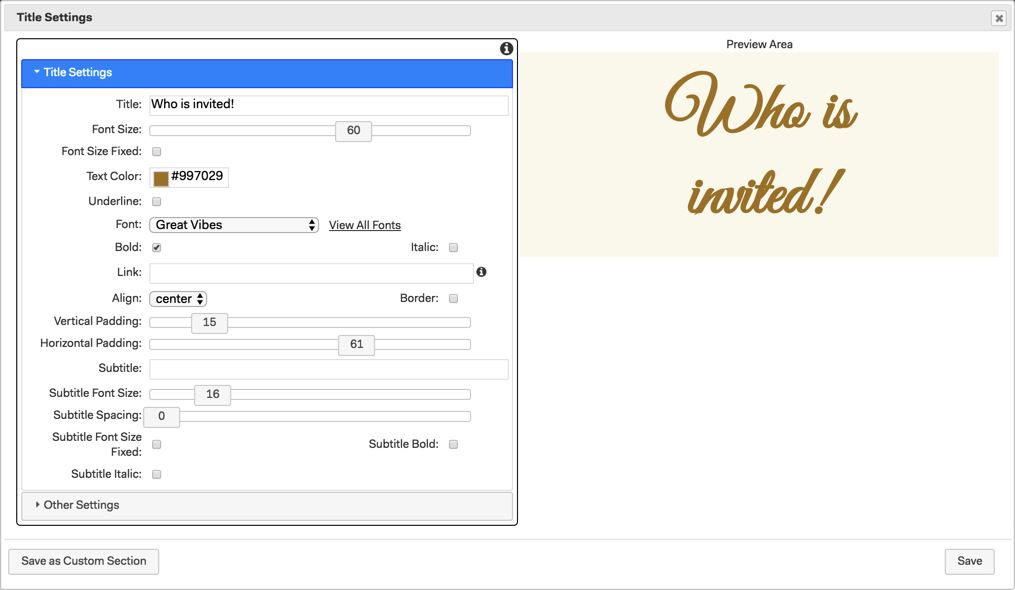
And here is the same Title section with both vertical and horizontalpadding, if you increase the horizontalpadding enough you can also force the text onto more than 1 line like this.
Adding Section Margins
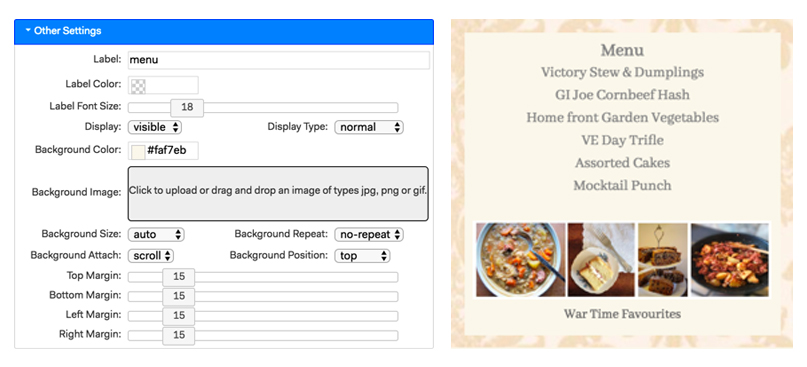
In the new style sections, it is also possible to set section margins which reduce the overall size of the section so that when a custom section background has been set for the sectionthe App background will appear as a border around the section as in the example below. A custom color of cream has been set for the menu document section background, a section margin has then been set and the damask wallpaper image uploaded as the App background has become visible as a border.
To set a section margin click on the other settings tab and use the sliders to add a margin to the top, bottom, left and right of the section. Margins are a proportional width based on the width of the device the App is viewed on, this means that they will be proportionally about the same width regardless of what device they are viewed on.
It is not possible to add section margins on old style Sections - as mentioned above the margin setting in the old style settings add a form of section padding instead.
Summary Of Background Behavior
As you can see there are a variety of options for customising both the App and Section backgrounds within your Apps. The possibilities are endless and you can achieve all sorts of different background effects by utilizing images you have created in Photoshop.
To help you remember how MyPhotoApp deals with backgrounds here is a summary of the basic rules:
1. New sections added to an App will not have a background color set, they will use the App background color or the App background image if one has been uploaded.
2. If you create a new App based on your own template or one from the template bazaar or another App any background settings used in it will be copied to the new App.
3. If a section has a custom background color set this will be used instead of the App background - to revert to the App background simply delete the custom background color for the section.
4. If A CSS background style is added it will override the App background settings - to remove it delete the syntax.
5. If you have set a custom background color in a new style section you can add a margin to the section so that the App background shows as a border.
6, When you upload an App background image or a computer background image it will override the background colors set. To revert to a background color delete the relevant image.
7. Adding section padding in new style sections or margins in old style sections will increase the space around the contents of the section and does not affect the app background in any way.
Here is a link to some free textures to get you started
To help you work out which section you can apply different levels of background control to here is a current breakdown of the old and new style sections as of Septemeber 2017
NEW Style Sections:
logo, gallery, buttons, text, Title, HTML, SEO, shopping cart, Image, forms, copyright (which is a text section), lock button, Parallax, Counter, Document, PricingTable, Buttons+, Loyalty, TwoColumn, columns, primary button, font, Facebook, separator, right click, redirect, hero, group, menu+, action, and welcome