 |
Need a knowledge base like this for your business?
Parallax Section
 | By Kim Dixon, MyPhotoApp Training Guru Created: December 21, 2016, 2:29 pm UTC Last updated: December 7, 2018, 9:28 pm UTC |
The parallax section allows you to add eye candy to your apps. It allows you to add an image where you only get to see a slice of it as you scroll over the section. Optionally you can also add text over the image using the title section. It is called parallax because the speed at which the image is scrolled over is different than the text speed so it sort of gives a 3D effect which looks impressive.
Here are the steps to add a Parallax Section:
1. Add a new Parallax section and click on the settings cog to view the Image settings. First, add a Label for the section so you can easily identify it in the layout sections, my example is going to be the header section for an about section so I'll call it about. Next Click to upload or drag your parallax image, as this section is designed to look good full width on a computer or other device 2048 px on the long side works well. On the image I have used I have maintained the image height and added negative space to the original image in PS using the content aware cropping tool to double the width of the image.
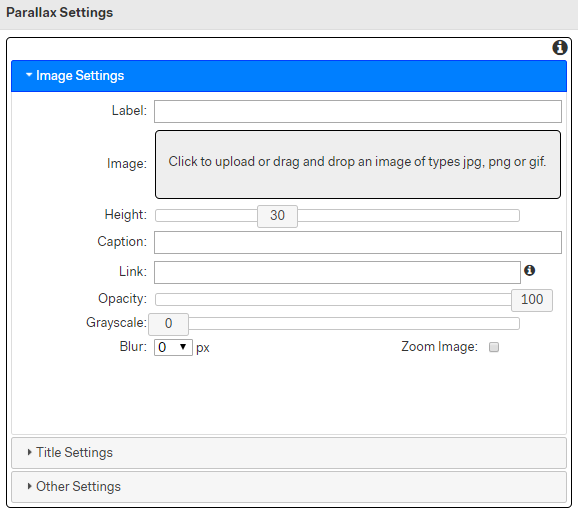
2. Let's take a look at the setting you can adjust:
- The height setting specifies what percentage of the image should be visible at any given time. The default height is set at 30% I have increased mine to 60% in the example below. The image you use will determine the best setting. Remeber it needs to be less than 100% or there will be no image to scroll over!
- The Caption setting is for SEO purpose, it allows you to add Alt Tag keywords to your Parallax section. Add text here that describes the image or better yet the keywords that people searching the internet might use when you would want that image or App to show up in their search results. NOTE: You must have an SEO section in your app for this to be effective.
- The Link Setting works just like any other section and allows you to add an active link to the section, for example, the relevant page on your website or another section.
- Opacity Setting this allows you to create a fade-out image by lowing the opacity from the default 100%
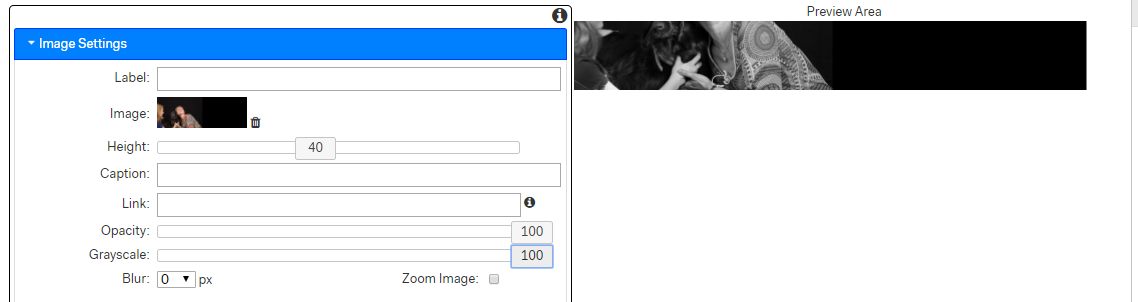
- Greyscale Setting allows you to reduce the saturation of the image 100% will totally desaturate the image and turn it into a greyscale image. You can see the effect in the preview area like this
- The Blur setting allows you to add a degree of blur to the image, the default is 0 as in no blur and you can then choose from 10 levels of blur with 1 being the least and 10 the most.
- The zoom image setting ticking this box zooms the image as the scroll is near the top of the viewport.
3. Next click on the Title Settings tab . The title is the optional text you can add that will be visible over the image in your App and is keyin helping to create the parallax look. The Text appears to stay still as the Parallax image scrolls behind it as you move down the App.
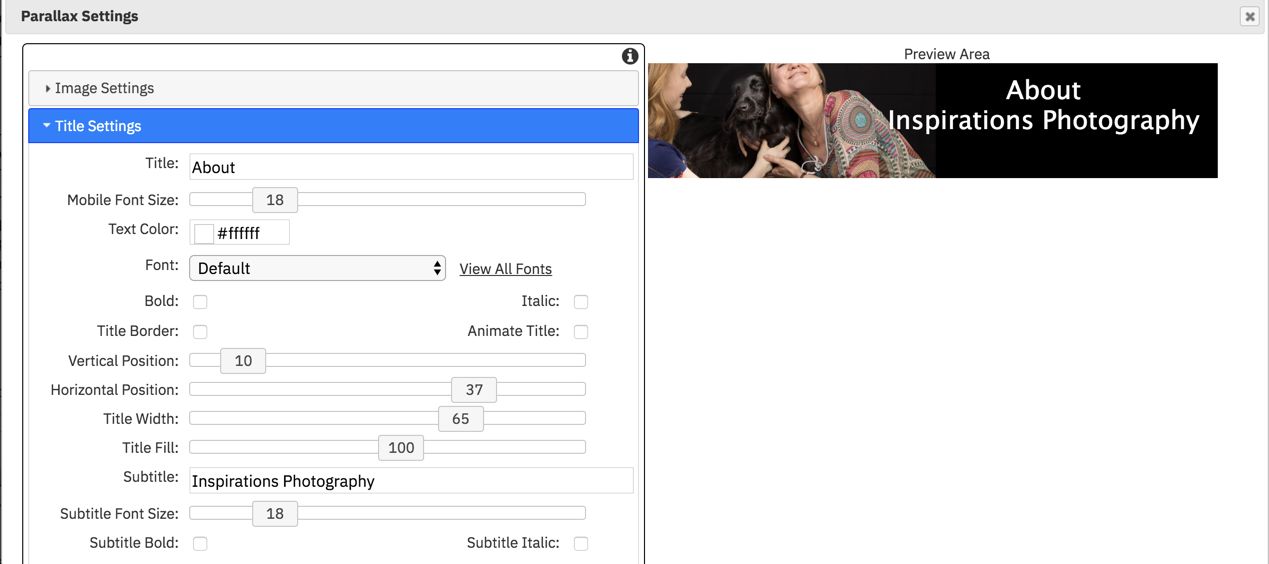
- Standard Text settings Type in your text and choose your Text settings, font size, text color, font, bold or italic.
- Title Border setting adds a line border around your text to emphasize it.
- Animate title setting causes the title to scroll down a bit as it gets near the top of the viewport.
- Vertical & Horizontal position settings allow you to adjust the position of the text over the image.
- Title width setting lets you decide what percentage of the image width the title occupies
- Title fill Setting this will adjust the fill behind your title from black to white 0 = black 100 = no fill and 200 = white, setting between this vary the opacity of the white or black fill.
- Subtitle setting you can add a subtitle here that will appear below the main title text you can choose a different font size, bold or italic.

4. Other Settings is where you will find the standard section settings you will not need to make adjustments to most of these for the parallax section. These allow you to adjust things like:
- label color & font size setting you can adjust this for sections that you want to set to the accordion display type but should leave at default settings for a parallax section.
- Display type setting - leave as default
- Background color setting allows you to define an alternative background color to display around the section to that selected as the App background color in layout settings.
- Vertical & Horizontal padding allow you add space around the section in the app above and below or on the left and right. If you add padding the background color or image will be visible as the border you have created around the section.
- Background Image setting allows you to upload an image to use as the section background instead of the default color or background image specified for the App.
- Background size, repeat, attach and position settings all allow you to determine how the background image behaves in the App.
Remember to SAVE your changes when you have finished.
NOTE: The parallax effect only works with published apps and does not work inside the builder. The image is still visible when the app is viewed offline.