 |
Need a knowledge base like this for your business?
Using The IPS App
 | By Kim Dixon, MyPhotoApp Training Guru Created: December 7, 2017, 6:15 pm UTC Last updated: December 14, 2017, 11:06 am UTC |
The IPS Gallery works best when used on a computer but can also be used on a tablet. You can also use it with a shared display on a TV or Monitor with a wireless keyboard.
Here are some essential Shortcuts & Tips to help you get the most out of the IPS section.
1. Keyboard Shortcuts
Keyboard Shortcuts for the IPS Gallery
| C | Comparison view of selected images |
| T | Thumbnail view |
| F | Full-screen view it is not possible to rate images in this view |
| U | Unselect all |
| S | Save data to server |
| P or arrow up | Thumbs up selected images |
| X or arrow down | Thumbs down selected images |
| 1-5 | Add a Star rating to selected images |
| 0 | Remove Star rating from Selected images |
| ESC | Exit to the previous screen or exits the slideshow early |
NOTE: Keyboard Shortcuts do not work when viewing Cart Sales Order form view.
2. The IPS Gallery Menu
The full menu is displayed in the default Thumbnail view, some items are not available in fullscreen or cart view.
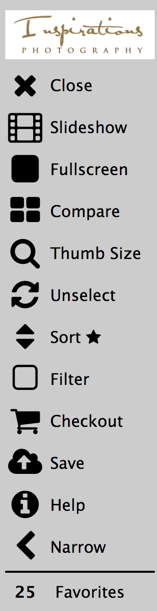 |
The Logo you uploaded will show here |
| Click Close to exit the IPS Gallery and return to the App | |
| Click to start a slideshow with the music you uploaded | |
| Toggles the displays from Thumbnail to Fullscreen | |
| Compares the select images adds compare next 1, 2 or 3 | |
| Toggles Thumbnail size between medium, large and small | |
| Unselects all images currently selected | |
| Sorts images by star rating high to low or low to high | |
| Switches between All, Thumbs Up and Thumbs down | |
| Opens the Sales Order Form to add product Items | |
| Saves the selections, ratings and order form to the server | |
| Opens Help info | |
| Toggles between full and narrow menu size | |
| Show number of images selected as Favorites - Thumbs Up |
It is a good idea to regularly click save or press S throughout the process to update the app with the changes you are making.
3. Selecting Images
Click an image to select it, selected images have a blue border around them. You can deselect individual images by clicking them again or by pressing the unselect button on the menu.
To select a block of images click the first and then hold down the shift key and click the last.
Arrow Right - swipe left on a mobile device - shows next image enlarged or where no image is selected, shows the first image in the Gallery.
Arrow Left - swipe right on a mobile device - shows the previous image enlarged or where no image is selected, shows the last image in the gallery.
4. Choosing Favorites
All images are selected as favorites and thumbs up when you first open the IPS Gallery. Click the thumbs up icon to change to thumbs down and visa versa or use the keyboard shortcuts to change the rating of single or multiple selected images.
Click the Filter button on the menu to toggle view from All, Thumbs Up and Thumbs down.
ONLY Images selected as favorites with thumbs up will appear on the Sales Order Form.
5. Using Star Ratings
You can add a star rating to individual images by clicking the number of stars or to multiple selected images using the keyboard shortcut 1-5.
Star ratings can be useful as a means of categorizing images for inclusion in particular products or marking possible images clients aren't sure of. To remove a star rating from an individual image click on the rightmost star or for multiple selected images use the keyboard shortcut 0.
6. Changing The Order Of Images
You can automatically organize images by the star ratings you have added by clicking Sort on the menu. Images are displayed from high to low star rating, clicking Sort again toggles the order from low to high instead.
You can also manually rearrange images into your preferred order.
On a computer - using Drag and Drop by clicking and holding the 4-way arrow.
On a mobile device - you can move images by Tapping the circle icon in the upper left-hand corner of the image(s) you want to move to select them, the circle will turn black. Then tap on the image you want to move the selected images in front of. The selected images will be moved to the left of that image.
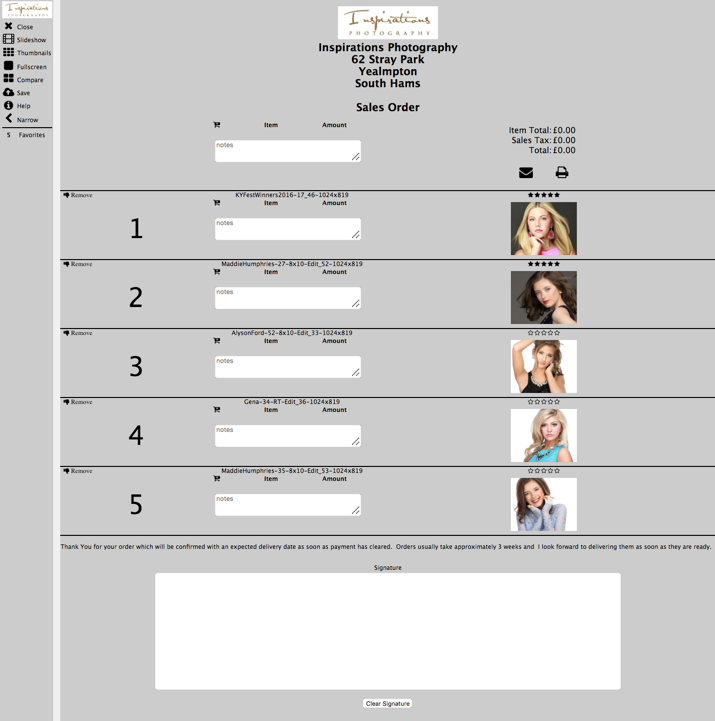
7. The Order Form
When you have finished selecting images click Save and then click checkout to go to the Sales order form. if you are using a star rating key you could add this in the instruction note field when you set up the IPS section and it will appear at the top of the form under Sales Order.
All images marked as favorites will be included in the form in the order they appeared in the Gallery.
Click on the cart icon for individual images to choose from the preset list of products or add a new item. You can change prices or the product names to fully customise an order to reflect any discounts or extras you are applying to individual items. For example, to increase a price due to additional editing required. If you included a product description when you added the item in the IPS settings this will appear below the product name and price and is where you can provide more details about the product or what is included.
Multi-image items should only be added once either to an individual image or at the top of the order form.
Click the thumbs down icon on the left to remove images from the order. To add more images click on thumbnails on the menu to exit the order form and then filter to show thumbs down images and selected additional images. you can then return to the order form by clicking checkout again.
8. Adding Custom Items & Discounts
The Cart at the top of the form is ideal for adding multi-image product items, discounts or Free of charge incentives or bonuses. Click the Cart icon and use the drop-down arrow to select from the list or click add item to create a custom item or discount. A blank item field will be added ready for you to type in the item name and price. This is also great for adding things like extra spreads for albums or extra editing costs that you haven't added to the items list.
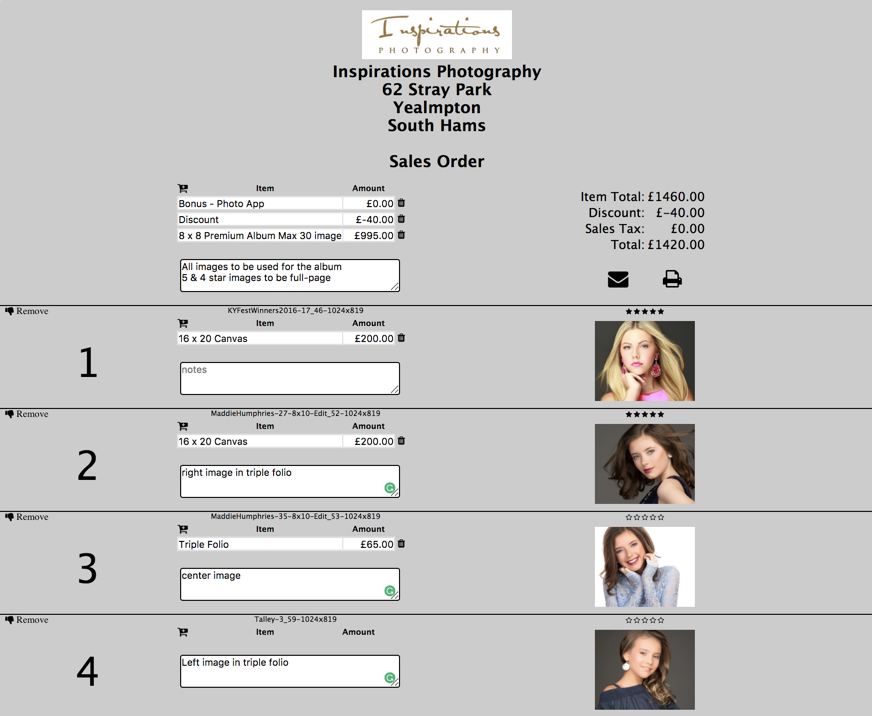
In the example below I have added a free of charge Photo App as a bonus for ordering an album and a small discount equivalent to 10% off for the 2 canvases ordered.
You can add a specific discount by value or a percentage discount which will be applied to the total price of the order. when a discount is added it will appear beneath the Item total as a minus amount.
Simply add a new blank item a description and either
- A minus monetary value -£40 useful for giving a specific discount of particular products or
- A minus Percentage -10% which will be calculated from the total order and show as a monetary value.
I have also added a reminder about which images must be full-page in the notes.
I have also added a triple folio to one of the 3 images to be used for this product and then just added a note for the other two images to be used with details of each images position.
9. Finalizing The Order
When you have finished adding products and notes its time to check the order.
- Check All images are correct
- That all products have been added
- Prices are correct
- Any discounts or bonus have been added
- Charges for Additional work or items have been added
- Sales tax if applicable is added
- Notes have been added where necessary
- Images for Multi-image products are identified.
Ask your client to check the order carefully and draw their attention to any terms and conditions regarding the order you have added to the order form notes and if you have included a signature box sign it.
Alternatively, you may wish to print the order by clicking the Printer Icon on the top right of the order form and ask your client sign the printed version first. A printer friendly form is printed with a plain white background.
Before exiting the order form click on the email envelope to send a copy of the order to yourself, and your client is you wish, by entering their email in the box provided and then click Send Email. Emailed forms are in a print ready format without the grey background.

WARNING Before exiting the IPS gallery click SAVE to ensure you update the App with the changes you have made. Exiting the App without doing so will result in the loss of any changes made since you last updated the server by saving it.