 |
Need a knowledge base like this for your business?
Form and Mailchimp Integration
 | By Kim Dixon, MyPhotoApp Training Guru Created: November 8, 2015, 7:23 pm UTC Last updated: May 5, 2018, 7:28 pm UTC |
When you add forms to your Apps to collect a person's contact details you can automatically have the email details added to a MailChimp mailing list. There are a few easy steps you need to follow:
1. The first thing you need to do is log in or set up a MailChimp account and set up or choose a mailing list to link to MyPhotoApp. It's a good idea to name the list so you can easily identify which list is linked to MyPhotoApp especially if you are linking different lists to multiple brands. Next, you need to locate and copy the Mailchimp Credentials you will need:
- The List ID - Found under mail list settings it will look something like this:
63d36a5d57
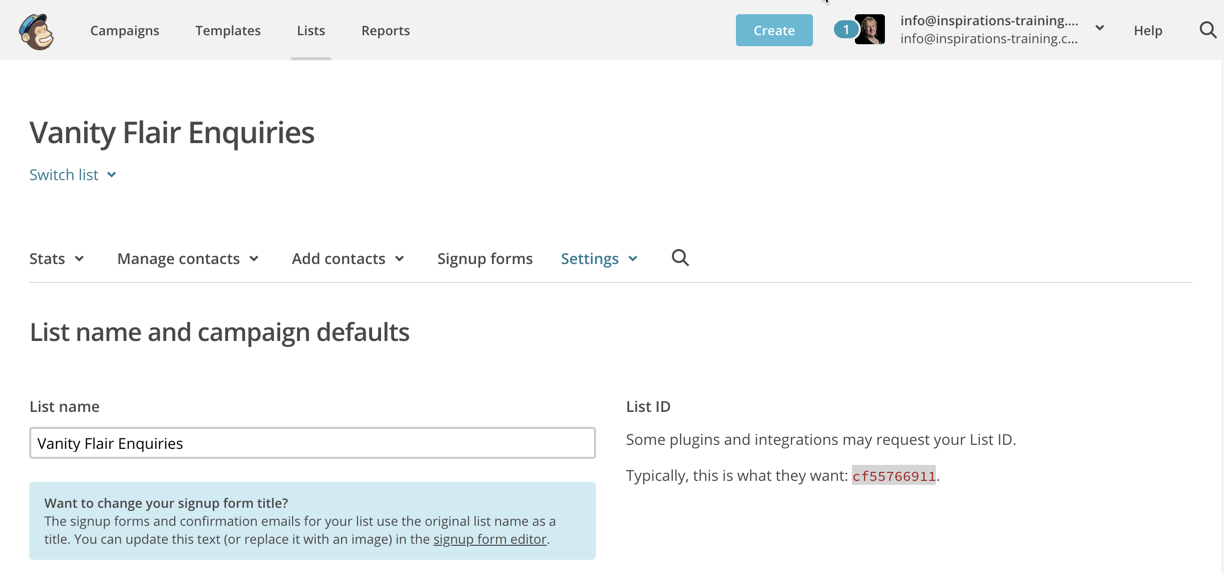
Click here to read how to find your Mail List ID number - Find Your List ID
- The MailChimp API Key - Found under account extras which will look something like this:
ef363z18b63aa50f968d5868904c89f6-us4
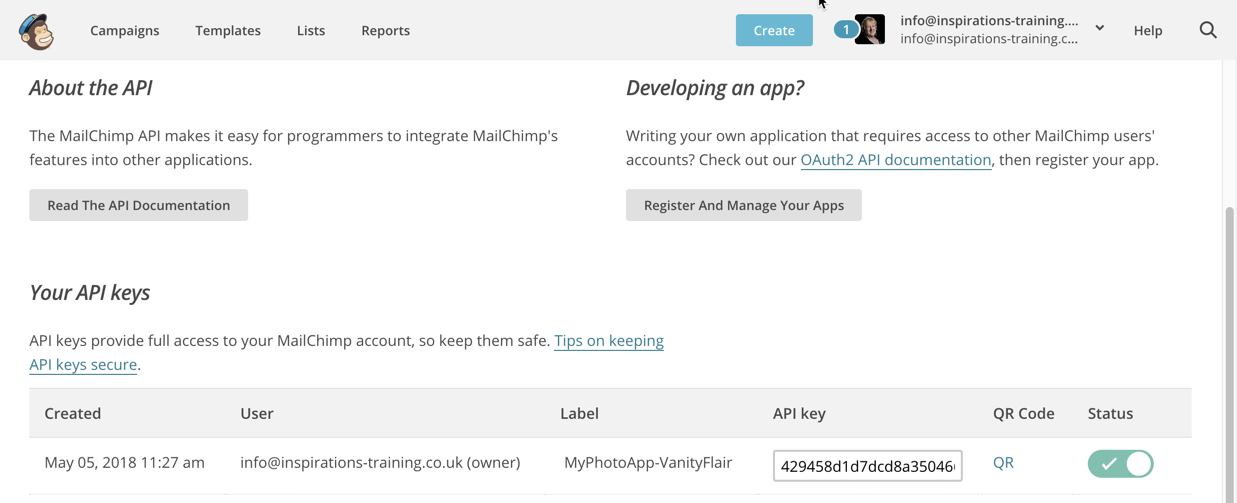
Click here to read how to find or create MailChimp API Keys - About API Keys
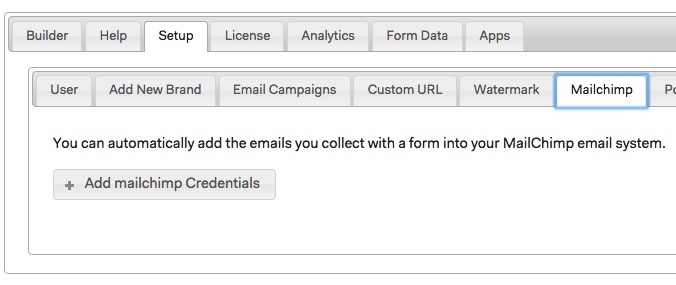
2. Now you are ready to link your chosen MailChimp list to your Brand. Click on the Setup Tab and then on MailChimp and click the +Add MailChimp Credentials Button to open the settings menu.
Enter a name for your list and the information you collected from your MailChimp Account into the relevant fields and then Click Add/update to link the list to this brand.
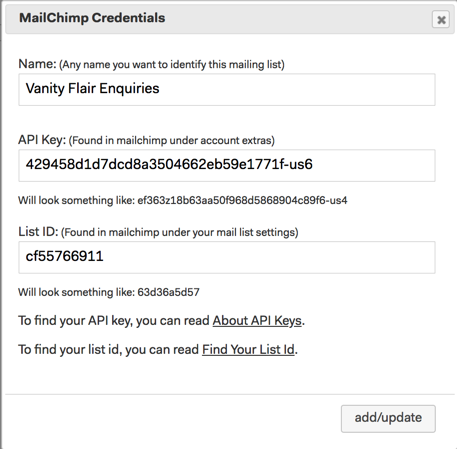
Note: MailChimp lists are brand specific. You can link multiple MailChimp list to an individual brand, you then select the list you wish the form you are working with to add the email addresses from the form submission to.
3. Once you have linked your mailChimp list to MyPhotoApp you are ready to choose it from the form setting. Go to the app and click on the form settings Make sure you have added an email field and click the checkbox to have that email added to your MailChimp account.

4. Next at the top of the forms settings, you will need to select the MailChimp account/list to associate with this form in the MailChimp List field by using the drop down arrow. Once you have finished click save to update the form settings and Republish the App to apply the changes.

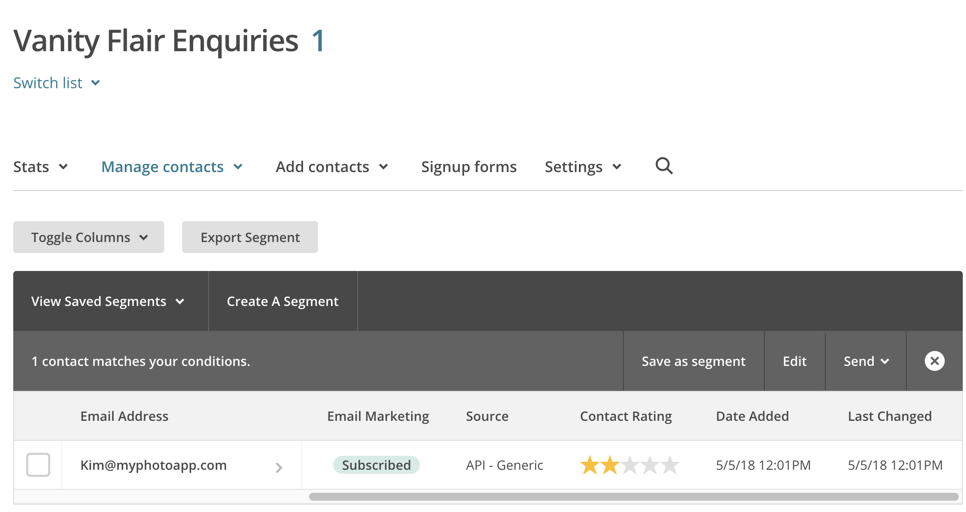
4. Finally open you App and perform a test to make sure everything is working. When you check back your test email should now show up on your list as a new subscriber.
How Do I Add the name and Telephone number to my Mail Chimp List?
Currently MyPhotoApp only updates your MailChimp list with the email address. if you want to add additional information from your Form you can do so manually by exporting your form Data from MyPhotoApp.
- Click on Form Data and enter the name of the App you wish to download form data for in the filer field next to the App name and press enter.
- You will see all the data collected from form submissions for that particular App in the last 180 days which is the maximum time form data is retained on the MyPhotoApp server
- Click the download symbol next to CSV to download and save a copy of the form data on your computer.
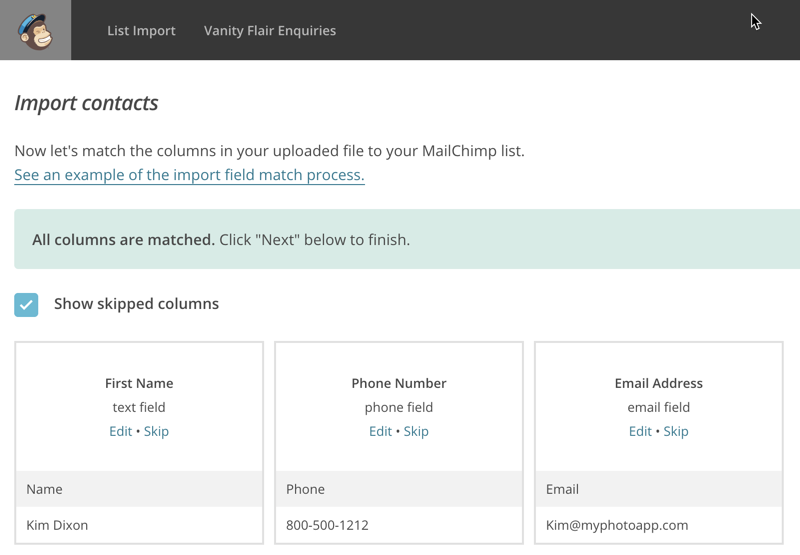
- Next open the CSV file and delete any unwanted columns of data such as the form title column and save the changes to the CSV file.
- Login to your Mail Chimp account and go to your lists. Click the drop-down menu next to the list you want to import the data into, and choose Import. Choose CSV or tab-delimited text file and click next and find the saved CSV file with the form data you want to import.
- Click next and follow the prompts to match your columns then choose the category as subscribed and then click Import.
To find oout how best to prepare your CSV file you can read more about importing subscriber to a mail chimp List here - How To Import Subscribers
Key words : mail chimp