 |
Need a knowledge base like this for your business?
Working With App Templates
 | By Kim Dixon, MyPhotoApp Training Guru Created: October 2, 2017, 10:24 pm UTC Last updated: January 22, 2019, 8:35 pm UTC |
It's never been easier to create Apps in minutes with MyPhotoApp!
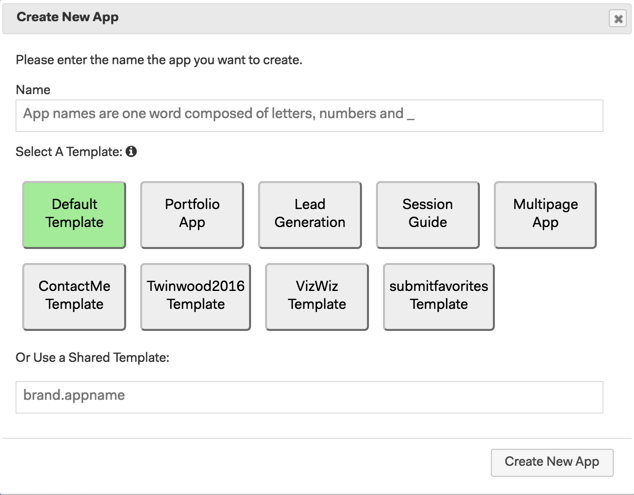
The Quick Start Templates
To help you get started quickly some of the most popular App Templates have been added to the Create App menu. Simply click on the Create App Icon in the Builder and type in a Name for your new App, names are case sensitive, cannot have any spaces and can only comprise letters, numbers and _ underscore. The Default App is automatically selected and highlighted Green and will create a simple Photo App as a starting point for you to customize that is ideal for sharing with your clients.
Alternatively, click on one of the other 4 Quick Start App templates provided.
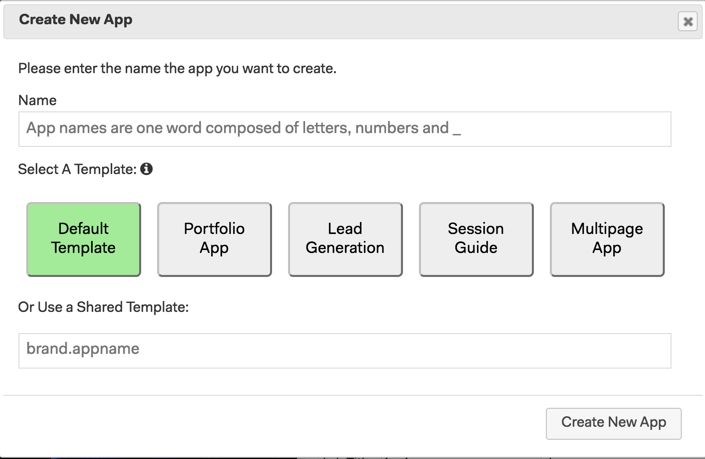
Once you have completed the Brand Quick set-up your Logo image, color scheme, contact info and social media Account IDs these will automatically be added to the New App.
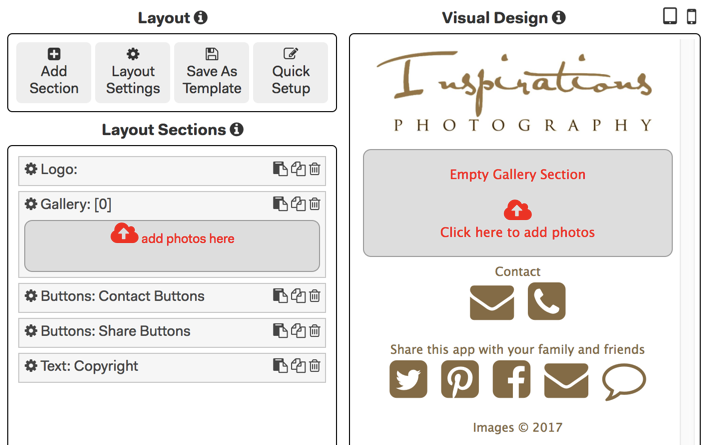
1. Default App
This creates a simple single page Photo App suitable for all subscription levels. It has 5 sections:
- Logo - With the jpg logo you have uploaded.
- Gallery - Ready for your jpg, png or gif images.
- Sharing Buttons - Add or remove to meet your needs.
- Contact Buttons - With your contact info add or remove buttons to meet your needs.
- Copyright Text Section - Add your business name and choose text format options.
Updating The Default Template To Suit Your Needs
You can update the Default Template to include whatever you want. Simply start with an App and add and remove sections and make any changes you want to the color scheme and information and then click on the Save As Template icon and choose Save As Default Template. This will replace the MPA Default Template with your customized version. You can always return to the MPA Default Template by choosing Restore System Template from the Save As Template menu.
2. Portfolio App
The App consists of:
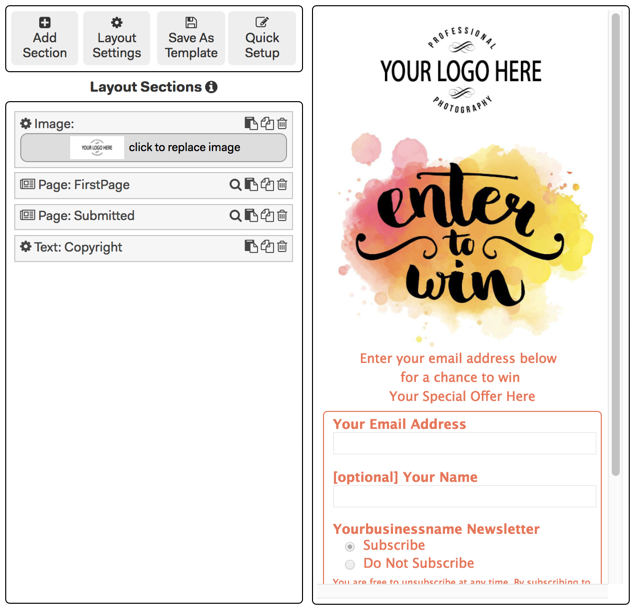
3. Lead Generation
This is a simple lead generation App based on the principal of a fishbowl Sales funnel. It is designed to promote a special offer, competition or free product in return for obtaining a person's contact details to build your email list and is ideal for use at trade shows and events. The contact form can be linked to a Mail Chimp List so you can easily follow up the leads you collect. You can also add an auto responder email to the form an instant response or follow up offer. Add a Facebook section to the App and add a suitable Hero image, a Call To Action and some brief text and your ready to run a promotion on your Facebook Page.
The App consists of:
- Image - the usual logo section has been replaced with an Image section, this allows you to add a Link to your webpage if you want.
- Page - FirstPage - contains a call to action image in an image section, a document section with an outline of the offer and what they have to do to enter and a simple contact form to submit their entry.
- Page - Submitted - contains an image section, a document section for a thank you message and a return button to go back to the First page ready for the next entry.
- Copyright Text Section - Add your business name and choose text format options.
4. Session Guide
This is a simple single page session guide to share with your clients once they have booked their session and is suitable for all subscription levels - apart from the HTML section which is supported for Pro subscription or above. But don't worry if you don't have a Pro subscription as you can still add a simple map to your App by replacing the HTML section with an Image section instead. This App includes the following sections:
- Logo - With your default logo image.
- Text - Add your Introduction.
- Gallery - Getting Ready For Your Session - Provide information here from your Welcome magazine.
- Gallery - Choosing What To Wear - Add your style guide images.
- Gallery - What To Bring - Add details to gudie your clients.
- Text - The Legal Stuff - Add your terms and conditions.
- Text - Save The Date - Add the Booking details.
- Image - To add a simple signature block to personalize the App.
- Contact Buttons -With your contact info add or remove buttons to meet your needs.
- Save App & App Info Buttons - Provides instructions on how to save & use the App.
- Text - A hidden section that contains the App info text.
- HTML - Add a Google map with your studio location.
- Copyright Text Section - Add your business name and choose text format options.
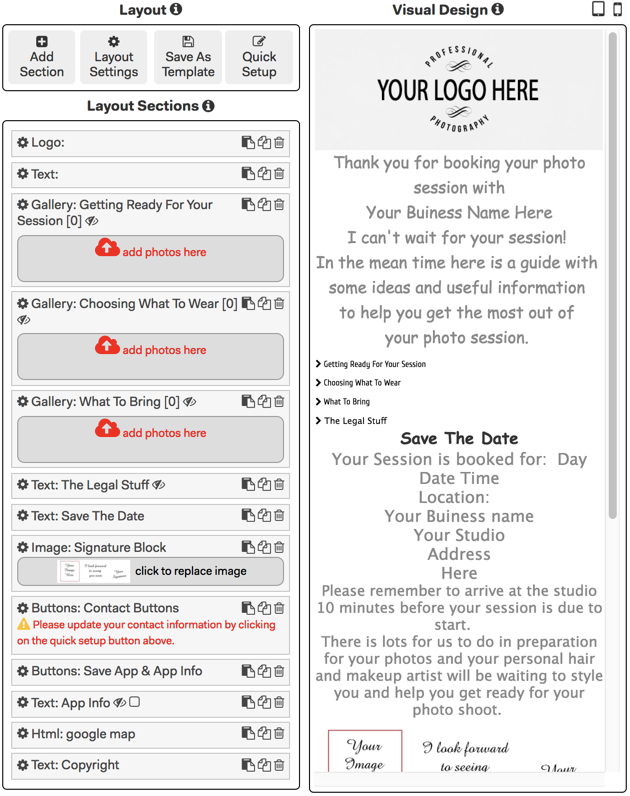
The 3 galleries are ready for you to upload individual pages of your welcome magazine with all the information your clients need to prepare for their session. They have been set to the accordion display option that uses the section label as a heading and set as hidden, this hides the content until the viewer clicks on the heading. The text section for the legal stuff has also been set to accordion and hidden, those with Pro subscription may want to replace this with the newer Document section.
To add extra wow factor if you have a Pro subscription or above you could be replaced the signature block Image section with a Column section for greater flexibility or why not add a Video section with a Behind The Scenes Video.
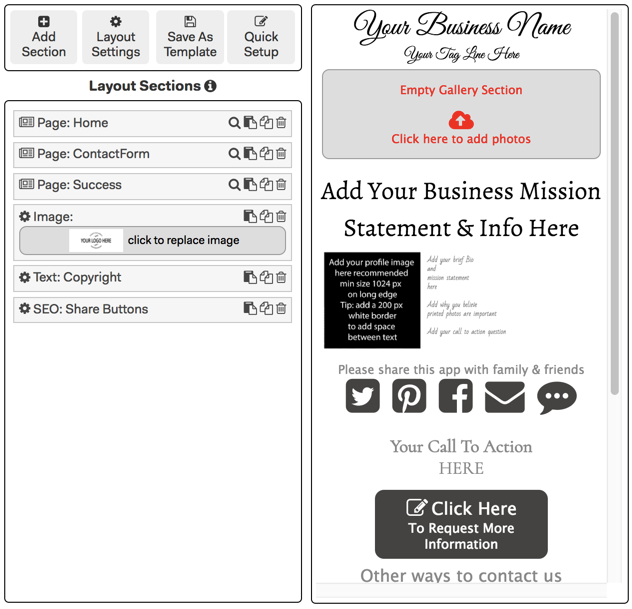
5. Multipage App
This App will help you quickly create multi-page Apps and can be used for a variety of different purposes, from a general Index App to a Website. The Home Page has 4 Image sections with titles each linked to a different Page in this example Senior Portraits, Family Portraits, Wedding Photography and About us. Each page has a Document and Gallery section ready for information about the different aspects of your services and a return button to the Home Page.
The contains the following sections:
- Logo - With your default logo image as App Header.
- Menu - On the home screen to provide easy navigation.
- Page Home - This contains the main sections that are visible when the App is opened as follows:
- Title - For a Call to action.
- Document - For your studio address details with a link ready for the website address for you to edit.
- 4 x Images - Used as header sections to link to the other pages in the App.
- Primary button - Linked to the Contact Page and form.
- Document - For studio contact details.
- HTML - ready for you to add your location map.
- Social Media Buttons - ready for you to update
- Document - with instructions on how to update Social media Buttons to delete later.
- Sharing Buttons - Add or remove to meet your needs.
- Page - Senior Portrait Info - With a Document section, Gallery section and a return button.
- Page - Family Portrait info - With a Document section, Gallery section and a return button.
- Page - Wedding Info - With a Document section, Gallery section and a return button.
- Page - About Us - With a Document section, Gallery section and a return button.
- Page - Contact - With a Contact form - ready for you to update and a return button.
- Page - Success - With a document section for a thank you message and a return button.
- Copyright Text - Add your business name and choose text format options.
- SEO - Ready to add keywords and phrases
- Tracking - Ready to update with your info
- Facebook - Add a suitable Hero image, a Call To Action and some brief text and your ready to post on social media
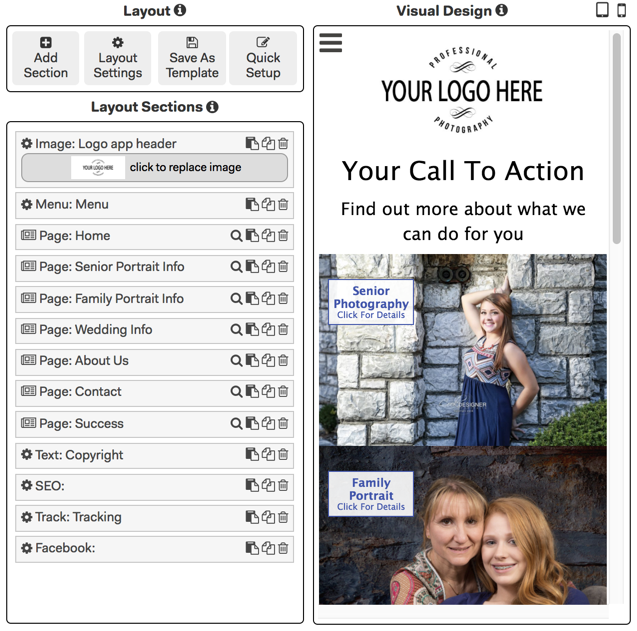
When one of the images is clicked in the App the page it is linked to is displayed and the other page sections are hidden. The menu and return buttons can be used to navigate back to the Home Page.
The Menu, Logo and Copyright section are on the Home Screen which means that are always visible as the App header and footer within the App regardless of which page is viewed.
Using Your Own Templates
If you have created your own Template Apps you'll see them listed below MyPhotoApp Quick Start templates in the Create App menu. This makes it easier than ever to save your favourite Apps to use again and again.
To save an App as a template simple select the App in the app navigator and click Save As Template, type a name for your Template in the New Template box and click Save As New Template. The template name can be identical to the original App. Your new template will be at the top of the app navigator. It's also a good idea to create a new folder to store all your templates in as this helps to organise the App navigator.
Using A Shared Template
If you have the name of a Shared Template or wish to use an App you have already created in a different brand you can enter the name of the App in the format brand.appname and it will be used as the template for your new App.
Find More Templates
Check out the Template Tab in the builder to browse the Template bazaar for more great templates from the MPA team and members to get you started.
Elite members also have access to exclusive templates on the Masterclass Tab.
NOTE: from time to time some of the Quick Start Templates may be changed to highlight new features and uses but the Default Template will always be included. Don't worry if you miss your favorite template you can find any that have been swapped out on the Template or Master Class Tabs.