Need a knowledge base like this for your business?
How To Add A Scheduling Option To Your App
By Kim Dixon, MyPhotoApp Training Guru
Created: February 24, 2018, 7:14 pm UTC Last updated: February 19, 2019, 12:21 pm UTC
There is a wide variety of CRM and scheduling tools available to help you streamline your business and many of them offer a free basic subscription allowing you to do the basics without adding another monthly charge.
Which Scheduling Service Works Best with MyPhotoApp
In today's online culture people often spend their spare time researching the things they want to book and spend money on and often do so on their mobile devices whilst waiting at the dentist, traveling to and from work or just killing time. Providing a way for them to schedule a callback or book a session for a special promotion is a great way of dealing with the out of hours nature of such research and inquiries and can save you both time and lost enquires as people want an instant result.
There are many services to choose from but having tried several I love Acuity it's highly rated, really easy to use, integrates easily with MyPhotoApp and offers a feature-rich 100% fully functional free option. I'm going to show you the different ways you can use a free Acutity account with MyPhotoApp.
So if you haven't already done so you can sign up for a free Acuity Account using the link below
TIP: When you are ready to upgrade to a paid subscription it starts at just $10 a month and adds the ability to fully customize how your booking pages look with your logo and color scheme. paid versions also integrate with other services such as payment services like Stripe or PayPal and accounting software like Quickbooks and Xero making it really easy to pull together the different aspects of your business.
Setting up your Acuity Account
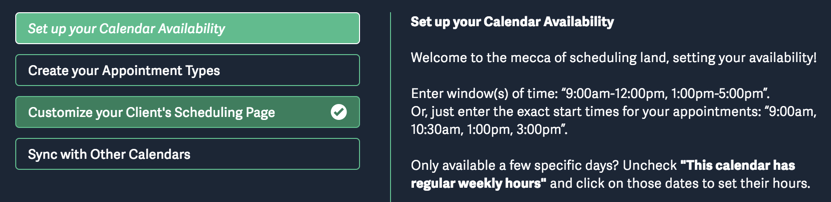
Once you have signed up for your free Acuity account you need to follow the 4 basic steps to set up your scheduling:-
Set up your calendar availability
Create your appointment types
Customize your client's scheduling Page
Set up syncing with your other Calendars (only works during trial and paid accounts)
You can also customize how the client booking page looks, create client intake form questions and add your terms and conditions that clients need to agree to when booking.
Why Add A Booking Option To Your App
Adding a booking option to your App is a way of adding a virtual online assistant to deal with client inquiries regardless of the time they are made. In today's instant world people hate waiting for a response to an inquiry form and will often move on and keep searching. By providing a way of scheduling a convenient time for personal contact or booking a service they already know they want you are making it easier for them to find out more and book your services. Some clients will choose you over a competitor simply because you were the easiest to schedule a time with.
Adding a Booking form to your Business Apps and websites has many advantages. The biggest advantage is that a booking system eliminates the time consuming back and forth communication with clients when you are trying to find a mutually convenient time for a consultation or session. A booking service allows you to control your availability 24/7 by showing your clients ONLY the time slots you want them to see for different booking options.
Only want to deal with telephone consultations on certain days and times no problem just block out when clients can book them.
Running a headshots promotion on a particular day and want to offer 1-hour slots on that day, simply set up the appointment times and people can book on a first come first served basis.
Only want to offer studio appointments at certain times and days no problem dimply block out the options.
You will also find that adding an element of scarcity and urgency also helps motivate people to book now.
Clients can quickly:
View your real-time availability and self-book their own appointments
Pay a Booking reservation fee online when you link a payment method to Acuity
Cancel & Reschedule with a single click.
You can even set up automatic reminders to keep clients prompt and eliminate forgotten appointments saving you even more time either using Acuity or by adding clients to the new CRM feature in MyPhotoApp Elite. Since I use Apps throughout the client process I am now using the CRM feature for my appointment reminders.
There are many reasons why you might want to add the ability for people to make a booking including the following:
Before the session
To book a telephone consultation to find out more about your services
To book an in-person consultation to find out more about your services
To book a Model Call or Senior Rep Interview
To Book a studio tour
To book a pre-shoot style & wardrobe consultation
To book a time slot for a special promotion you are running
To book a regular session
After the session
To book an in-person reveal and order appointment
To book a product pick up or delivery appointment
You can choose to make the booking provisional, pending payment of an invoice and confirmation or confirmed and add a pay now option.
I use Acuity in my Apps for people to schedule a telephone consultation with me to find out more about the services I offer and to book time slots on special limited edition seasonal sessions when I run them.
I also enter confirmed session bookings myself when they are made to update my availability and show the blocked off time that is no longer available.
Adding a Booking Option To Your App
Once you have set up your calendar availability and appointment types you are ready to add your Acuity booking calendar to your App. You can add direct links to your acuity scheduler or embed it directly on your App. Here's how in a few easy steps:
1. Find The HTML Code for Your Acuity Booking Calendar
From the Acuity Dashboard click on Business settings and then on Integrations, you will see a whole list of different Apps and systems Acuity can be integrated with. We want either a URL link or the basic HTML code to add to an HTML section in an app so scroll down until you get to the Web Builders section and find the Wordpress option.
2. Choose What You Want To Integrate
You can also choose to link or integrate your:
General client's scheduling page,
Individual appointment types
Calendars
Appointment type categories or
All classes
to do so click the drop down arrow to choose from the list the default choice is set to General Scheduling page.
3. Choose How You Want To Integrate Your Booking Calendar
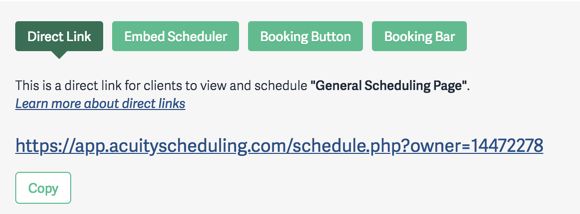
Once you have decided what to integrate you need to select the method. There are 4 different options for integrating the Acuity scheduler in your Apps:
Direct link
Embed Scheduler
Booking Button
Booking Bar
Click the green button for the option you want to use to view the HTMLcode or link you need and then click the copy button below this to copy the link or code to the clipboard ready to paste into your App.
This is an example of the URL you would need to copy to use as a link for text, a button or an image in MyPhotoApp:
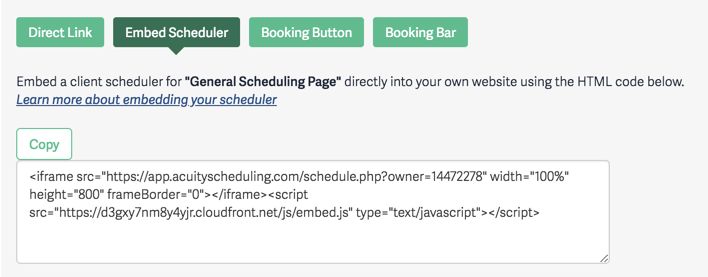
And here is an example of the embed code:
The Booking Button Code
TIP: If you want to change the color of the booking button you can replace the hexadecimal color in the code - so in the above example code replacing #5fb8b9 with the color you want will change the backgroundcolor of the button and replacing #fff will change the textcolor from white. Remeber to make sure you leave the semicolons after the hexadecimal color numbers.
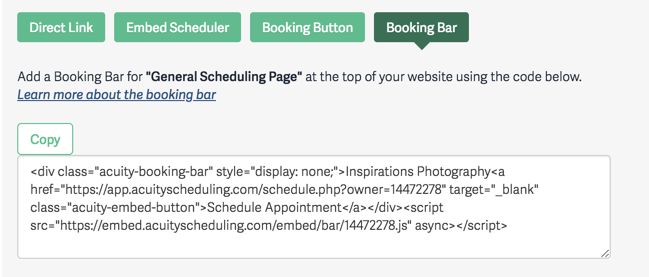
And finally the Booking Bar code:
Once you have copied the relevant link or code you can return to the Builder and your App 4. Integrate The Acuity scheduler Into Your App
To integrate Acuity you will need to add a new section to contain the URL or Code.
To add a direct link you will need one of the following:
A Button section
An Image section
A Document, Title, Markdown or Text section
When you have added the new section you want to use click on the settings cog and then paste the Acuity URL into the section Link field and click SAve to update the section.
To add code to embed the Acuity scheduler or add a booking bar or button you will need to add a new HTML section and paste the copied code into it and click Save to update the section.
Once you have added the URL or Code to your new section remember to publish your App to check out your new feature.
Here is an example App showing all four methods of integrating Acuity into your Apps.